Beef Brisket braised in White Wine

I’ll just come out and say up front that this is the best straight-up brisket braise I have ever done, and I’ve been tinkering with brisket recipes all year. It is easy to prep, and just requires a little patience with the slow cooking. So with no further ado:

Spice Rub
2 tsp salt
1 tsp spanish/smoked paprika (pimenton)
1 1/2 tsp oregano
3 bay leaves
1/2 tsp coriander seeds
1/2 tsp cumin seed
1/4 new mexico red chile powder

Main Ingredients
2 to 3 lb beef brisket (grass-fed if you can get it)
2 large carrots, roughly chopped
1 1/2 large onions, roughly chopped
6 garlic cloves, roughly chopped
1 28 oz can of whole, peeled tomatoes
1/2 bottle dry white wine
3 or 4 tbsp of olive oil

In a spice grinder, grind up the components for the spice rub. Remove the brisket from the fridge, wash it and pat it dry. If your cut has a large amount of excess fat, you can trim it but leave some for flavor and moisture. Apply the spice rub and let the brisket come to room temperature for about 30 minutes.

Preheat oven to 275F.

In a large dutch oven, heat up the olive oil on medium-high heat until very hot (a drop of water will sizzle and pop). Brown the brisket on one side for 2 minutes, then brown the other side for the same. Remove the brisket to the side, and lower the heat to medium-low.

Add the onions and garlic into the pot and cook, stirring occasionally, until the onions start to turn translucent. Add in the carrots and cook for another couple of minutes, then pour in the white wine. Scrape the bottom of the pot with your wooden or plastic spatula to deglaze any remnants from the browning of the beef. Add in the tin of whole, peeled tomatoes and the accompanying juice. Do not break up the tomatoes.

Nestle the brisket into the liquid and vegetables, cover the dutch oven and place in the oven. Braise for 5 or 6 hours at 275F, gently turning the brisket every 1.5 to 2 hours.

Before serving, remove the dutch oven from the oven and carefully spoon out as much of the excess fat/oil from the top of the liquid around the brisket. Remove the brisket to a warm plate or a cutting board, and blend up the liquid and vegetables into a gravy using a blender, food processor, or an immersion blender (which is what I used, thanks to a lovely Christmas gift from my sister). Return the brisket to the dutch oven and cover to keep warm if you need a few more minutes to prep your dinner.

Serve by slicing against the grain (expect it to fall apart as you slice) and either present on a serving tray with the gravy on the side, or plate with several spoonfuls of the gravy on top and maybe a little fresh pepper.

brisket braised in white wine, plated
I served this with a favorite treatment for potatoes, which is to peel, halve or quarter, and steam about halfway done. Then you bake them with a sprinkling of olive oil and coarse sea salt on top until fluffy and tender inside and browned on the outside. So good.

Previous Recipes: If you like beef brisket, you might try Brisket braised in Slab Bacon, Sweet Peppers and Squash

Bayless’ Tomatillo Pork Braise

Before I talk about this recipe, I wanted to highlight the Menu for Change fundraiser going on for the World Food Program. You can find out information at Steamy Kitchen or Chez Pim. It’s an inspiring effort. Another good cause I would point you too is Kiva, the micro-lending site. If you are into the food blogging community, you might join the 101 Cookbooks team over there.

The first time I heard of Rick Bayless was his appearance on Top Chef – Chicago. I was flipping through a Food & Wine book and ran across his Tomatillo Pork Braise recipe, which was originally in his Mexico One Plate at a Time cookbook. Always being one to try a braise, I kept reasonably true to his recipe, split the work for this over two work nights, and loved how it came out. It is deliciously tart and has a real kick.

pork tomatillo braise

Tomatillo Pork Braise, adapted from Rick Bayless

2 lb boneless pork shoulder, cut into 1 inch pieces
1 tbsp worcestershire sauce
1 to 1 1/2 lb tomatillos, husked and cut into half-inch slices
4 medium garlic cloves, peeled and halved
1/3 cup pickled jalapeno slices, most seeds removed
1 dried ancho chile, stem and seeds removed, and halved
1 1/2 tsp salt
1/2 cup chopped cilantro
1 cup dried Cargamanto Cranberry beans
water

Preheat oven to 300F.

Place the cut pork into a bowl and add the worcestershire sauce, stirring it around to coat the pork evenly. In a dutch oven, layer the tomatillos, then scatter the garlic, half of the cilantro, jalapenos and ancho chile (ie dried poblano pepper) on top. Sprinkle with 1 1/2 tsp salt. Then scatter the pork evenly over the top. Place in the oven for 3 hours. (Note: my picture shows a few cilantro stalks thrown on top for good measure)

During this time, you can cook the beans if you are doing this dish all on the same day (see note below). Bring the beans to a boil for 2 minutes, then drain. Refill pot with water an inch or so over the top of the beans and cook until tender. Drain and set aside.

pork tomatillo braise

When braise is done, remove the pork to a bowl with tongs.

Remove any excess oil from the braise vegetable mixture, and then puree in a food processor or blender. Place back in the dutch oven and cook over low heat. Add enough water to bring the sauce to the consistency of a creamy soup (I probably added 1/4 cup or possibly more of water to mine).

Stir in the beans, the rest of the cilantro and the pork and cook on low heat until everything is warm, then serve.

pork tomatillo

Notes:
1. Bayless recommends adding a little sugar if the sauce is too tart for your taste. I found it perfect without the sugar, but then I’m a big salsa verde fan.

2. If you don’t want to use beans, Bayless recommends placing potatoes, turnips or even carrots in below the meat at the start of the braising stage, and removing before the puree step. If you like beans, I think many variations will work here. Bayless recommends Great Northern. I used a Cranberry bean variant and think Pinto beans would probably work nicely too.

3. Bayless also suggests tossing in some fresh spinach and creme fraiche when pureeing the sauce, which does sound pretty good (I didn’t have any on hand)

4. because I was cooking this on work nights, and didn’t want to eat at midnight, I split it into two nights. The prep is pretty quick, so the first night I just had to get the braise into the oven and leave it for 3-hours. I placed the meat and sauce mixture in the fridge overnight, in separate containers. The second night, I cooked the beans, pureed and finished the sauce, added the meat and heated everything up together on the lowest heat setting (pot covered).

Veal Braised in Milk; a lesson learned

IN WHICH Pooh visits the butcher and does a Silly thing
Pooh, being a bear of very Little brain, was happily flipping through cookbook pictures, given that he was nearly always hungry and that words were best left to Eminences like Rabbit. Pooh did not exactly know what an Eminence was, but had a vague feeling that it had something to do with arugula and very expensive sea salt. As Pooh read, he hummed a little song:

Cooking for bears is like
Poaching with pears, and baking
a cookie or two.
You think we like honey but
the funniest honey…

At this point Pooh was wondering how honey could be funny, and if it really was appropriate to have two uses of the word honey right next to each other, but honey being what it was, Pooh decided that more was always better. Then he stopped, because on the next page was something called veal braised in milk.

Pooh had never eaten veal braised in milk before, but he knew that he must like it, not in a Tigger-looking-for-breakfast kind of way, but with a I-must-make-this-recipe-right-now feeling. So by and by, Pooh set off for the local butcher. Pooh knew in the back of his head that veal was expensive, but he figured that since it was a braise, it should be a cheaper cut, as most well-behaved braises are. After waiting in line, Pooh came to the proprietor.

“How can I help you,” said the butcher.
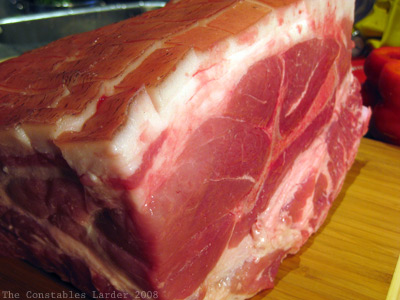
“A boneless leg of veal, about 2 or 3 pounds please,” asked Pooh.
“What part of the leg?” asked the butcher (who tended towards the irascible).

At this point, Pooh was very Confused. The recipe hadn’t called for a part, just a leg, although obviously Pooh wasn’t going to be cooking an entire leg, but still it felt Highly Irregular. The butcher rattled off a list of parts, then asked what it was for, and then rattled off some other parts. Pooh thought to himself, “WWOD?” (What Would Owl Do), and then nodded his head, trying to look sage but not doing a very good job. He also snuck little glances at the line of customers behind him, waiting for him to Hurry Up and make up his mind.

“Yes,” said Pooh, figuring that yes would be faster than no, and definitely faster than maybe.

The butcher disappeared and after a few minutes his Helper brought out a wrapped piece of veal and went over to the cash register.

“That will be $72.68,” said the Helper.
“_” said Poo, taken aback.
“!” said Poo, trying again and attempting to recollect why he had gone to the butcher’s in the first place.

Now Poo, being a bear and a stuffed bear at that, cannot really look stricken, but if Pooh could look stricken, then that is how he would have looked.

“How much is that per pound?” asked Pooh, cautiously.
“Twenty-two dollars,” stated the Helper, who was starting to look at Pooh a little Suspiciously.

Pooh, feeling a little miserable now, not to mention a little foolish, bought the veal and took it home, and attempted to avoid telling Mrs. Pooh just how much he had spent on a part of a leg of veal. He could not tell if he was angry at the butcher for not warning him, angry at the veal for being so expensive, or just angry at himself for being such a Silly bear.

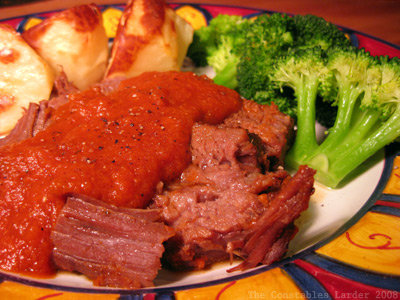
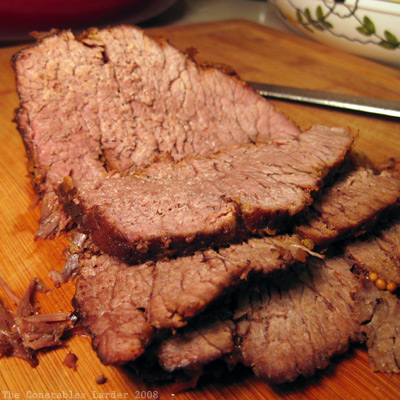
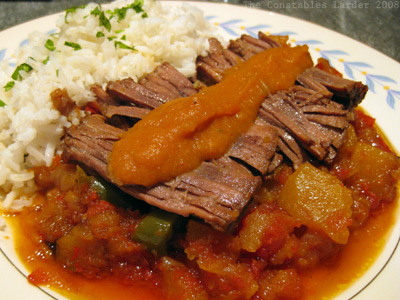
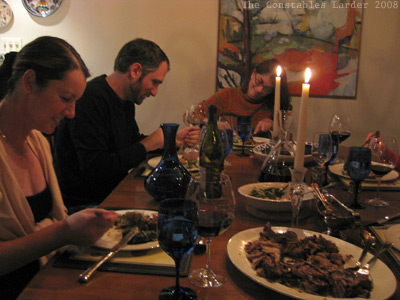
However, when Pooh cooked up the veal braised in milk for some visiting Relations, everyone agreed that it was a delicious meal, a very tender and subtle cut of meat, and a lovely way to cook it. But Pooh learned the lesson of always, always asking for the price ahead of time.

veal in milk

Veal Braised in Milk, adapted from Tori Ritchie’s Braises and Stews

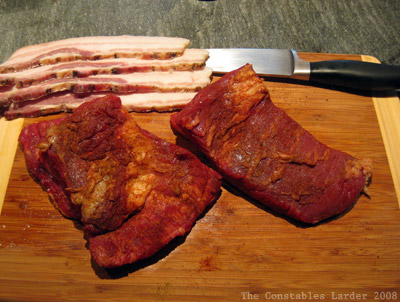
1 3lb boneless leg of veal
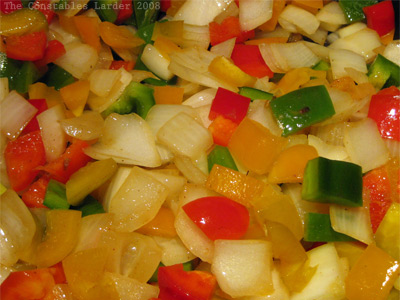
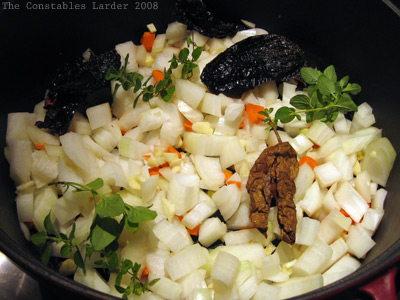
1 vidalia onion, chopped
1 celery stalk, chopped
1 carrot, chopped
3/4 cup Riesling (on the sweet side)
whole milk
coarse sea salt
coarsely ground pepper
olive oil

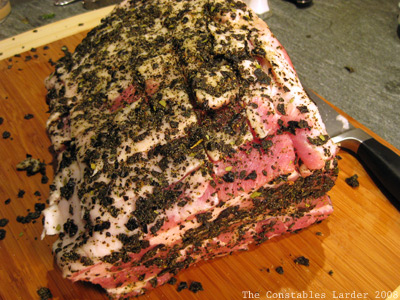
An hour or so before cooking, wash and dry the veal. Rub it all over with 2 or 3 tsp of coarse sea salt and 1/2 to 1 tsp of coarsely ground pepper. Let the meat come to room temperature.

Preheat the oven to 320F.

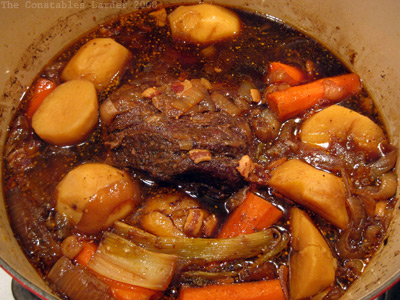
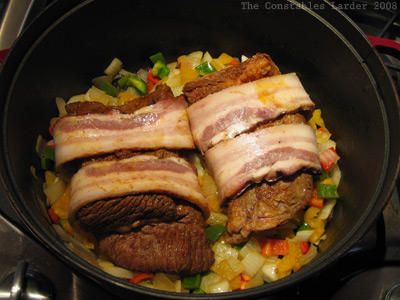
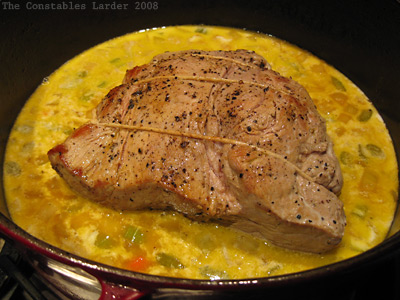
Set the flame to medium-high and heat up a couple tbsp of olive oil in a dutch oven large enough to hold the veal, and when the oil is quite hot, brown the sides of the veal. Set the meat aside and lower the heat to just below medium.

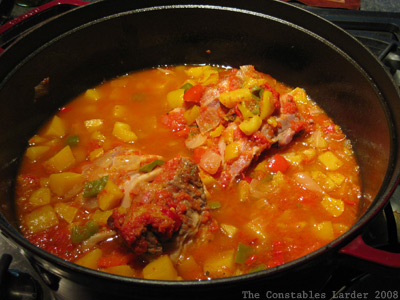
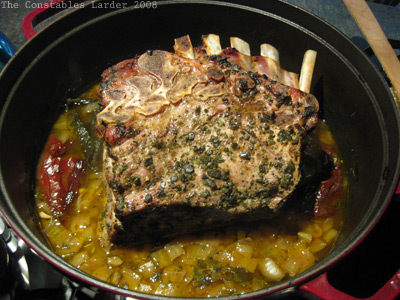
Add the chopped onion and cook for a minute or two, then add the celery and carrot and the wine, stirring and scraping the browned bits on the bottom of the pot. Cook for about 5 minutes and return the meat and any juices to the pot. Pour in enough milk so that it comes halfway up the side of the meat. Bring the milk to a boil, then cover and place in the oven.

After an hour, flip the veal. If it looks like the liquid is bubbling a little too much, lower the oven temperature to 300F. Cook for another hour, and check tenderness with a fork.

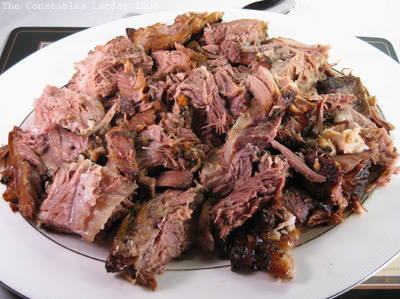
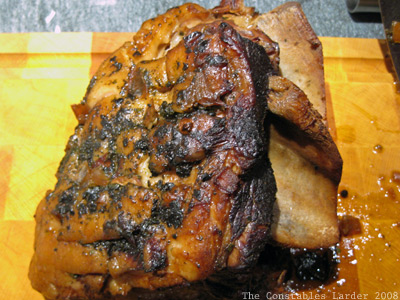
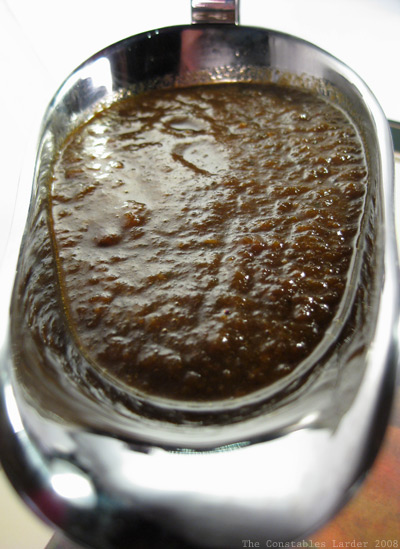
Remove the veal and tent with aluminum foil. The milk in the braising liquid will appear quite coagulated but that is expected. Let the liquid cool for a several minutes, taste it for salt and pepper, then carefully puree it in a food processor or blender.

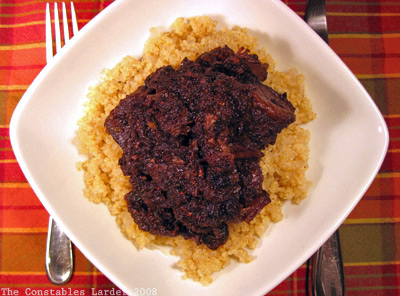
Slice the meat, spoon the sauce on top, and serve.

* * *

Any resemblance between me and the Pooh character above is entirely coincidental. But what an amazing coincidence! The meal (which happened several weeks ago) was truly delicious, and I comforted myself with the thought that I fed 5.5 people (counting Munchkin) a restaurant-quality dish for a lot less than if we had eaten out, however I still felt like a bit of an ass.

When I was next at Fleishers up in Kingston, a butcher shop where I feel a lot more comfortable, I asked the owner Josh Applestone about butcher etiquette. He agreed that once I had let them cut the meat, I had to buy it (“that is, if you wanted to ever go back there!” he laughed). He also thought that the cost was rather high, and noted that some butchers carry veal because they can get away with sky-high prices. It was foolish of me to allow myself to get intimidated, and to fail to learn the price before I made a decision, but lesson learned.

I don’t know that I will be splurging again on such a cut anytime soon, but it was a very interesting cooking method, and I might try it again on veal shoulder, if more reasonably priced, or some very good quality pork.

Chicken Braised in Coconut Milk, Lime, and Cilantro

chicken braise

Over the summer, I discovered a Brazilian fish recipe destined to be one of my top-five fish recipes. The other day, I decided to try adapting the spirit of the recipe for chicken. Fast forward to me cutting extra slices of bread just to sop up the fantastic sauce, and you have the following…

6 chicken thighs (or more or less, depending on size)
3 limes
6 cloves garlic, minced
6 tbsp fresh cilantro, chopped
1 large vidalia onion
1 carrot
1 celery stalk
1 13.5 oz can of coconut milk
1/2 cup dry white wine
1 jalapeno, seeded and sliced (double or triple if you want hot)
1/2 cup crushed tomatoes
salt

Marinate the chicken in the garlic, 2 tbsp of the cilantro, the juice of 2 limes, and a healthy sprinkling of salt. Let it rest for 30 or so.

In a food processor, combine the onion, carrot, celery stalk, and coconut milk and puree.

Preheat oven to 325F.

Heat 1 tbsp of olive oil and 1 tbsp of canola or vegetable oil in a dutch oven on high until very hot, and then brown the chicken thighs for a couple minutes on both sides, then remove back to marinade dish. Deglaze the bottom of the pot with the white wine, lower heat and return chicken to the pot, adding in any garlic, cilantro and lime juice from the marinade dish. Pour the coconut milk puree over the top, and add the crushed tomatoes, the jalapeno, another 2 tbsp of cilantro, the juice of the last lime, and two more pinches of salt.

Gently mix the sauce around and spoon over the chicken thighs.

Place in the oven and after 30 minutes, turn the heat down to 300F. Let cook for another 45 to 60 minutes.

The one pain about this dish is that before you serve, you will need to spoon off the layer of oil (from the chicken fat).

This dish is best served with some white rice, lots of sauce poured on top, and a sprinkling of fresh cilantro (that last 2 tbsp).

I served this with some beet greens sauteed with sherry vinegar, a touch of red pepper flakes, half a small onion, and a clove of garlic (I had wanted to try this recipe, but had run out of apple cider vinegar). Still, this variation was still quite nice. In the chaos of my evening, I didn’t have time to make rice, so made do with some huge hunks of ciabatta bread. The meal went really nicely with a spicy, medium-to-full bodied red wine.

Now if only I had some of your cookies for dessert. Or, perhaps, some Zen insanity.

Beef Pot Roast in Beer

braised beef sliced

Yesterday I decided to do another braise, and since so many of my creations lately have been tomato-based, I decided to riff off of the spice rub from a recent recipe from Sass & Veracity, her Beef Chuck with Vegetables in Red Wine. I used a dark beer and had a few other alterations, but the direction definitely came from Kelly.

But first I wanted to touch on an interesting discussion that Kelly kicked off a few days later that was focused on food photography/blogging and revolving around “food photo snobbery”. You should read her blog and the comments it elicited, but to pull a few lines, Kelly wrote: “The problems begin when a judgment is made about the quality of the dish by looking at the photo alone. If this is all about photos, then why post a recipe.” She also noted to me “If one is taking the time to think about content and “readers” are only scanning the pretty photos, then blogging becomes as impersonal as a pretty cookbook can be.

I can’t resist going big picture for a second. This notion of quality is a recurring one in this era of online creation. When blogging first gained traction, there were (and are) debates over writing quality. YouTube, Flickr, and Second Life — wherever there is “user generated content” — all spur discussions of good versus ugly.

I love this video by Ze Frank (Internet artist/philosopher for lack of a better description), where he’s riffing on “ugly” MySpace pages, and how the lowered cost of creation tools is opening up design to everyone, which is a very cool thing. (Ze is a trip of non-stop ideas — I once shared a taxi with him on the way to a conference and thought my head would explode, but in a good way).

When it comes to food blogs, I appreciate authors who put effort into their pictures (and I count Kelly as one of those). Food photography is damned hard. I’m fighting with it constantly, especially since I do not use fancy equipment of any kind. I like a blog post that shares not just via words and measurements, but through images as well. I’ve probably driven half of you away by this point with all this text and just one picture so far! But I sally on! My personal preference leans towards more natural photos, just as my food preferences lean towards “peasant food” rather than foams and haute cuisine.

Photography is an art form, and as such quality is a subjective thing. Everyone should have confidence in their own subjective tastes, and ignore self-appointed critics. Look to improve, but not to be something you are not! Robert Henri, an influential early-20th-century American painter (he led the Ash Can School / Group of 8), nailed it when he said of art: “The man who has honesty, integrity, the love of inquiry, the desire to see beyond, is ready to appreciate good art. He needs no one to give him an art education; he is already qualified.” (I should note that the Group of 8 got hammered by the art establishment of the time, so it’s no surprise that Henri was saying “stuff your pedigree!”)

Now, speaking of un-fancy photos, on to the pot roast, I mean braise, I mean whatever the heck it is! This one spent part of the time in the oven, and then was booted to the top of the stove to make room for Lisl’s loaf of bread. If it is both a braise and a pot roast, that make it a broast?

And for the record, I find that it is very hard to take pretty photos of braises once plated. I tried for this meal and they were so damn boring, I left them off.

Beef Pot Roast in Beer

2 lb beef chuck roast
2 tsp coarse sea salt
2 tsp peppercorns
1 tsp mustard seed
1 tsp sweet paprika
1 tsp smoked paprika
1 tsp dried oregano
1 tsp brown sugar
6 slices smoked bacon, sliced into 1/2 inch pieces
base of a bunch of celery stalks
1 dark beer (I used a stout)
1 cup of water
2 large onions, loosely chopped
2 bay leaves
4 cloves of garlic, peeled
4 large carrots, peeled
Handful of medium red potatoes, peeled

Preheat oven to 350F. In a mortar, grind up your mustard seeds and black pepper, then mix in the other spices (salt, paprika, oregano, brown sugar). Rub the mix all over your roast.
braised beef rub

In a dutch oven on the stove top, cook the bacon until almost crispy, then remove. Sear the roast on both sides and remove, and deglaze the pot with the beer and water.

Add the roast back in, and sprinkle the bacon and onions around. I also chopped the “foot” off of some stalks of celery to add flavor, and tossed in an extra celery stalk, 4 cloves of garlic, and a couple bay leaves.
braised beef start

Let this cook for 20-30 minutes at 350F, then lower to 290F. At the hour mark, flip the roast. Let this cook for another 2 to 3 hours, flipping the roast once more, then basting it every 40 to 60 minutes or so. Keep an eye that the liquid doesn’t get too low, and add some stock or water if it does (with the heat set this low, I did not have to add more). Add the carrots and potatoes with about 1 1/2 hours left and turn them about halfway through.

braised beef done

As noted, my pot was booted from the oven but I kept it warm at the lowest setting on our gas stovetop. I removed the roast, carved it across the grain (top picture), and served on a bed of egg noodles with the potatoes and carrots, generously spooning the fabulous liquid from the pot on top.

Doubled Braised Pork Chili

Chili (double braised pork)

I love chili, and this one is one of my best. I jokingly called it “double braised chili” because the pork shoulder is braised the night before, and then stewed in the chili the next day. I have also made the braise several nights before, served it as one meal, and saved the majority of the meat for cooking the chili.

Braising the Pork Shoulder (night before)
1 4lb bone-in pork shoulder or butt (upper part of shoulder)
3 dried ancho chiles, seeds and stem removed
1 dried chipotle pepper, seeds and stem removed
3 bay leaves
4 garlic cloves
2 tbsp salt
2 onions, chopped
1 green pepper, de-seeded and chopped (optional)
1 yellow pepper, de-seeded and chopped (optional)
2 cups dry white wine
water
olive oil

Pre-heat oven to 350F

Remove any excess fat from the pork shoulder. In a food processor, combine the ancho and chipotle chilis, bay leaves, salt and garlic and pulse until it is as finely chopped as you can get. Rub the mix all over the pork. In a dutch oven, lay a bed of the onions and peppers, and place the pork shoulder on top. Then pour in the wine and enough water to come a quarter of the way up the side of the pork. Cover and place in the oven, and after 20 minutes lower heat to 300F. Braise for 4 hours, turning the pork over halfway through. You can turn off the oven when you go to bed, leaving the dutch oven covered, and pick up the recipe in the morning.

You might also soak the beans overnight to speed things up the next day.

Making the Chili

Braised pork shoulder
3/4 cup dried pinto beans
3/4 cup dried mayacoba beans
3/4 cup dried vallarta beans
reserved bean cooking liquid
6 slices, thickly cut slab bacon
1 1/2 yellow onions, chopped
1 red onion, chopped
4 cloves garlic, minced
2 28 oz cans crushed or whole tomatoes (chopped)
1 1/2 tbsp tomato paste
2 jalapenos, sliced (with seeds)
2 tbsp ground cumin
1 1/2 tbsp dried mexican oregano
1 tbsp salt
3 bay leaves

Wash the beans and check for any small pebbles. In a large pot, cover with cold water, an inch over the top if they were soaked, and two inches if they were not. Bring to a boil, then lower heat, loosely cover and let simmer for about 40 minutes or until al dente. Remove beans and reserve the cooking liquid.

Remove the pork shoulder from the dutch oven, separate out the bones and excess fat, and using two forks shred the meat into bite size pieces. I used about 2/3 of the pork shoulder in the chili, saving the rest for lunch. Also reserve a ladel-full of the spicy braising liquid (albeit without the oil) and some of the vegetables.

Rinse and dry the dutch oven and place on stove top. Cut up the bacon into 1/2″ pieces and saute in the dutch oven until almost crispy, then remove from pan and turn off heat. Drain or spoon out excess bacon fat, leaving a tablespoon or so in the pan (or remove all, and add in olive oil). On medium-low heat, saute the onions and garlic until onions are translucent, then combine the rest: beans, bacon, shredded pork, spicy liquid/vegetables from the pork braise, tomatoes, tomato paste, jalapenos, and herbs. Add enough of the reserved bean cooking liquid (or stock, if that is your preference) until the chili is moist, but not yet soupy.

You can either cook this on the stove top at a very slow simmer or place in the oven at 280F. If the chili has too much liquid, let it cook uncovered for a bit (when I grabbed the above photo, it was still a bit too liquidy but still delicious). If it starts getting too dry, ladel in a little bit more of the bean liquid or stock you are using. Taste for heat, salt and spices and adjust to your fancy.

I usually cook this for several hours, giving the liquid plenty of time to concentrate and letting all the flavors mingle.

This chili was fantastic on its own, but we served with some raw chopped red onion, some freshly diced serrano pepper, and a dollop of greek yogurt.

Note on Beans
I have made this chili with various kinds of beans, and different amounts — do not feel bound to the above recipe at all. For a recent version of this chili, I used 1/2 lb of vaquero beans (which were hearty and darkened the chili to a wonderful color) with 1/2 lb of pebbles beans. A common mix in the US is pinto with red kidney beans and great northern beans.

chili snow

Brisket braised in Sweet Peppers & Squash

brisket done

My entry to the Low and Slow (link) blog event (you have until the end of Oct 15th to submit!) is a brisket braised in sweet peppers and carnival squash. I was inspired by a Boulud recipe for creole stew, and took it in my own direction. I had a wonderful cut of brisket and some slab bacon from my favorite butcher Fleishers, and vegetables right off the field from the local farm. It is coming to the end of the New York growing season, so I’m making the most of it! The end result was a “wow (long pause) this is good!” response from Lisl. And so with no further ado (and lots of pictures):

2 1/2 lb brisket
dry rub of salt, sweet paprika, and ground cumin
4 to 6 slices slab bacon
1 1/2 spanish onion, diced
3 cloves garlic, minced
1 red, 1 orange, 1 green pepper, diced
1 carnival squash, flesh only, cut into 1/2 inch dice
7 or 8 plum or medium tomatoes
2 bay leaves
1 cup white wine
juice from 1 lime
black pepper
Olive oil

brisket rub

Preheat oven to 275F.

Take your brisket and rub a hearty amount of salt, sweet paprika (smoked paprika would also be great) and ground cumin. I would guess I used about a tablespoon of each. Note: I only cut the brisket in half to fit in the dutch oven more easily because it was a long cut.

brisket base

In a large oven-proof pot or dutch oven, saute the onion, garlic and sweet peppers in olive oil until the onion starts to turn slightly transparent.

brisket wrap

Keeping the pot on low heat, wrap the bacon around the brisket and place on top of the vegetable base. I had very thickly sliced slab bacon, and so with more normal bacon I would probably use a few more slices.

De-seed your carnival squash (a butternut squash would also be great), remove the tough skin, and chop it into 1/2 inch dice. Then add the squash around the brisket.

Halve your tomatoes across the middle (if it was the earth and the stem was the north pole, you would be cutting across the equator) and de-seed. Then place in a food processor with the two bay leaves and pulse until smooth. Pour this on top of and around the brisket, and then pour in the white wine. Cover and place in the oven for 4 or 5 hours.

brisket cooking

This is what the braise looked like after about 2 hours. At this point, you can taste the vegetable mixture for salt and add more if needed. Spoon some of the braising liquid over the top of the brisket, then return to oven.

After about 3 hours, I pulled it out and spooned off some of the excess fat on top of the liquid, and again spooned some of the remaining liquid ove the meat. When I placed the pot back in the oven, I left a very slight crack open on the lid to let some of the moisture out.

In total, I cooked the braise at 275F for just over 4 hours. As the cooking time gets on, you want to keep an eye on the amount of liquid so it doesn’t dry out. If the braise is moist but only a little loose liquid remains, remove from the oven and keep covered until you are ready to serve. You can always reheat gently on the stove top.

Final step to serve

Make a sauce / gravy by taking two large spoonfuls of the vegetables and placing in the food processor with the juice of one lime. Add some ground pepper and puree. Add a little bit of water if you want to thin the consistency.

Take your brisket, discard the bacon, and with two forks, pull apart “slices” for serving, working with the grain. Taste for salt — you will most likely want to add some more salt to the brisket itself even though the vegetables are probably fine at this point.

Braises tend to be difficult to plate beautifully for photos (although rustic bowls tend to work well). In our case, I served with some white rice (with a touch of cilantro sprinkled on top), and placed the meat on a bed of the braised vegetables, covered with the pureed sauce.

brisket served

So there you have it. Delicious! And now that I’m done writing, I’m curious: is that too many photos for this blog post? Let me know what you think.

P.S. Lisl had the clever idea of using some of the leftover brisket and lime-veggie sauce the next day for quesadillas, along with chopped tomato and grated monterey jack cheese. SO good.

Pork Shoulder Braised with Dried Chiles

pork serving dish
(part of From Provence to the Catskills, our celebration held as part of of the Foodbuzz 24, 24, 24 blog event)

The main course was inspired by Alice Waters, working off of a recipe in her fabulous cookbook The Art of Simple Food. While we diverged in several ways from Waters’ recipe, the biggest point of departure was that while Alice cooks her pork at 375F for about two hours, we did a longer, slower braise at lower temperature. I will have to say that this was one of the best braises I’ve ever made, and I’ll give equal credit to the flavor combinations and to the quality of the pork. We got our pork shoulder from Fleishers in Kingston, NY, which is an amazing butcher I’ve written about previously that only deals in grass-fed and organic meats.

Dry Rub (made the day before)
3 dried ancho chiles, with seeds and stem removed* (see footnote)
2 tbsp salt
2 tbsp oregano
1/2 tsp pepper
1 large bay leaf

1 6 lb pork shoulder, bone-in

Combine everything into a food processor and pulse until the chiles are reasonably chopped up.

pork shoulder

If you have a lot of excess fat on the pork shoulder, trim it down but do not remove it all as it will help the flavor enormously. As I was trimming some of the fat from my pork shoulder, I was imagining Josh Applestone leaning over my shoulder going “you’re killing me! that’s the best part!”

pork dry rub

Rub the spice and chile combination all over the pork shoulder, then wrap it up and place in the fridge overnight.

Braising the Pork

2 onions, coarsely chopped
1 carrot, coarsely chopped
2 dried ancho chiles, seeds and stems removed
1 dried chipotle chile, seeds and stem removed
1 head of garlic, peeled and coarsely chopped
8 black peppercorns
4 oregano sprigs
4 to 6 cups chicken stock**

Preheat the oven to 375F.

Combine the onions, carrot, chiles, garlic, peppercorns, and oregano in a large dutch oven and stir together. Nestle the pork shoulder fat-side down on top of the vegetables and then pour the stock** over the top – enough to reach a quarter of the way up the pork shoulder.

pork vegetables

Cover your dutch oven and place in the oven. After 15 minutes, lower the temperature to 320F. Cook for two hours. Every hour, check the pork and pour some of the broth over the top with a spoon (be careful not to burn yourself!). At this point, turn the pork shoulder over, lower the oven to 300F, re-cover and return the pot to the oven. Cook for another 2 1/2 hours, again checking the pot halfway through to pour some broth over top.

pork partially done

Remove from the oven. Place the pork shoulder on a large chopping board and lightly cover with aluminum foil while you create the gravy.

pork cooked

Making the Gravy
Using a large spoon, skim as much fat off the top of the liquid as you can. Then spoon the vegetables and a fair amount of the remaining broth into a food processor. Lightly puree and pour into a pitcher or gravy boat. The chipotle chile will give it a slight kick but not overwhelmingly so.

Remove the bones from the pork shoulder and “carve” — as much as one can carve meat that is falling apart so deliciously! Place the meat on a platter, lightly salt, and serve.

pork carving

pork gravy boat
To die for.

Footnotes:
* In keeping with our goal of using as much local ingredients as possible, I had dried a bunch of poblano peppers (which, dried, are called ancho chiles) several weeks ago when they were in season. I still ended up needing a couple extra dried ancho chiles and a chipotle chile from the market, but the effort was made! To dry your own peppers, place in the oven at around 175F all day long (and you might decide you need to let it go all night as well).

* In our case, we had a couple cups of homemade chicken stock in our freezer which I doubled by combining with a vegetable stock the day before, which was a simple combination of water, 3 carrots, 3 celery ribs, 1 onion, 3 large cloves of garlic, 2 bay leaves, several sprigs of thyme and a large bunch of parsley — all simmered together for several hours.

table eating main
We served this with a full-bodied red wine, accompanied by a shell bean ragout and some risotto wrapped in chard leaves.

Ancho and Coffee Short Ribs, on Quinoa Pilaf

Ancho and coffee short ribs w quinoa
Back in January 2003, Gourmet Magazine wrote up a recipe for short ribs braised in coffee and ancho chile sauce. I put it aside to make. I can’t believe it has taken me over FIVE FRIKKEN YEARS, but there it is. Somehow, I can’t come with any creative excuses. It was good though! As usual I didn’t follow it exactly, so here is my attempted description of our meal:

Ancho and Coffee Short Ribs

4 lb short ribs
3 dried ancho chile chiles
1 dried chipotle chile
1 onion
2 garlic cloves
2 tablespoons molasses (or maple syrup)
1/2 cup coffee
salt
smoked paprika

Preheat the oven to 300F.

Bring a pot of water to medium boil and boil your ancho and chipotle peppers for 20 minutes, then drain. Taste the liquid – if it is not too bitter, save.

In a blender, combine the ancho and chipotle chiles, the garlic, onion, molasses, and 1 tsp of salt and puree. Gourmet also recommends adding a tbsp of lime juice (I didn’t have any limes when making this, but the concept sounds good).

In a heavy bottomed pan or dutch oven, heat up some olive oil on medium high heat and brown the short ribs in batches, then set aside.

Pour the puree into the dutch oven and cook on the stovetop for several minutes. Add 1 1/2 cups of either the chile boiling water or regular water, and the 1/2 cup of coffee. Then add in the short ribs and spoon the sauce over the ribs so coated. Cover the dutch oven and put in the oven for 3 hours, occasionally checking to turn the ribs and spoon more sauce over them.

In our case, we made the short ribs in advance one evening and placed in the fridge for a couple of days, rather than wait hungry for them to finish. We then placed the ribs and braising sauce in a saute pan and warmed back up on very low heat until bubbling, tasting for salt and adding a sprinkling of smoked paprika.

Before you serve, spoon out any excess grease/oil, then remove the bones, tendon and any excess fat. Serve on a bed of quinoa pilaf, with a hefty red wine (a cab sav, zin, shiraz, malbec, or solid chateauneuf de pape would all work nicely). While I didn’t use a garnish, I imagine that some chopped parsley or finely chopped jalapenos might be a nice addition.

Quinoa Pilaf
Gourmet recommends serving this dish on a bed of polenta, but I decided to use my Rancho Gordo quinoa. Having never made quinoa, I checked my Bittman How to Cook Everything and discovered a nice little “quinoa pilaf” recipe. It is very simple and delicious and I will definitely be making quinoa more in future:

1 cup quinoa (repeatedly washed)
1 3/4 cup water (or stock)
1/2 onion, finely chopped
salt and pepper
olive oil

In a saute pan, heat up some olive oil and saute the onions for several minutes on medium heat, then add the quinoa and cook for another 5 minutes, stirring frequently. Add in the water (or stock), a few grindings of salt and pepper, reduce heat to low, cover and cook for 15 mintues. Taste for salt.

Blog Event: Low and Slow (Boulud or Stevens cookbook prize)

low and slow graphic
I can’t get enough of slow cooking… braises, stews… anything which cooks for a lonnnngggg time on lowwwwww heat. So I’m taking a stab at a monthly blog event – called Low and Slow – on that very topic since I haven’t come across one yet and because I’d love to learn from you all. I hope you participate! To make it a little more fun, for this round I’m going to send the person with the most interesting submission their choice of either a copy of Daniel Boulud’s Braise or Molly Stevens’ All About Braising.

Low and Slow Guidelines

The When
This round will be over October 15, 2008. You can submit more than once – this is about having fun and sharing after all!

The What
We want to keep this flexible: it can be vegetarian or with meat; it can be cooked in the oven or on the stove top; it can be a braise, a daube, a stew, a chili, a slow barbecue, and more. The key is that it is a dish that requires long cooking (at least an hour) at relatively low temperatures where flavors mix together in delightful ways.

How to submit
Put a link back to here in your post, and either send an email to larder (at) constable.net, or post a comment here with a link back to your recipe and pictures.

The cookbook
As mentioned, we’ll send the person with the most interesting or irresistable submission their choice of either a copy of Daniel Boulud’s Braise or Molly Stevens’ All About Braising. For this first Low and Slow event, Lisl and I will pick the “winning” recipe.

Round-up
After the deadline, I’ll post a summary of all the submissions with links and pictures (so please only submit if you are willing to let me put a picture on here that links back to your blog)

UPDATE: Roundup posted here. Thanks all!