Green Bean and Shallot Salad; Porcupine dances; Weekend in Pictures part 2

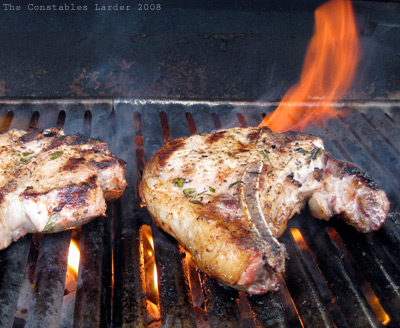
Hello from Los Angeles. Let’s just say that my culinary experiences out here have been, ah, lacking, so I will skip the gripes and get right back to images and thoughts from last weekend.

bean salad

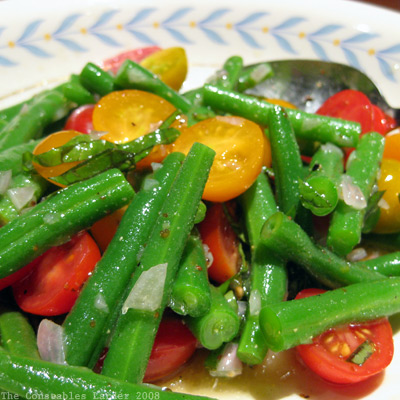
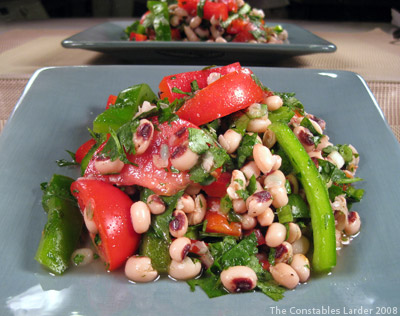
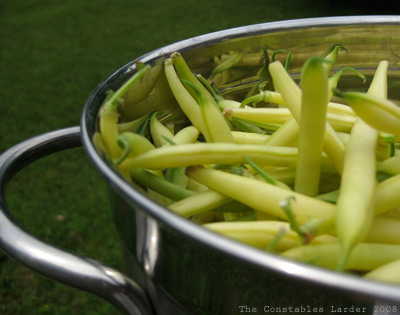
Another small dish we served this weekend was a super-simple green bean salad with a shallot-vinegrette. I should title this “porcupine salad” in honor of our dog Ellie, who you saw last post, discovering said creature for the first and hopefully last time. I saw it at the end of our driveway a split second after Ellie did, but it was a split-second too late (insert slow motion “NNNNNnnnnooooooooo!!!”)

The ensuing debacle included a bizarre 3-way dance with Ellie (mouth and nose at this point already covered in spines) circling the porcupine while shaking her head in pain, me in pursuit of the dog yelling and trying not to get spiked myself, and the porcupine making slow but steady progress towards the woods while spinning around and around waving its pointy business end at both of us.

Believe it or not, this was actually repeated twice, as our dog (normally so well behaved) squirmed free of my grasp as Lisl tried to remove a few spines, and went *back* after the porcupine. Four hours and a big emergency vet bill later, Ellie was fine, if a bit woozy from the anesthetic.

It really was a glorious weekend if we just pretend The Porcupine Affair was a Ludlum book rather than our afternoon.

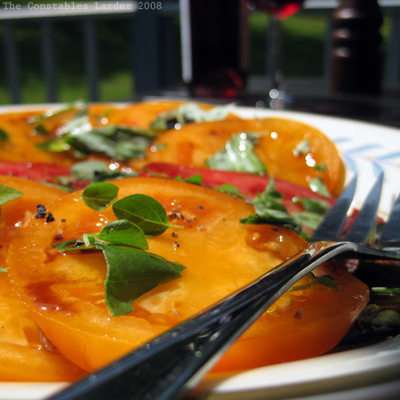
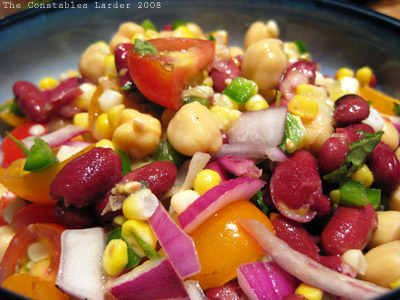
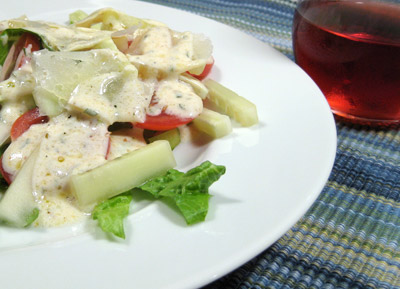
Green Bean, Tomato & Shallot Salad
Amounts serve 2

Two handfuls of fresh green beans
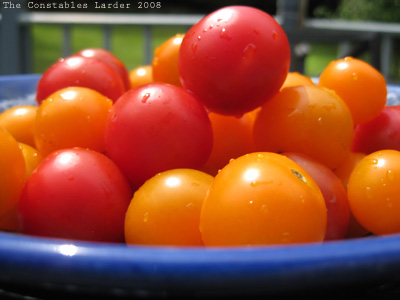
1 large handful of red and orange cherry tomatoes
1 small/medium shallot
extra virgin olive oil
white wine vinegar
dijon mustard
salt and pepper

Mince your shallot and place in a small bowl or mug with a dash of olive oil and two dashes of white wine vinegar. Let this marinate while you do the rest.

Wash and top and tail the green beans. Place in boiling water for 2 to 3 minutes then immediately drain and cool by running cold water over the beans in the colander. Cut them in half (or bite sized pieces) and place in a salad bowl.

Wash, dry and halve your cherry tomatoes, and add to salad bowl.

Finish your vinegrette by adding a small amount of dijon mustard (say, 1/8 of a tsp), a dash or two more of olive oil, a small amount of sea salt and ground pepper. Taste and add more olive oil, vinegar, salt and/or pepper as needed. Mix into the salad bowl and let it all sit together for at least 10 minutes before serving.

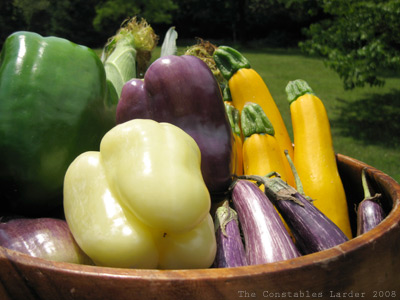
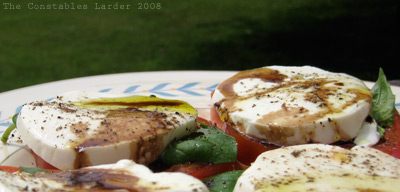
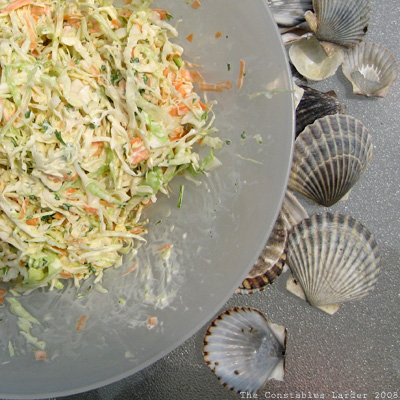
Now onto other pics from the weekend:
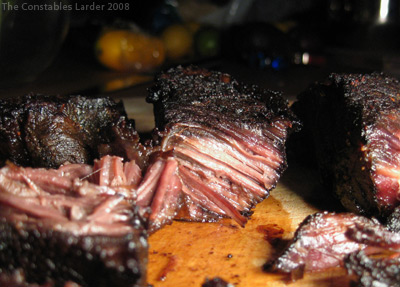
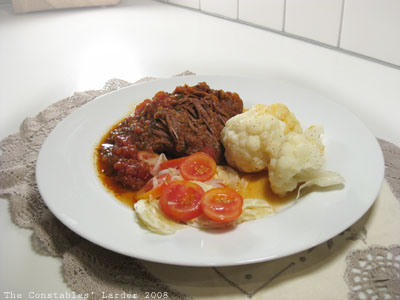
figs and cheese
Snack time

habaneros
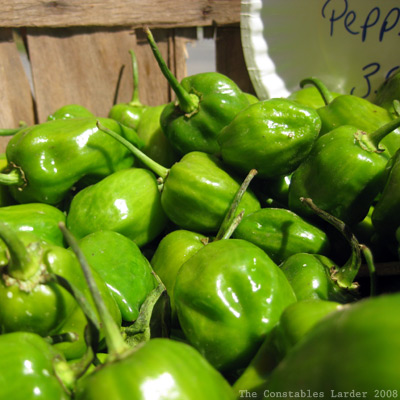
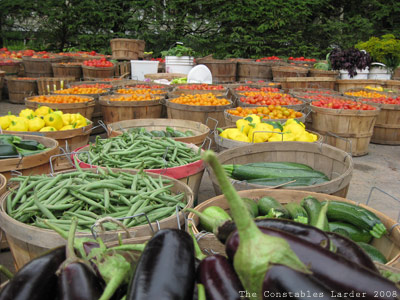
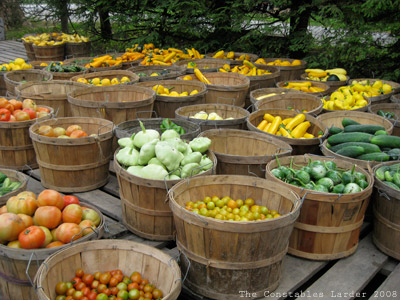
Habanero peppers at Gill’s farm stand

hotcherry peppers
Hot cherry peppers

pinecone
I spotted this lone pinecone hanging onto the spruce tree.

bee peppermint
Huge amounts of natural peppermint grow by a little creek at the front of our property, and the bees work away.

peppermint flower
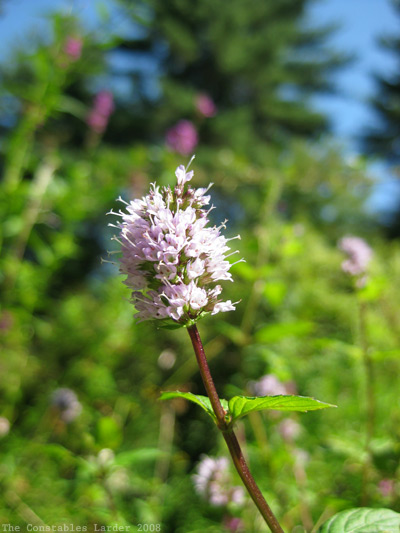
Peppermint plant flower

watermelon
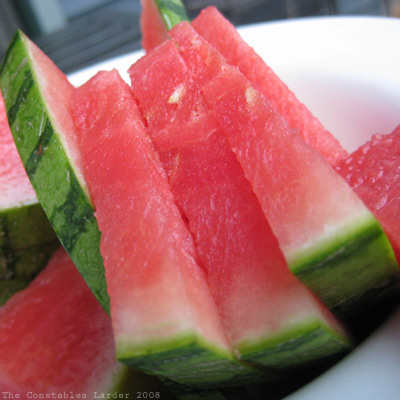
Not an unusual photo of watermelon, but I bet come February, I’ll be happy to see this pic again!

Tomato Salad; Bitten pasta recipe; photoshop irritation

Tomato Salad
Who doesn’t love summer tomatoes?

Tomato Salad
This was just sliced tomatoes with oregano, basil, salt, pepper, olive oil, and a touch of balsamic vinegar. Nothing fancy, just happiness. We served it with some bread, the pesto from yesterday, and homemade hummus (ever since reading I Found Happy’s recipe I’ve been making my own hummus… don’t know why it never occurred to me to do before!) .

Biting into Bitten
For dinner, we decided to try a recent recipe from the NYTimes Bitten blog: Pasta with Eggplant, Tomato and Breadcrumbs (click on that link for the recipe). We made it without the pancetta, but felt that it was missing something in the end result (still quite satisfying however). My own notes/changes for next time: make sure that the breadcrumbs are well browned; throw the chopped tomatoes in at the very end so that are barely cooked; experiment with lemon or cumin to punch up the flavor a bit, or drop the vegetarian angle and add the pancetta.

Pasta
Pile o’ basil

Pasta sauce
Making the sauce did make for this amazing orange (orange tomatoes) and purple combination. The lighting in the kitchen wasn’t ideal for a picture, but there was some serious color going on.

Photoshop Grrrrr
So I tried once again to edit my digital pictures on my Mac laptop (which I use for work), but continue to face this irritating problem where Photoshop CS3 screws up the color profile and washes out all the color when saving as a jpeg. I’ve tried one workaround I found googling, but that has not worked. I was able to salvage yesterday’s lamb pictures somewhat, but who wants to look at a picture of a greyish tomato? Newwwpp! So I had to wait until I got home to my personal Windoze machine tonight to redo the pictures and post this. Adobe, I love your products, but you messed up on this one. More net research required methinks.

P.S. I meant to do a shout out to my former work colleague Allison Hemler for kicking off her internship at Serious Eats and getting her first post up. We miss you AH, but good to see you taking on such cool new projects!

Tomato & Black Eyed Pea Thai-inspired Salad

Tomato & Black-eyed Pea Salad
If you are looking for ways to use your summer tomatoes, and want to try an interesting salad dressing, you might enjoy this combination. I used a Thai-inspired base dressing normally used in Yum Nuea, but then mixed with basil (in Yum Nuea, you add cilantro, ginger and serrano peppers).

The resulting salad was a satisfying meal unto itself (the black-eyed peas were critical to making it hearty), and an interesting new flavor which we enjoyed.

The following amounts served two

Dressing
2 tbsp cup lime juice
1 to 1 1/2 tbsp fish sauce
1/2 tsp sesame oil
Several drops of dark soy sauce

1/2 cup of black eyed peas
2 ripe medium or large tomatoes
Handful of cherry tomatoes
1 red pepper
Red onion
Handful of basil leaves
Several leaves of lemon basil

Cooking the black-eyed peas: I put the black-eyed peas in a bowl to soak in the morning before heading to work, but that is optional. In any case, put the beans in a pot of cold water about 1 inch over the top, bring to a boil, then lower to a gentle simmer and cook until tender (about 25-30 minutes if soaked, and another 15 minutes or so if not). I made a larger batch, but used roughly half a cup in the salad.

In a small bowl, combine the dressing together, finalizing amounts to taste (start with minimal soy sauce and add drops to taste — like you experience with salt, if you go overboard with soy sauce by accident, you are better off starting over than trying to fix).

Cut a few thin slices of red onion, break into smaller pieces, and soak in the bowl with the dressing while you finish the rest of the salad.

Slice your large tomatoes into thin crescents. Halve your cherry tomatoes. Remove the stem, seeds and inside of the red pepper and chop into bite-sized pieces. Do a loose chiffonade of the basil leaves, i.e. cut into very thin strips (note: I didn’t bother rolling up the leaves before cutting, which is a common chiffonade approach).

Combine everything into a bowl, toss, let sit for just a few minutes, toss again and serve. We paired this with a nice rose.

Rice & Beef Salad (exploration)

Rice Salad
Tonight’s food experiment began with a beef marinade. The result ended up being an unusual but satisfying “salad” of beef, rice, yogurt, pickled onions and mint. The journey is below.

This started because I had about a pound of chuck (cut into two large strips), and decided to try marinating it with several tablespoons of soy sauce, a light sprinkling of sesame oil, the juice from two limes, some salt and pepper, and a dusting of red curry powder. Thinking more, I thought it would best served slow-cooked and flaky, so I cut the marinade short. I seared the beef in a cast iron pan very briefly, then poured the juice from the marinade into the pan with a little water (say a third of a cup). This was then cooked in the oven at 300F for 3 hours. I had it covered for the first two hours, flipped the meat halfway through, and added some more water when the liquid in the pan started to dry out.

Braise
The result was a flaky beef with an highly flavored crust (where the soy sauce concentrated from the cooking process and really stood out). Once tasted, I knew the beef needed to be directly complemented with some other flavors to balance out that crust. Using two forks I shredded the beef into small pieces. The other components of the simple dish just presented themselves in my head.

I cooked up 3/4 cup of basmati rice, quickly pickled a thinly-sliced red onion (see recipe here, which I very loosely followed and let sit for about 40 minutes), added several dollops of natural greek yogurt (critical to the dish), and chopped up some mint (optional but I liked the addition).

In all got mixed together in a bowl, then served warm. If you feel like trying this exploration yourself (I wouldn’t be posting here if I didn’t like the result), I recommend pairing it with a strong red wine like an Aussie shiraz or a hefty California zin.

So there you have it. I haven’t posted in a typical recipe format, because it was really just an ad hoc experimentation that used some flavors I’ve been playing with lately. The results, however, were satisfying and different (which, since I’ve spent so long cooking French-inspired food — yes, I learned how to cook from Julia Child’s Essentials of French Cooking — qA what I was shooting for). Now I’m going to sit back and see if you all think I’m nuts.

Summer Bean Salad

Bean Salad
We’re back up in the Catskills and dropped in at our favorite local farm stand. I got to walk into the fields and pick a peck of fresh parsley, which is always fun for a city boy like me. Continuing on the vegetarian bent, and armed with fresh corn, tomatoes and peppers, I whipped up a simple bean salad (I was put in the mood by Food Blogga, who had gone with more of a Southwestern bent).

1 can red kidney beans
1 can chick peas
1/2 red onion, loosely chopped
big handful of red and orange cherry tomatoes, quartered
2 (hot) fresh jalapenos, seeded and finely chopped
2 ears of corn
2 lemons
olive oil
fresh oregano
fresh lemon basil
salt and pepper

Thoroughly rinse the kidney beans and chick peas in a colander, removing any loose skins. Let drain, and add to salad bowl along with the tomatoes, red onion, and jalapeno.

I normally prefer to grill corn, but time was limited so I cooked each ear of corn (with the husk still on) in the microwave for 2 min, 40 seconds. After it cooled slightly, I removed the husk (be careful not to burn yourself) and then cut the kernals off the cob with a sharp knife, setting the cob pointing vertical and slicing downward, then rotating to do another downward cut (note to self: see if there’s a better way).

I wanted a really clean flavor for the salad, so kept the dressing simple by combining the juice of two lemons, some olive oil, a small handful each of chopped oregano and lemon basil, and some salt and pepper. We didn’t have time to let it all marinate together, but when a salad like this is well mixed you get a wonderful combination of flavor with each bite.

Cherry Tomatoes
Better than candy!
Gill's Farm
Right off the farm.
sunflower

Black-Eyed Peas, Cilantro Salad

Black Eyed Pea salad
While I will probably always remain an omnivore, I’ve been trying to eat more vegetarian meals. Tonight we went with a black-eyed peas & cilantro/lime salad, roughly inspired by a Saveur recipe, that came out really nicely.

For 2 full servings
1/4 lb. dried black eyed peas
1/2 yellow onion
1 green pepper
1 red pepper
fresh cilantro (coriander)
fresh flat-leaf parsley
2 medium tomatoes
3 spring onions (scallions)
1 jalapeno, or some pickled jalapeno slices
3 limes
extra virgin olive oil
salt & pepper

Soak your black-eyed peas overnight or for several hours during the day. Cover with water in a pot with half a yellow onion and bring to a boil. Lower heat and cover, letting simmer for about 30-35 minutes or until tender. When done, remove onion, drain in a colander and cool by running cold water over the peas. When fully drained, add to salad bowl.

Remove seeds from your green and red peppers and chop to desired style (I chopped them up about 1.5 to 2 inches long, 1/3 inch wide), then add to bowl.

Take a very large handful of fresh cilantro and loosely chop, removing any excess stalk, then add to bowl. Take a handful of flat leaf parsley (discard the stalks) and more finely chop, and add to bowl.

Cut 2 medium tomatoes into eighths, and add to bowl. De-seed a hot jalapeno pepper, then chop and add. If you don’t have access to fresh jalapenos, a handful of pickled jalapenos loosely chopped will still work well.

Thinly slice 3 spring onions (scallions) starting in the white and cutting as high into the green as you can (where the green is still fresh), and add. (Optional: slice up and add some red onion)

Squeeze the juice from 3 fresh limes over everything. Add 4 tbsp of extra virgin olive oil (that is a guess — it could have been more since I never really measure my olive oil amounts; really you should do it to your own taste).

Mix up your salad, but try to be gentle so that you don’t mush up your peas. Let it sit for 15-20 minutes so that the peas start to take on the flavor of the lime and olive oil.

Add salt and freshly ground pepper to taste. I found that I used more salt than I normally use in a greens-based salad, so add salt carefully as usual, but be prepared to taste and add more.

We served this with Presidente beers (a Pilsner-style beer from the Dominican Republic). While I didn’t think of it at the time, some lightly toasted pita bread would also make a nice accompaniment.

P.S. this keeps overnight in the fridge really well (possibly even better) since it all marinates together.

Weekend in the Caskills (Caprese, Grilled Pork, Produce)

The local produce has emerged in New York’s Catskills mountains. This weekend we hit our favorite farm stand and popped up to Kingston to visit the farmers’ market and a favorite butcher. For any New Yorkers reading, I should note that Kingston’s market is useful for a few interesting items like zucchini blossoms, gooseberries, and fresh mozzarella, but for your typical farm produce, it is expensive and sadly of mixed quality (that’s not to say there isn’t good stuff to be found, just be choosy). For wonderfully fresh produce, we go to a farm stand located at the back of Gill’s Farm in Hurley NY, right off their fields.
Gills Farm Stand
We walked away with a ton of veggies and an enormous armful of fresh basil for making pesto, some of which Lisl used Saturday night to make her fried zucchini blossoms (the subject of another blog post).
Summer Veggies
Summer Fruit

Hot, humid weather inspires a simple, cool lunch — in this case, a Caprese salad, with slices of tomato, fresh basil, mozzarella, and drizzlings of olive oil, balsamic vinegar and salt and pepper.
Caprese Salad

While we were in Kingston, we stopped by our favorite butcher shop, Fleishers, which not only has the most amazing grass-fed and organic meats, it is also run by the nicest couple (and I just learned they hit the Saveur “Top 100” list for 2008). I purchased two porterhouse pork chops and let them spend the day marinating in the fridge covered in olive oil, white wine vinegar, white wine, grain mustard, and a scattering of fresh oregano, salt and pepper.

Grilling Pork
I grilled them that evening to excellent effect, and while I’d like to give my marinade and grilling skills much of the credit, I think it really belongs to the Berkshire (aka Kurobuta) pork that Fleishers carries.

Wax Beans

The full dinner menu ended up being fried zucchini blossoms to start, then a main course of grilled pork, corn on the cobb (nothing like freshly picked corn), and wax beans (boiled for three minutes then tossed with some butter, fresh oregano, and salt/pepper). We served it with a chilled Malbec Rose from Crios, which I highly recommend.

Yogurt-based Dressing

Yogurt-based dressing
Something about tonight’s heat and humidity made me crave cool flavors. The meal I whipped up was pretty simple: a London broil marinated in sesame oil and soy sauce, then grilled, and a salad of Romaine lettuce, cucumber (cut into strips), ripe tomatoes, and peelings of Manchego cheese with a yogurt-based dressing (with a nice Rose wine).

Lisl has a contraption she brought over from Australia that allows you to make natural yogurt at home (it is so much better than most yogurt available in the supermarket). I started scooping small portions of yogurt into a bowl and tasting different flavor combinations. Among the experiments, the uses of salt or soy sauce were total dead ends. I liked the base mixture of yogurt and Sriracha chili sauce (need only a touch), but in the end my favorite was a more Greek-style dressing:

I mixed two tablespoons of natural yogurt, 3 pinches or so of season salt, several pinches of dried oregano, a touch of olive oil (measurement-wise I would guess about a half a tsp) and some ground pepper. I wished I had a lemon handy because I think some lemon juice would have been a great addition.

Cole Slaw – just lemon, and hold the sugar!

Cole Slaw recipe
Summer picnics often mean cole slaw, but I’ll come right out and say that I hate most American cole slaw, primarily because of the insistence on making it sweet, not to mention the overload of mayonnaise. Bleaghh! (now you get to guess what sound I am intending when I wrote that word)

In my mind, a great cole slaw is a simple one. I inherited this simple recipe from my parents, and I’ve never run across a superior recipe. This is exactly what we made for a family 4th of July gathering yesterday:

1 green cabbage
4 lemons
2-3 carrots (or 1 really big one)
big handful of parsley
salt & pepper
Mayonnaise (Ed. I typically just use Hellmann’s, although my understanding from Lisl is that Aussie’s definition of mayo is a bit different so I’m not sure what a good off-the-shelf equivalent would be outside of the US)

With a long chef’s knife (8″ or longer), shred the cabbage as thin as you can (don’t be afraid to chop it up a little more if you feel your shredding job is a bit too chunky). Place in a large bowl. Peel your carrots, discarding the outside peelings, and then using the peeler, cut long, thin strips of carrot turning the carrot in your hand as you go so you are working all around the carrot’s circumference. Depending on the carrot, you may want to discard the woody inside core. I usually then quickly chop up the peelings a bit so that no piece is longer than an inch or two. Add the carrot to the bowl, as well as finely chopped parsely.

Squeeze the juice of 4 lemons into the bowl (can always increase or decrease number of lemons to taste). Halve or quarter the lemons and then squeeze into your free hand, keeping your fingers close enough together that you can catch and discard any lemon pits. Add a light amount of salt and pepper.

Estimating the amount of mayo is a “feel” thing that depends on how much you love mayo. I tend to err on the lighter side, but for a full cabbage this still ends of being between 4 and 6 big tablespoons. The key is to mix and taste as you go (like salt, you can’t really pull it *out* of the dish once in). You can also add more salt and pepper to your taste in this step.

The result is a fresh and tasty cole slaw that goes great with a barbecue meal (which is exactly what we did). I’ve also done this recipe with dill instead of parsely and liked the results.

For an interesting and different take on cole slaw, check out the Lime and Peanut recipe over at 101 Cookbooks.

P.S. the scallop shells in the picture have nothing to do with the dish, they just happened to be on the table as the girls had been collecting shells on the beach earlier.

Tomato Beef braise, Fennel/Tomato salad, Cauliflower dinner

Tomato-based Beef Braise
It sometimes drives Lisl nuts when I create a two-color-palette meal, but I clearly have a tendency in that direction, as evidenced by the above photo. Today I got away with not having anything green on the plate! Granted that time for both of us was limited, but still there was enough to put together a decent meal.

This meal came about because the local butcher, the owner of an excellent store called Crisfields, sold me on a cut of what he called “super chuck” (once he starts pitching me on something, I usually fold like a house of cards). The steak was a 1.5 inch think cut of chuck, shaped not unlike a typical brisket cut, but with much more marbling.

Tomato Beef Braise
2 lb flat cut of chuck steak
1 yellow onion
4 carrots
3 celery stalks
2 tins of italian peeled tomatoes (14 oz)
Olive oil
Salt and pepper
Fresh oregano
Bay leaf

Heat a few tablespoons of olive oil in a dutch oven on the stove top on medium-high heat. Salt and pepper both sides of the beef and once the pot is hot, sear on both sides for a minute or two either side. Remove and set aside.

Chop up a yellow onion and 3 or 4 garlic cloves and saute in olive oil over low heat for a few minutes until onions start to turn translucent. Take 3 celery stalks and 4 peeled carrots, and put them in a food processor and pulse until very finely chopped (I wanted the flavor but not extra chunkiness, hence this step). Add to the pot and saute for a few more minutes. Add two tins of Italian skinless tomatoes and about half a cup of wine (in this case I used white but red would do). I think I added about two teaspoons of salt, a bunch of ground pepper, bay leaf (or two) and a nice handful of fresh oregano. Once this is all simmering for a bit, break up the tomatoes with your spatula and nestle the beef in the sauce. Spoon some sauce over top to make sure there is moisture on all sides of the beef.

In my case, I didn’t have the ability to start this recipe during the day, so I put it on when I went to bed the night before, and set the oven nice and low at 225F. In the morning I spooned away some of the melted fat, moved it all into another container, and placed in the fridge. That night after work, I put it back into the dutch oven, got it simmering again on the stovetop, added salt and pepper to taste, tossed in some more oregano, and left uncovered in the oven at 250F for another hour or two.

This ended up delicious and flaky, but so rich that I decided to serve it with some cauliflower, simply steamed, to have a healthy but neutral addition, and then whipped up a tomato and fennel salad to add a bit of acidity. This was probably my last braise for a little while, given the rapidly rising temperatures.

Cherry Tomato and Fennel Salad
Half a fennel bulb
A handful of cherry tomatoes

I sliced the cherry tomatoes into 4 slivers and placed in a bowl. The fennel bulb I washed then sliced as thin as I could with a sharp knife. Because I didn’t have a mandolin to cut it really fine, I decided to soften the fennel a touch by steaming it for about 2 or 3 minutes, then adding to the bowl. I dashed some olive oil, rice vinegar, salt, pepper, and lemon on top to complete.

P.S. I’m not going to give myself awards for food photography any time soon, not least because I am usually hungry so hurry it along, but it was nice to discover that I could manually set the white balance on my little Canon digital, and that helped remove the orange cast I was seeing with night shots. I can always aspire to be like Aun, a high school friend, who takes the dreamiest pictures of food ever.