Eggplant, Zucchini & Basil Gratin

eggplant-zucchini-slice

[Update 8/30/09 a year later, I made this dish again and loved it as much, if not more.  I am updating the recipe to be less of a record of the original creation and more of a general recipe).

I seem to be on this vegetarian comfort food kick. Tonight’s dinner was a lovely success, layering eggplant, zucchini, cheese, breadcrumbs and basil. I completely winged it (having only about 2 brain cells left to rub together after a late night and a long day) but at the first bite Lisl and I were both at “wow!” I suppose I shouldn’t be surprised… melted veggies with gobs of cheese and olive oil? As Mr. Powers would say, yeah baby!

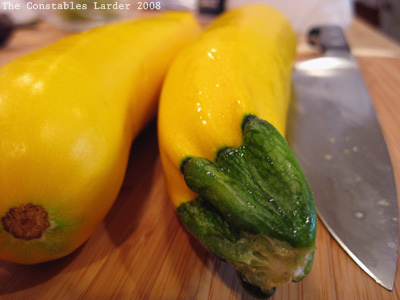
3 golden zucchini (green or summer squash fine as well)
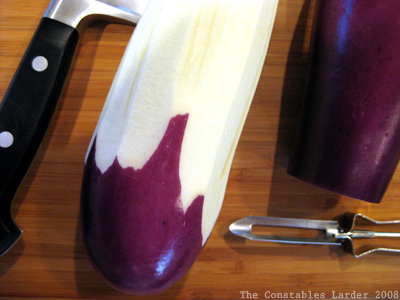
2 medium Japanese eggplants, peeled (Italian eggplant fine as well)
1 cup coarse bread crumbs (whole wheat or rustic white)
large handful of basil leaves
1/2 cup coarsely grated mozzarella cheese (version 2: manchego)
1/2 cup coarsely grated monterey jack cheese (version 2: cheddar)
1/2 cup coarsely grated parmesan cheese
extra virgin olive oil
salt and pepper

In a food processor, pulse your bread into coarse breadcrumbs. Preheat oven at 350F.  In a baking tray, spread out the crumbs and bake, occasionally stirring around, until lightly browned.

Peel the eggplant with a vegetable peeler and slice lengthwise into slices about 2 millimeters thick.  (Optional: salt both sides of the eggplant and place in a colander to drain for about 20 minutes. Dry the slices with paper towel. Then slice the zucchini the same thickness.

Heat a large pan with olive oil on medium to medium-high heat and saute your eggplant and zucchini for 30-40 seconds a side, adding more olive oil to the pan between each batch. You don’t need to cook the slices all the way, just enough to soften them.

In a deep, medium-sized baking dish baking dish, layer your gratin by alternating the ingredients as you wish, or in this order:

eggplant
a mixture of the 3 cheeses
zucchini
salt and pepper
scattering of breadcrumbs
layer of basil leaves
cheese
eggplant
zucchini
salt and pepper
cheese
basil
eggplant
zucchini
salt and pepper
final, more thorough layer of cheese
final, more thorough layer of breadcrumbs

Don’t be afraid to cut your slices of eggplant or zucchini into the necessary size to fit the gaps in a layer. Where it calls for salt and pepper, just add 2 or 3 turnings of a grinder.  The order of the layers and ingredients is anything but scientific — the flavors will blend together nicely.

eggplant zucchini gratin (layered)
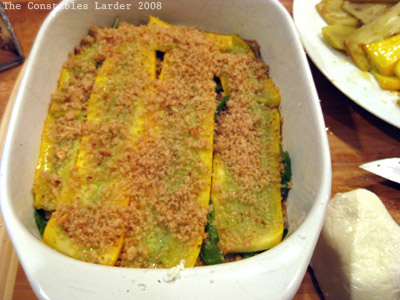
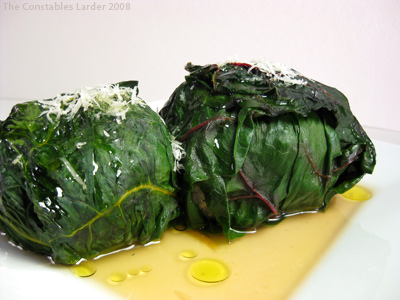
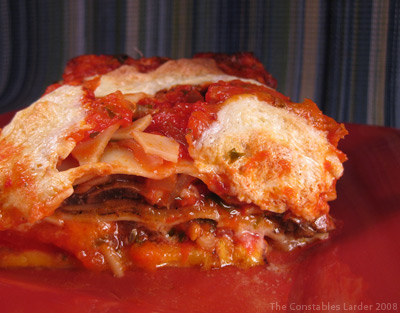
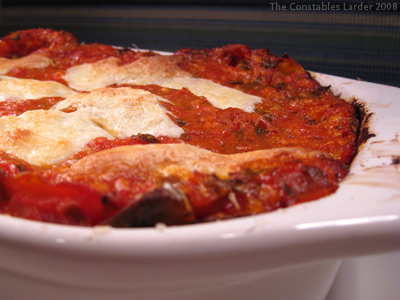
Out of focus picture but you get the point…

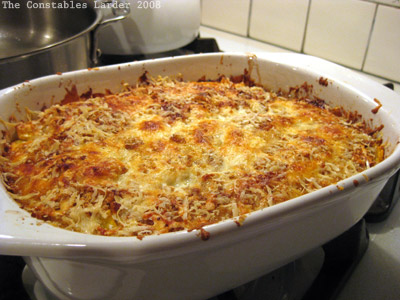
Optional: drizzle some olive oil over top.

Baked for 50 minutes at 350F. You get a delightful crust and a totally melted core. The layer of basil really permeates this dish nicely. It’s rich, but oh so satisfying. This dish can handle a hefty, peppery red wine should you be so inclined.

Eggplant & Zucchini Gratin (out of oven)

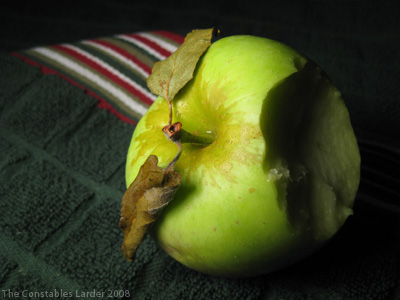
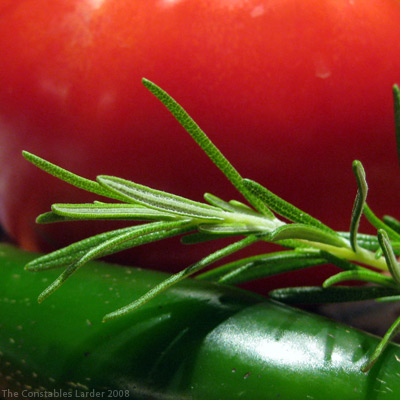
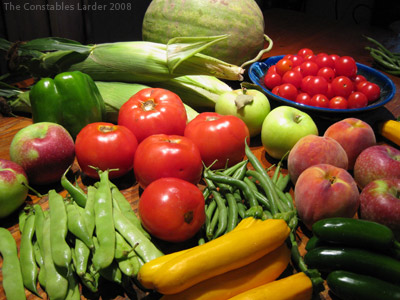
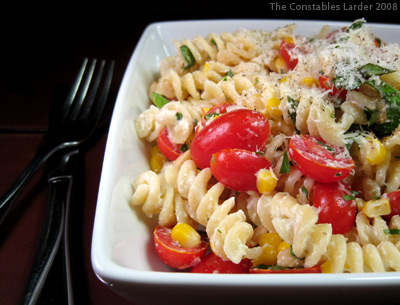
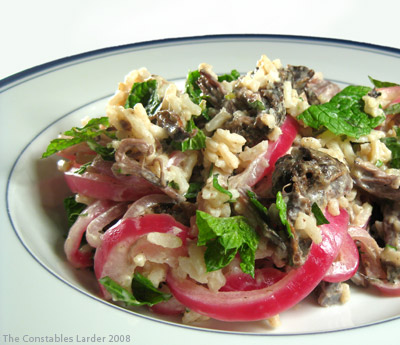
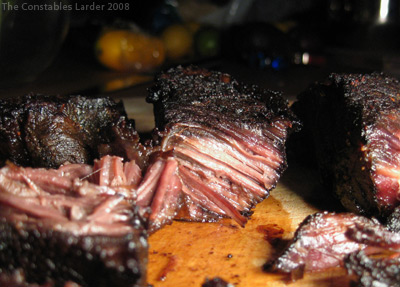
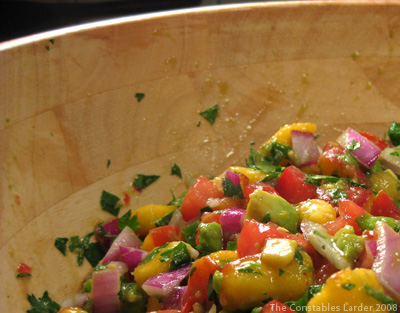
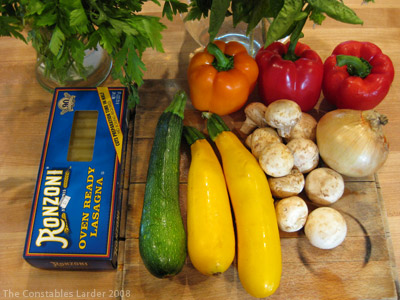
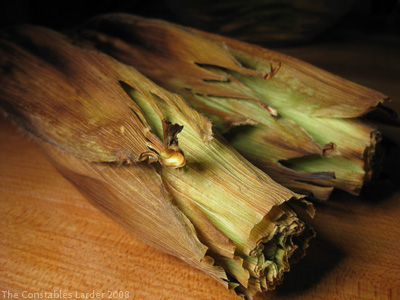
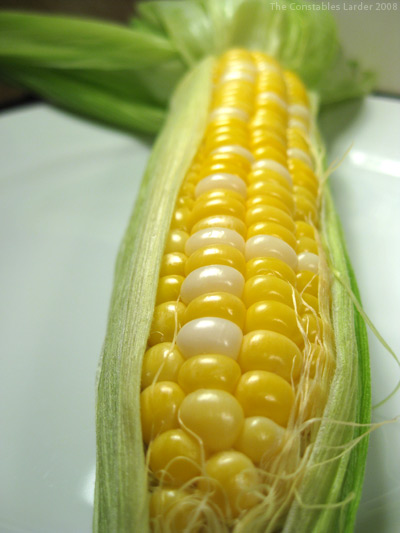
I’ll end with a few “ingredients” pictures.

Eggplant
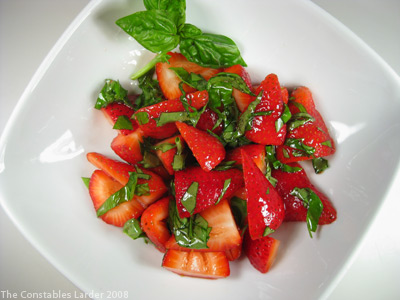
I love how this one came out.

Golden Zucchini

Weekend in Pictures

While we ate well this weekend, I can’t really say there was much in the way of recipes — just fine, fresh food. Below are a few of the photographs taken along the way.

First apples of 2008
The first local apples are emerging in the Catskills: Ginger Golds (above) and Paula Reds. Tart and delicious!

Mixed Peppers
Mixed peppers

abstract
I love color

farm bounty
Bounty from the farm stand

roast tomatoes (before)
I tried roasting tomatoes after seeing them on Smitten Kitchen. While you see that I tossed some rosemary on top, Deb is right in her post that herbs are really unnecessary. Next time I’ll leave them out entirely.

roast tomatoes (after)
They’re like little tomato candies

summer meal
Saturday’s meal was super simple and completely satisfying: corn picked that morning; par-boiled romano beans and cherry tomato salad (tossed with oregano, olive oil and red wine vinegar); and grilled pork lightly marinated in olive oil and rosemary. I’m sad that this was the last week for romano beans, as they were my favorite discovery this summer.

lemonade

I’ll leave you with a lemon-limeade (juice from 5 lemons, 5 limes, sugar to taste, tons of mint chilled in the fridge for a while and served with frozen watermelon chunks standing in for ice cubes). I don’t love the picture but the drink was yummy!

Apples in the Catskills mean that summer is waning, but luckily there’s a whole new wave of great produce still to come.

Chickpea Stew (and mag cover whimsy)

chickpea stew
Tonight I adapted a recipe from the Sept 2008 edition of Food & Wine, a chickpea and spinach stew (original recipe here). I can’t resist saying, the cover of the magazine absolutely cracked me up. It read:

our 20 best fast recipes ever

So does a food mag have to be like Cosmo now? And I query: do they really come up with 20 new best sex positions each month? (I refer to Cosmo there, not F&W, although I guess that could be an interesting editorial direction…) . At least F&W stuck to a round number, unlike Details which prefers things like 133 ways to look great… I’m imaging the editorial cutting table: “sorry Boss, we tried to make it to your 135 quota but just couldn’t get there!

Enough amusing myself — onto the food! This is a great dish, and while I’m sure the original recipe is good, I had to go my own direction. I diverged from F&W in a number of ways: smaller portion, longer cooking (I know … efficiency yada yada yada but it’s a STEW, not a chickpea stirfry for crying out loud), and slightly different ingredients (for one, I can’t stand raisins in cooked food but that’s just me — I’m a “savory” type).

Chickpea Stew

1/2 lb of dried chickpeas (approx)
7 oz bag of baby spinach
1 medium yellow onion or half a large vidalia onion
3 roma tomatoes
1 medium garlic clove
small pinch of saffron
1 tsp hot hungarian paprika
1/2 tsp cumin
1 tbsp tomato paste
1 bay leaf
salt and pepper
olive oil (extra virgin if you have it)

The Chickpeas
You can easily use a can of pre-cooked chickpeas, but I don’t like the taste of the liquid you get with canned beans, so I try to cook from dried beans whenever time permits (one also has more control over tenderness that way). Before I went to work this morning, I soaked about half of a 1 lb bag of dried chickpeas in a bowl of cool water.

Rinse the chickpeas, placed them in a medium pot and covered with water about an inch above the chickpeas. Bring them to a boil, lower heat to a simmer, and cook for about an hour (you can add things like a carrot, onion, parsley stems, or bay leaf if you feel inspired). If you don’t have time to soak, but want to use dried beans, you’ll probably need to let them cook for another 40 to 60 minutes. Once your chickpeas are done, save three cups of the cooking liquid, drain the pot and return the chickpeas and 1 cup of the cooking liquid to the pot.

tomato crosshatch

The Tomatoes
I skinned and seeded the Roma tomatoes. If you are in a hurry, you can skip this step, but it is a nice touch. To skin a tomato, cut a shallow X at the bottom (I find with the oblong roma tomato, it is easier with slightly bigger crosshatch cuts than normally needed) and place it in boiling water for about 30 seconds. Once it cools, the skin should come off easily. Quarter the tomatoes and use your fingers to gently scoop out the seeds. Then loosely chop into smaller pieces and add to the pot with the chickpeas. Turn on the heat and get the chickpeas, liquid and tomatoes to a simmer.

The Onion
Chop your onion and saute it with a tablespoon of olive oil until it just turning translucent, then add to the pot. Keep the saute pan handy for the spinach (below).

The Spices
Mash a medium-sized clove of garlic with the flat of your knife and remove the skin. Then chop and place in a mortar. Add the ground cumin, hot paprika, 1/4 tsp of salt, and (very optionally, given the price of saffron) a pinch of saffron threads to the mortar. Pound into a paste and then add to the stew pot, along with a bay leaf, the tomato paste, and 1/2 cup of the reserved liquid (if you forgot to reserve any, just use water). Stir and keep at a low simmer for 20 minutes.

You want the stew to be slightly liquidy but not soupy, so continue adding the reserved liquid as needed as the stew thickens, stirring periodically. Add salt and pepper to taste (I estimate that I added another 1/4 tsp of salt here). You might also decide to add more cumin if you want a stronger spiced meal.

Adding the Spinach
As the stew is lightly simmering, saute the baby spinach in a tablespoon of olive oil for a couple of minutes until it has just cooked down. Drain in a collander and press on the leaves to drain the extra liquid. Mix the spinach into the stew pot and let simmer for another 10 or 15 minutes, adding any extra reserved liquid to achieve the consistency you want, and tasting for spices.

When you serve, you can drizzle a little more olive oil and/or grind a little black pepper on top of each bowl. I ate this with some grilled sausages, but frankly it would be a great, very satisfying meal unto itself with a big hunk of good bread. I want to try it again adding carrots, parsley, and another version with more heat from hot peppers.

Chard Leaves Stuffed with Mushroom Risotto

risotto stuffed in chard leaves
Tonight I adapted Mark Bittman’s post on Chard Stuffed with Risotto and Mozarella, which he in turn adapted from the restaurant La Zucca Magica in Nice. It makes for fabulous comfort food or a rich first course. Yum. If you make the dish, you might find his short video useful. It’s also really fast to put together if you have made the risotto in advance. Did I say yum already?

My version was to make a mushroom and shallot risotto with chicken broth (Bittman went with a lemon-saffron risotto). Vegetable broth would work quite well for you vegetarians out there.

Shallot and Mushroom Risotto
(Makes enough for 6 medium-sized stuffed chard leaves)
2 tbsp butter
1 1/2 cup arborio rice
2 medium shallots, finely diced or minced
1 cup white button mushrooms, thinly sliced*
6 cups of stock (chicken or vegetable)
splash of dry white wine
olive oil
salt and pepper

Heat your stock (I used a homemade chicken stock) in a saucepan until it very lightly simmering.

In a thick bottomed pan, melt 2 tbsp of butter and a dash of olive oil over medium heat. When the butter has melted, add the shallots and cook for a minute or so, stirring regularly to prevent any sticking. Then add the mushrooms and continue cooking and stirring for several minutes until the juices from the mushrooms start to emerge. Add the arborio rice and stir it in until it is coated with the butter. Add a few turnings of salt and pepper grinders.

With a ladle, start adding the stock, never pouring more than 1/2 cup worth of liquid in at a time. Stir as continuously as you can bear (continuously is preferrable), and when most of the stock has been absorbed or evaporated, ladle in some more. You don’t want the rice to ever get too soupy or too dry — it should remain bubbling. After a few ladles-worth of stock, add a dash of dry white wine, stir in, then go back to adding stock.

Most cookbooks recommend that you start tasting your risotto after 20 minutes of cooking. You want the rice to be cooked but still have a bit of a crunch. In my case, the risotto took 25 minutes of cooking. If you don’t have quite enough stock, continue with water.

* Note: many folks use fancier mushrooms for risotto, such as porcini or shitake; those are delicious, but button mushrooms are cheaper and still quite good.

swiss chard

Stuffing & Cooking the Chard Leaves

6 Chard Leaves (or as many as you need)
Fresh mozarella, loosely diced
1/2 cup of broth (chicken or vegetable)
parmesan cheese, grated
olive oil

You’ll want to let the risotto cool before you proceed to the next step (of course, you won’t have this issue if you are using leftover risotto from the fridge). You’ll want to have a medium to large chard leaf for each risotto ball you are making.

With a sharp knife, remove the thick stalk running up the center of the chard leaves, leaving the two halves of each leaf connected by 2 or 3 inches of leaf at the top. Then parboil the leaves in boiling water for about 30 or 40 seconds.

Using your hands, make medium-sized balls of the risotto (I went with about 2.5 inches in diameter). As Bittman put it, it’s rather like making a small snowball. Then push in one side to create a cavity. Place a few pieces of mozarella in the cavity, then close up the ball around it.

Place the risotto ball at the point of the chard leaf where the two halves of the leaf connect, and the snugly wrap each leaf half around it until it is entirely covered.

Place the stuffed leaves snugly in a small/medium-sized baking dish, and pour some broth over top — enough to fill the dish with about a half-inch of broth. Then bake for 20 minutes at 400F.

Serve by dribbling some of the broth from the baking dish over the top and add a dribble of olive oil and some grated parmesan cheese. Some fresh pepper is nice as well. Note: I decided that this particular rendition of the dish was better without the lemon zest garnish Bittman uses in his version.

parmesan

In the spirit of experimentation, I played with using collard green leaves as well for the wrapping and the verdict was clear: the chard was absolutely delicious; the collard greens were very quickly voted off the island!

A big thank you to La Zucca Magica and Mark Bittman for bringing this one to the rest of the world. Did I mention “yum”?

Fusilli, Ricotta w/ Lemon, Tomatoes and Corn

Fusilli with Ricotta

Earlier today I came across Food Blogga’s Penne with Fresh Ricotta and Baby Heirloom Tomatoes, which is a beautiful take on a classic combination (just go look at her photographs – absolutely killer), and there was no question what I was having for dinner tonight. Food Blogga (aka Susan) had these amazing baby heirloom tomatoes, but I was stuck with something a lot less appealing — tomato envy. However, I had some grape tomatoes (poor chaps, buck up, it’s hard to compete with the fashion models) and had picked up some fresh sweet corn. Here’s my riff:

1/2 lb fusilli
1 cup grape tomatoes
1 ear, very fresh sweet corn
1/2 tsp lemon zest
2 tbsp lemon juice
1/3 cup of ricotta cheese
1/4 cup of grated parmesan cheese
1 tbsp pine nuts
handful of fresh parsley, chopped
handful of fresh basil, chopped
salt and pepper

Halve the tomatoes and combine in a bowl with the lemon zest, lemon juice, parsley, basil, and some grindings of salt and pepper. I was in a hurry so I microwaved the corn in the husk for 2 1/2 minutes, let it cool for a few, then cut the kernals from the ear and mixed into the bowl.

Heat a small saute pan (ideally non-stick) over medium heat and toast the pine nuts for a couple of minutes, periodically shaking the pan to roll the nuts.

Boil the fusilli until al dente (with dried pasta, about 10 minutes). When done, reserve a cup of the cooking liquid. Drain the pasta and return to the pot, then mix in the ricotta cheese and about 1/4 cup of the cooking liquid until the pasta is well coated. Stir in most of the grated parmesan.

Note 1: The Kitchn writes of an interesting approach where the ricotta is warmed in a bowl over the boiling pasta. Note 2. 101 Cookbooks has a post on making your own ricotta (mine was store bought whole milk ricotta).

Add the herbs and vegetables, as well as the pine nuts, and lightly toss. Taste and if you feel that the texture is a little dry, add a little more of the reserved cooking liquid or squeeze some fresh lemon juice and lightly toss again.

Sprinkle the remaining parmesan cheese on top when serving. I think this dish goes really nicely with a Sancerre or an Australian or New Zealand Sauvingon Blanc (the Chilean Sauv’s are improving as well).

Rice & Beef Salad (exploration)

Rice Salad
Tonight’s food experiment began with a beef marinade. The result ended up being an unusual but satisfying “salad” of beef, rice, yogurt, pickled onions and mint. The journey is below.

This started because I had about a pound of chuck (cut into two large strips), and decided to try marinating it with several tablespoons of soy sauce, a light sprinkling of sesame oil, the juice from two limes, some salt and pepper, and a dusting of red curry powder. Thinking more, I thought it would best served slow-cooked and flaky, so I cut the marinade short. I seared the beef in a cast iron pan very briefly, then poured the juice from the marinade into the pan with a little water (say a third of a cup). This was then cooked in the oven at 300F for 3 hours. I had it covered for the first two hours, flipped the meat halfway through, and added some more water when the liquid in the pan started to dry out.

Braise
The result was a flaky beef with an highly flavored crust (where the soy sauce concentrated from the cooking process and really stood out). Once tasted, I knew the beef needed to be directly complemented with some other flavors to balance out that crust. Using two forks I shredded the beef into small pieces. The other components of the simple dish just presented themselves in my head.

I cooked up 3/4 cup of basmati rice, quickly pickled a thinly-sliced red onion (see recipe here, which I very loosely followed and let sit for about 40 minutes), added several dollops of natural greek yogurt (critical to the dish), and chopped up some mint (optional but I liked the addition).

In all got mixed together in a bowl, then served warm. If you feel like trying this exploration yourself (I wouldn’t be posting here if I didn’t like the result), I recommend pairing it with a strong red wine like an Aussie shiraz or a hefty California zin.

So there you have it. I haven’t posted in a typical recipe format, because it was really just an ad hoc experimentation that used some flavors I’ve been playing with lately. The results, however, were satisfying and different (which, since I’ve spent so long cooking French-inspired food — yes, I learned how to cook from Julia Child’s Essentials of French Cooking — qA what I was shooting for). Now I’m going to sit back and see if you all think I’m nuts.

Experimenting with Peach Salsa

peach salsa
Some friends spoiled us the other week with a brilliant dish of mahi mahi covered in peach salsa, so I’ve been in the mood for it since. I decided to try a recipe for peach and avocado salsa I saw posted on Foodbuzz by TiffyC (that link will take you to the ingredients). It was good but I think I would hold the avocado next time (personal preference, not the fault of the recipe). I did a little experimentation with vinegars and the apple cider vinegar came out on top; I also tried adding chopped mint and liked the result.

Note: If I had used my head, I would have held the avocado and peach till last and chopped/mixed up all the other ingredients first to prevent mushiness with stirring (not the recipe’s fault since it calls for a light hand, but I was playing with flavors — in any case I think it makes most sense to add the peach and avocado last, lightly mix, then chill).

I ended up deciding that my own inclination pointed towards the more fruity recipe our friend Caroline used and was kind enough to share with me:

2 large ripe peaches, finely diced
2 tbsp jalapeno pepper, seeded and minced
1/2 cup red onion, diced
1/4 cup cilantro, coarsely chopped
1 large navel orange, supremed with juice
2 tbsp white wine vinegar
1/2 cup extra virgin olive oil
kosher salt to taste
freshly ground black pepper to taste

Vegetarian Lasagna; Strawberries with Basil and Honey

Vegetarian Lasagna
My kitchen is a complete disaster area right now. I’d share a picture but it might short out your monitor. The silver lining is that my first attempt at a vegetarian lasagna was successful (your first, you cry! ah but tis true — normally Lisl is the lasagna champ in this household but she’s on a plane to the UK). And so with no further ado:

Lasagna Components
2 golden zucchini (green zucchini or summer squash would work)
2 red or orange bell peppers
big handful of white button mushrooms
lasagna pasta
basil
parmesan cheese
mozzarella cheese
bechamel sauce (flour, butter, milk – see below)

Tomato Sauce
1 medium yellow or vidalia onion
3 cloves of garlic
14 oz can of skinless, whole tomatoes
olive oil
salt and pepper
cayenne pepper
bay leaf
parsley

Vegetarian Lasagna Ingredients
Note on above picture: I didn’t end up using the orange pepper or green zucchini

Whip up a tomato sauce: in some olive oil, saute the finely chopped onion on moderate heat, then add the garlic, minced. Add the tomatoes, half a teaspoon of salt, some grindings of pepper, a healthy pinch of cayenne pepper, a bay leaf, and a handful of chopped parsley (I also added a touch of white wine). Do not chop up the tomatoes yet, but rather bring to a boil then let it lightly simmer uncovered for an hour if time permits. Then remove bay leaf and chop and mix the tomatoes with your spatula. Note: you don’t want this sauce to be too watery, or your lasagna will be equally watered down.

Fire up your grill or broiler. Char the peppers on all sides and place in a paper or plastic bag for 10 minutes. Then peel off the skin and remove the seeds and stem.

Thinly slice the zucchini lengthwise, drizzle with olive oil and grill or broil briefly, taking care not to burn.

Thinly slice the mushrooms and saute them in a little butter and olive oil.

Next, create a bechamel sauce (white sauce). I decided to reference a few sources here and amusingly everyone differed. For a single cup of milk: Marcella Hazan used 2 tbsp of butter and 1.5 tbsp of flour; Julia Child used 1 tbsp of butter and 1.5 tbsp of flour; and Mark Bittman was right in the middle, with 1.5 tbsp of butter and 1.5 tbsp of flour.

I ended up going the Hazan route more or less. Heat the milk in a saucepan, with a dash of salt, until it starts to bubble. In another saucepan, melt the butter over low heat and then wisk in the flour. Remove from heat and slowly add in the hot milk, wisking aggressively. Continue to cook over low heat, wisking, if you want to thicken the sauce.

For the construction of the lasagna, I used “oven ready” pasta so I didn’t need to pre-soften but actually I would have preferred the latter since it would have made it easier to cut the pasta to fit my baking dish. I used a smaller but deeper pan than normal because I went multi-layer.

My layers (as best I can remember):
1. thin layer of bechamel, 2. pasta, 3. thin layer of tomato sauce, 4. zucchini, 5. grated parmesan cheese, 6. bechamel sauce, 7. pasta, 8. tomato sauce, 9. basil leaves, 10. bell peppers, 11. sauted mushrooms, 12. pasta, 13. tomato sauce, 14. grated parmesan cheese and torn chunks of mozzarella cheese.

I tend to cook light on salt, but you can always sprinkle a touch of salt and/or pepper on a layer or two as you form the lasagna. When complete, place in the oven for 45 minutes at 350F, or until mozzarella on top starts to brown.

Lasagna
Wish my pictures had come out better…

Strawberries, Basil and Honey
Strawberries, basil and honey
For dessert, I tried a very simple but surprisingly good combination I picked up over at Lucullian Delights, thanks to the Food Blog Search. It doesn’t get much easier than this: cut up your strawberries, chop up some basil, drizzle on some honey, and mix it all together. What’s really interesting is that the basil starts taking on the flavor of cloves.

Mags to Blogs + Recipe Links

There was a time when I hit the magazine racks once a month to choose a magazine out of the Gourmet, Saveur, Bon Appetit, and Food & Wine selection. I never knew which title I would want each month. I bought them for inspiration and the fabulous photography (who doesn’t love some good food pr0n?). But I have to admit, I’m wondering why I would spend the money on magazines at all when I can barely keep up with excellent posts from food bloggers.

There are so many blogs where the photographs are great, the culinary ideas delicious, and the writing down to earth. Not to mention that in the foodiesphere, it is participatory, i.e. you can have a conversation or send someone a smile through comments, email, or a vote on sites like Foodbuzz. I admit that we currently have subscriptions to Food & Wine (which used to be my least favorite, but may actually now be my most favorite) and Gourmet, but I have to wonder for how long. How do those magazines raise the bar to compete?

I now have 55 food blogs in my RSS feeder (luckily food blogs are much easier to scan and follow than other blog categories), and it continues to grow. Here are a few links to recipes over the last week or so that I want to try (in no particular order):