Stuffed Eggplant with Greek Flavors

Stuffed Eggplant
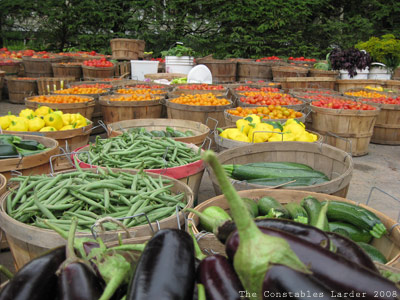
Lisl found herself missing authentic Greek food this weekend, and we had picked up some lovely young eggplants at the farm on Sunday. What she really wanted was Papoutsakia, which has ground beef and cheese, however there hadn’t been any time to pick up meat at the supermarket so I went vegetarian. I found a recipe on Epicurious that I modified to my needs, and was happy with the net results.

3 small to medium eggplants
2 large handfuls of fresh parsley, chopped
1/2 cup feta cheese, chopped into small cubes
1/2 cup of black kalamata olives, pitted and chopped
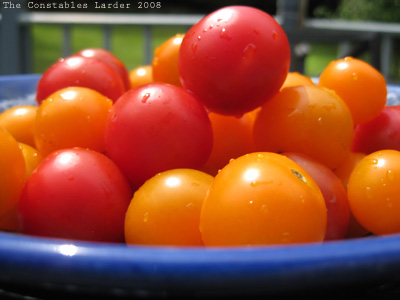
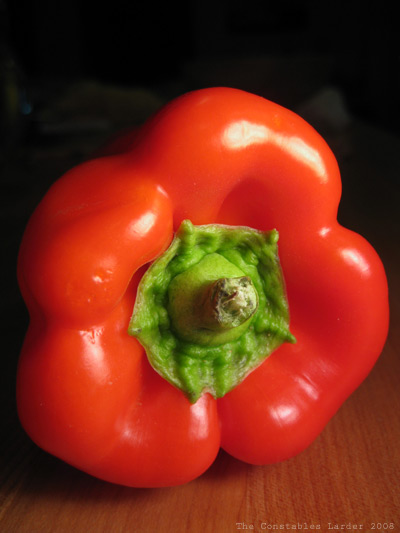
2 medium tomatoes, chopped or cut into thin strips
1 yellow or vidalia onion, chopped
2 cloves garlic, minced
olive oil
salt and pepper

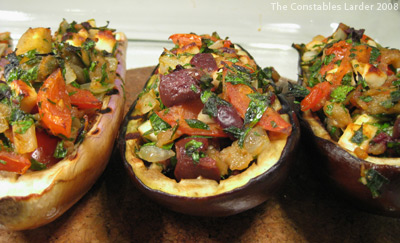
Cut the eggplants in half lengthwise and score them in a crisscross fashion with a sharp knife, making sure not to cut all the way through to the skin. I used a metal teaspoon to scoop out the meat in the middle of the eggplants, making sure not to dig too close to the skin, and creating little eggplant “boats” (the scoring makes it easier to scoop the meat out and helps define the thickness of the edges).

Lightly salt the flesh side of the boats and place down on some paper towel to drain for about 20 minutes. Chop up the scooped eggplant, salt and let drain in a colander for 20 minutes. Then try to pick up any extra moisture with a paper towel.

Lightly coat the top of the eggplant boats with olive oil and either grill (face down) or broil (face up) the eggplant for about 5 minutes, being careful not to burn them. Then in a skillet, add several tablespoons of olive oil and cook the chopped eggplant until golden Add the onions and garlic and cook until the onions are almost translucent. Turn off the heat and add the tomatoes, parsley, feta and olives. Salt and pepper to taste. If the mixture seems too dry, add a touch of water to moisten it up, since it will dry some when baked.

If your kalamata olives are not pitted, smash each one with the flat side of your chopping knife (kind of like peeling garlic). This should make it pretty easy to remove the pit with your fingers.

In a baking dish, fill each boat with a hefty portion of the stuffing and if you want, drizzle a tiny bit more virgin olive oil on top. Now the Epicurious recipe calls for broiling the dish for another 5 minutes, however I found that the eggplant boats needed to cook (melt) a little more, so I would recommend baking for 15 minutes at 350F before turning on the broiler for a few minutes at the very end.

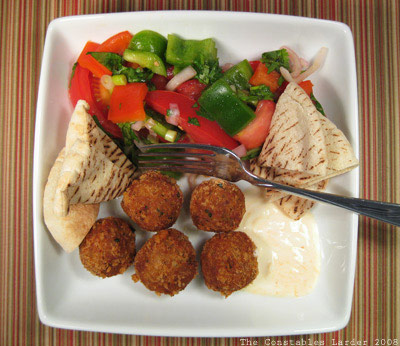
We ate these with some fresh corn and it was quite satisfying, although with more time it would have been fun to add some other Greek elements to the plate.

Stuffed Eggplant

Sunday Easy: black bean grilled cheese with roma beans

Sunday was a gorgeous, remarkably cool day in the Catskills and we visited some friends for a feast of a lunch. We didn’t have much time for dinner but I whipped up some fast and yummy “comfort food”. I have no idea what it should actually be called – “black bean grilled cheese” sounds about right (although not a sandwich).

My base was some unused black beans left over from Saturday night (an experiment with Poblano peppers that went horribly wrong – “don’t ask, don’t tell” is my policy for that dog’s breakfast kthxbye). Thankfully this meal came out delicious. Redemption! (although, smoked ham and a layer of melted jack cheese? what a shoo-in!)

Black bean Fry

Black Bean Grilled Cheese (for lack of a better name)

The following amounts served 2 and 1/4 people pretty well

Smoked ham, cubed, about a cup’s worth
Cooked black beans, about 1 1/2 to 2 cups
1/4 lb Monterey Jack cheese
1 tsp Ground cumin
1/2 tsp Paprika
Salt
Breadcrumbs

Cut hickory smoked ham into 1/4 inch cubes. Heat a dash of olive oil in a cast iron frying pan (or a pan you can place in the oven) and lightly brown the ham, stirring regularly, on medium-high heat. Lower the heat and add a 1 1/2 cups of cooked black beans (pre-made or canned). Add 1/4 cup of water, then 1 tsp of ground cumin, 1/2 tsp of paprika, and some salt to taste.

Stir in the spices and let cook for about 5 to 10 minutes together, adding small amounts of water if needed – you want it moist but not soupy. Turn off the heat, and sprinkle grated monterey jack cheese over the top, and then add a light layer of breadcrumbs. Place the pan under the broiler to brown the cheese and breadcrumbs — depending on how close the pan is to the broiler heat, this can happen really quickly. This will melt the cheese and the toasted breadcrumbs will add a nice texture.

Note: if you are working with dried beans, you’ll need to start a couple of hours earlier. Place in a pot with a bay leaf (and/or half an onion), cover with water, and bring to a boil, then simmer for about 1 to 1.5 hours until tender. Keep an eye on the water level and add more if it falls below the top of the beans. I’ll also note that I almost never use bought breadcrumbs — rather I just put a couple of slices of farm bread in a food processor.

Roma Beans
Washed roma beans

I served the black bean concoction with some roma beans from our local farm. I’d never cooked roma beans before, but they looked great and the nice lady at the farm stand said to treat them just like green beans. I nipped off the ends and boiled them for about 3 minutes and tossed with a small amount of salt and butter, and they were wonderful.

Summer Bean Salad

Bean Salad
We’re back up in the Catskills and dropped in at our favorite local farm stand. I got to walk into the fields and pick a peck of fresh parsley, which is always fun for a city boy like me. Continuing on the vegetarian bent, and armed with fresh corn, tomatoes and peppers, I whipped up a simple bean salad (I was put in the mood by Food Blogga, who had gone with more of a Southwestern bent).

1 can red kidney beans
1 can chick peas
1/2 red onion, loosely chopped
big handful of red and orange cherry tomatoes, quartered
2 (hot) fresh jalapenos, seeded and finely chopped
2 ears of corn
2 lemons
olive oil
fresh oregano
fresh lemon basil
salt and pepper

Thoroughly rinse the kidney beans and chick peas in a colander, removing any loose skins. Let drain, and add to salad bowl along with the tomatoes, red onion, and jalapeno.

I normally prefer to grill corn, but time was limited so I cooked each ear of corn (with the husk still on) in the microwave for 2 min, 40 seconds. After it cooled slightly, I removed the husk (be careful not to burn yourself) and then cut the kernals off the cob with a sharp knife, setting the cob pointing vertical and slicing downward, then rotating to do another downward cut (note to self: see if there’s a better way).

I wanted a really clean flavor for the salad, so kept the dressing simple by combining the juice of two lemons, some olive oil, a small handful each of chopped oregano and lemon basil, and some salt and pepper. We didn’t have time to let it all marinate together, but when a salad like this is well mixed you get a wonderful combination of flavor with each bite.

Cherry Tomatoes
Better than candy!
Gill's Farm
Right off the farm.
sunflower

Zucchini Falafel (thank you Haalo)

Falafel
Last night I decided to try the Zucchini Falafel recipe from Cook (almost) Anything at Least Once. Let’s just say that when both Lisl and I go back for thirds, it’s a winner. I’m not going to duplicate the recipe here since you can follow that link above to the source, and I followed it pretty closely for once. My comments: I decided to fry them in about an inch of corn oil (the diameter of my falafels were about an inch) and the result was delicious and crispy. If you would prefer to bake, Haalo has some tips in this comment (link).

I served them with a dipping sauce of natural greek yogurt mixed with a few drops of Sriracha hot chili sauce. I also whipped up a basic summer salad of tomatoes, peppers, shallots, spring onions, and cilantro with a dressing of olive oil, lime, rice vinegar and a few drops of sesame oil (yes, I’m definitely on a cilantro and lime kick right now).

Photography vent time: I’m definitely getting frustrated with my Mac and Photoshop CS3. I’ve been working out how to get the lighting and white balance adequate with my digital camera, but the radical difference between how colors are typically presented on Macs versus PCs makes it very hard to trust how an image is going to appear to others (on Macs these images might appear a bit washed out, while on PCs the saturation might seem fine). I am enjoying the visual art learning curve of food photography, but this is an irritant!

Falafel

redpepper