Pickled Red Onions (improvised)

pickled red onions
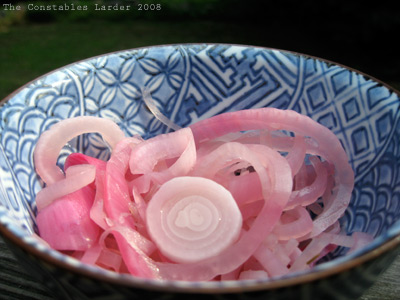
Flipping through a back issue of Bon Appetit (July 2003), I came upon a recipe for “pink pickled onions” that I just had to try. The magazine called for pickling spices and fresh rosemary, neither of which I had at hand, so I improvised the following adaptation working within the limits of my spice cabinet that day, sticking with spices that could be strained out (i.e. not ground).

1 red onion, sliced thin into rings
1 cup white wine vinegar
3/4 cup water
1/2 cup sugar
1 tbsp dried rosemary
1 tbsp salt
1 cinnamon stick
1 tsp cloves
1 tsp cumin seeds
1 tsp whole black peppercorns
2 dried bay leaves

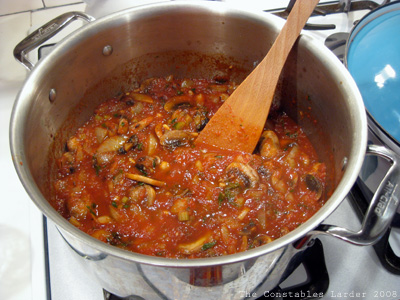
In a medium saucepan, add the vinegar, water, sugar and all the sprices and bring to a boil, stirring until the sugar and salt dissolve. Reduce heat and simmer, covered, for about 10 to 15 minutes. Place a metal bowl underneath a fine strainer and pour the liquid through the strainer so that the spices are removed. Push the sliced red onions into the liquid in the bowl and let cool.

I had hungry hordes to feed (ok, only my wife and daughter but when they are peckish, even Genghis would run for cover), so I let sit for just under an hour while I prepped the rest of dinner. You can also cover and place in your fridge for longer.

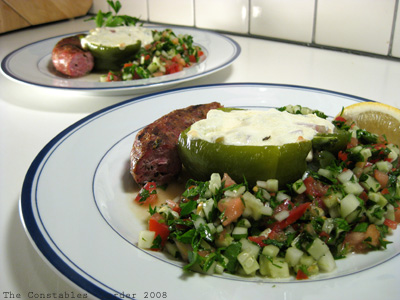
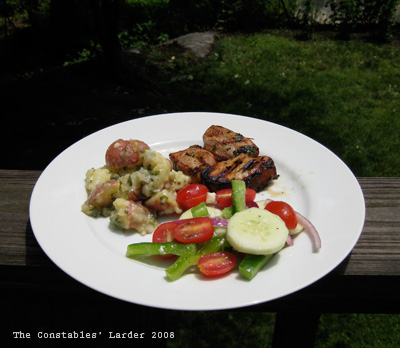
P.S. dinner consisted of sandwiches made out of grilled, spicy (chorizo-based) sausages (sliced) which could be swapped out for vegetarian sausages (in that case, I would recommend adding a little kick like Thai chili sauce), the pickled onions, chopped romaine lettuce and natural greek yogurt as a condiment. I wished I had some Cuban black beans to serve with it.

Pasta sauce with homemade milled tomatoes

Tomato Sauce
A few months ago, some friends of ours from Harrison, NY, gave us a jar of homemade stewed tomatoes. Apparently every year, a group of Italian women in the neighborhood (our friend’s mother being one) buy a huge quantity of tomatoes, mill them to de-seed and de-skin, stew, and then preserve in sterilized glass jars with a sprig of basil. Note: I’m hoping to get a more detailed description of this process to post in the next day or so (Update: description posted here).

On Monday evening we decided to crack open the jar and taste. I can only describe my taste bud reaction as “holy moly!” It had to be the sweetest tomato flavor I’ve ever had. Well, after this moment, my goal could only be to use this as the base for a pasta sauce without distracting too much from the incredible core flavor.

1 jar of stewed tomatoes (see below)
1 vidallia onion, chopped
1 and a half stalks of celery, chopped
2 cloves of garlic
8 oz white button mushrooms, cleaned and sliced
handful of parsley, washed and chopped
virgin olive oil
salt and pepper

I started by heating some olive oil in a big pot on low heat, and then sauteing the onions and garlic until the onions started to turn translucent. I then added the mushrooms and sauted, stirring occasionally, until the mushrooms were cooked and exuding their juices. I tossed in the parsley and celery, a pinch of salt and some ground pepper (I kept the salt light because the natural flavor of the tomatoes was so good), and let cook for a couple more minutes.

Normally I would also add wine or vermouth at this stage but it just wasn’t needed here. I then added the tomatos, turned up the heat slightly to bring everything to a light simmer, and cooked for about 30-60 minutes stirring regularly. We served this with farfalle pasta (campanelle would have worked nicely too) and a d’Arenberg Footbolt Shiraz.

Now, the tomato sauce we used as a base is obviously not something you can run out and get. Normally I use tins of peeled Italian tomatoes, and to be honest I rarely take the step to deseed the tomatoes (usually due to time considerations). Jamie Oliver also tends to leave the seeds in, and takes the approach of letting the tomatoes cook whole (i.e. he does not cut or break them up) with the sauce for a while and only breaking them up and letting the seeds out into the mix near the very end.

Many cookbooks talk about how tomato seeds can add slight bitterness. I had never really felt this to be enough of a problem to take the time, but if you want to try working with canned, peeled Italian tomatoes without the seeds, it’s a relatively easy, if slightly messy, step. To preserve most of the juices, I recommend working in your sink with a strainer over a bowl. Take each tomato, break it open in the middle with your fingers (they will be very soft), and let the seeds run out, gently scooping out any recalcitrant ones. Let the juices flow into the bowl, save the tomato flesh (can just put in the same bowl), and toss out the seeds in the strainer.

Parsley is Food

Parsley Salad
I love parsley. I’ll chop it up and stuff it into burgers by the handful. Sometimes I’ll add it to stews in huge quantities. Tonight I whipped up a simple parsley, cucumber and tomato salad that was delicious.

The parsley salad was extremely easy. Wash a big bunch of parsley carefully and dry in a dish towel. Remove the leaves from the stalks, discard stalks, and chop up the leaves. I then took a cucumber, peeled it, and chopped that up into cubes about half a centimeter big. Last was a ripe tomato, which I also chopped up into small pieces. It all went into a bowl with the juice from two lemons, a bit of olive oil, a bit of rice vinegar, and some turns on the salt and pepper grinders.

Tomorrow we hit the road to Nantucket, so this was another “what’s in the fridge to use” evening. Somehow we ended up with a bunch of unused vegetables, and yet again an uneaten green pepper, so I made a different kind of stuffed green pepper. As in the previous recipe, I halved the pepper and seeded it, leaving the stem. I then steamed the halves for about 7 minutes, immediately cooled them under some cold water to slow the cooking, and preheated the oven to 350F.

Stuffed Peppers
In a saute pan, I put a tbsp of butter and some olive oil, let that warm up over low heat, and added some chopped up red onion, celery, fennel, and a big handful of basil. I added some sea salt and pepper to taste. After the vegetables had slightly softened, I turned up the heat and added about a quarter cup of white wine, letting that cook down for a few minutes until there was no excess liquid. Then I turned off the heat.

I let the vegetables cool for a few minutes, then chopped up some mozzarella cheese and tossed it in. What I wish I had also done was make some breadcrumbs in the food processor to add to mix. I stuffed the peppers with the mix, laid some slices of mozzarella on top, and popped it in the oven (in a small baking dish) for about 25 minutes.

The final part of the meal was a broccoli rabe Italian sausage that I grilled.
Parsley salad, plated meal

Mulitmedia seven-layer dip

Last night, I went to a friend’s house for drinks, where one of the snacks was seven-layer dip. It brought back great memories of my old friend Laurie Kesselman, who made an excellent version of this for many get-togethers on her roof in the West Village, as well as my baby shower and numerous other parties – she was a real pro at it. It’s really quite delicious and satisfying!

For those unfamiliar with this dish (i.e. Australians), it’s a great tex-mex vegetarian (usually) party dish that’s good for any season. The basic concept is layering beans, guacamole, sour cream, chopped up green (spring) onions, diced tomatoes, chopped black olives, and shredded cheese, or you can add in green peppers, jalapeno, ground beef, or anything else that takes your fancy. I went hunting for a recipe online and found so many – you can start from scratch with making your own refried beans, or make it up from seasoning mixes and pre-prepared dips from the supermarket. You can even serve the beans hot under all the other ingredients.

I really like the Food Network’s version, which uses lots of fresh herbs and lettuce and healthier substitutes for some of the ingredients, such as greek yogurt for the sour cream and rinsed canned black beans instead of canned refried beans – a picture and the recipe is below. But for pure entertainment value, take a look at this video on startcooking.com. Cool!


Food Network’s Six Layers and a Chip Dip
From Food Network Kitchens

2 cloves garlic
2 teaspoons kosher salt
1(15-ounce) can black beans, drained and rinsed
1 (15-ounce) can pinto beans, drained and rinsed
2 teaspoons chili powder
2 tablespoons water
1 tablespoon extra-virgin olive oil
2 cups lowfat shredded Cheddar
2 ripe avocados, preferably Hass
1 jalapeno, stemmed, finely chopped, (with seeds for more heat)
2 cups chopped romaine lettuce
1 1/2 cups nonfat yogurt, preferably Greek
1/2 cup fresh cilantro, leaves and some stems, roughly chopped, plus more for garnish
3 ripe medium tomatoes, diced
5 scallions (white and green), thinly sliced
Baked tortilla chips, for dipping

On a cutting board, smash the garlic cloves, sprinkle with 1 teaspoon of the salt, and, with the flat side of a large knife, mash and smear the mixture to a coarse paste. Put the garlic, beans, chili powder, water, and olive oil in the bowl of a food processor and blend until smooth. Spread in the bottom of a 2 quart casserole or gratin dish, or in individual sized dishes, as desired.
Scatter the cheese over the beans. Halve and seed the avocados, then mash with the jalapeno and another teaspoon of salt in a small bowl. Spread a layer of the avocado over the cheese, and then scatter the lettuce on top.
Mix the yogurt with the cilantro and then spread over the lettuce. Add a layer of tomatoes and finally scatter the scallions on top. Chill until ready to serve. Garnish with a few cilantro sprigs and serve with baked chips.

Sunday lunch: Caper Potato Salad and Marinated Pork

Summer Sundays are great for catching up with friends for lunch on our Rye deck. A perfect day sees the kids tearing around playing havoc with the toys while the adults relax under the umbrella enjoying beers and lunch. The hot weather at the moment is just right for salads and grilled meats – fresh flavors and mostly cold food. Today, we had a delicious grilled marinated pork, french style potato salad (without mayo) and a greek-ish salad of cucumber, peppers, cherry tomatoes, red onion and feta cheese.

Sunday Lunch 6-15-08

Pork marinade: Apple cider vinegar, coriander (cilantro), jalapeno peppers and a dash of soy sauce. We marinated the meat overnight and then grilled on the BBQ.

Potato salad: Boil small red potatoes until tender. Meanwhile mix dressing – minced shallot, parsley, 1/4 cup of white wine vinegar, 1 tbs Dijon mustard; whisk together while adding about 6 tbs olive oil in a stream; finish off with a couple of teaspoons of capers. Dice the cooked potatoes and mix with dressing while warm so they soak it up. Eat warm or refrigerated.

Chilled Avocado & Cucumber Soup (and photo struggles)

Tonight I played with a soup that would work on a hot evening, which combined a base inspired by the Food & Wine’s 2007 Annual Cookbook and a relish picked up from an old issue of Gourmet.

Soup base:
1 large cucumber, seeded and chopped
2 avocados, pitted and peeled
1 1/2 cups buttermilk
2 tablespoons red wine vinegar
1 1/2 tablespoons fresh lime juice
1 teaspoon sugar
pinch of salt
1 teaspoon ground cumin

Combine all the ingrediants into a blender and blend until smooth. Theoretically one could then strain this, but I found it smooth enough as is. The buttermilk adds a wonderful tang, not unlike a good natural yogurt.

Corn Relish
2 fresh ears of corn
6 cherry tomatoes
handful of cilantro
1 tablespoon of minced shallots
4 tablespoons fresh lime juice
1 tablespoon olive oil
pinch of salt
pinch of sugar

I find that the only useful thing the microwave can do, other than heating up spagetti sauce, is cooking corn.* Leave the corn in the husk, cutting off the excess on either end, and microwave for 2 1/2 minutes. Set aside and let cool before removing husk. Chop up the tomatoes and the cilantro, then combine in a bowl with the minced shallots, lime juice, sugar, salt, and olive oil. Husk the corn and with a sharp knife remove the kernals. Mix the kernals in.

When you serve the soup, dollop the relish in the soup and lightly mix in.

* my favorite way to cook corn is to leave in husk, soak in water, and cook on the grill for 15 to 25 minutes, depending on grill heat

The combination came out pretty well. What did not was the photo. Right now I’m trying to use a digital camera, and *thought* that I had enough light for the pictures, but as you can see below they came out in an orange-tinted shadow (the image on the right is a separate mushroom dish I tried that also suffered from the orange plague). Clearly I have some work to do understanding my camera’s settings, since I primarily cook in the evenings when natural light is an impossibility. [UPDATE: I just use a small digital camera (Canon SD1100) and first tried playing with the ISO speeds, but really the easiest solution to get decent shots is the manual white balance feature.]

Three Cheese Salad

3 Cheese Salad
On a hot, humid Saturday, we wanted something light, fast to prepare, and which would go nicely with a Brooklyn Lager wheat beer. Our combination:

Ripe tomatoes, sliced into bite-sizes (campari, grape or cherry tomatoes recommended)
A big handful of fresh basil, torn
Mozarella cheese, cut into small cubes
Feta cheese, cut into small cubes
Parmigan cheese, shaved
Pine nuts
Olive oil
White wine vinegar
Salt and Pepper

For reasons only known to the most obscure of Greek god, Audrey has decided today that she is a squirrel and mommy and daddy are trees. We managed to scrape her off long enough to throw together a meal!

Scavenger meal: stuffed green peppers

Post audrey bathtime, post work conference call, I looked in the fridge to see what I could throw together. Green pepper, check, leftover black beans, nice!, spring onions, cilantro? hmmm that isn’t a happy color for cilantro, moving on … tomatoes… ok, we’re off to the races.

1 green pepper
Basmati rice
1 medium tomato, diced
Black beans (see recipe)
2 spring onions, diced
Montery Jack cheese
salt and pepper
Hot chili sauce

Pre-heat oven to 350 F. Halve your green pepper, then remove the seeds leaving the stem. Steam them for 8 to 10 minutes then set aside. Cook up some rice (in this case I used basmati and made a full cup but only used a serving spoon’s worth). In a mixing bowl, combine your rice, beans, spring onions, tomato, a handful of grated cheese, and a little salt and a healthy dose of pepper. Add something to give it some heat, this dish wants a kick — right now I am using some Sriracha hot chili sauce but would have preferred some fresh serrano or jalapeno peppers. Ah, the limits of the scavenger meal.

Stuff the pepper halves with your mixture and grate some more cheese on the top. Pop in the oven for 30 minutes.

And now for the ultimate scavenge score: ONE more bottle of wine in the house, and it’s a South African Shiraz. Ok enough blogging, time to eat.

Minnesota cream of wild rice soup?

Lisl’s gastronomic business trip continues. We rocked up to St Paul last night looking for comfort food. Who knew that cream of wild rice soup is not only a Minnesota specialty but quite delicious? Looking for the recipe on cooks.com, there seem to be two schools of thought on how Minnesota wild rice soup should be made – one with cream and the other with tomatoes and spices. I had the creamy one last night and it was great, but I’m sure Giff will want the spicy one.

Here’s a recipe I found that looks close to what I had last night. Looking forward to experimenting when I get home (when the temperature drops below 60 or we get air conditioning)

MINNESOTA WILD RICE SOUP

1/4 c. butter
1/4 c. raw wild rice
1/2 c. slivered almonds
1/2 c. diced onions
1/2 c. diced celery
1/2 c. diced carrot
Soup stock, about 4 1/2 c.
3-4 tsp. cornstarch
2 c. whipping cream or half and half

In heavy pan, melt the butter over medium heat and saute the wild rice, almonds, onion, celery and carrot for 2 to 3 minutes. Add the soup stock and simmer over low heat for 1 1/4 hours, skimming occasionally. Thicken with the cornstarch dissolved in 1/4 cup of cream. Stir in the remaining cream.

Blue Cashew Cuban Black Beans

Gregory Triana, co-owner of the fabulous kitchen and dinnerware supply store Blue Cashew in High Falls, NY (warning: dangerous store to wallet), sent me this wonderful vegetarian black bean recipe.

It definitely takes some time and attention but is worth it. Given my carnivore tendencies and my inability to leave a recipe alone, I have started dabbling with adding chorizo or beef to it to good effect, but so far I think the original vegetarian version below is the best.

I usually just make 1 pound of dried beans, and therefore cut the amount of garlic, but have played with keeping the cumin, green pepper and onion portions the same, also to good effect.

Thank you to Gregory for letting me share this here.

Ingredients
2 – 1lb. Bags of Goya Black Beans ( I like the size and texture of their beans when cooked)
2- Medium to Large Spanish Onions –red onion works as well (To be used at different times)
2- Medium to Large Green Peppers (To be used at different times)
8- Large Garlic Cloves (To be used at different times)
6 – Dried Bay Leaves (To be used at different times)
Coarse Salt ( To be used as you cook, you must taste as you go and depending on your salt level add accordingly
Pepper and (Crushed Black Pepper also for a touch later)
Spanish Olive Oil ( I suggest Goya Spanish Olive Oil or a Sicilian Olive Oil its hearty and cloudy and great for beans)
1-Teaspoon of Apple Cider Vinegar
Ground Cumin

Preparation for Soaking The Beans
Take your beans and clean/rinse very carefully several times they sometimes contain little pebbles etc…place in the pot
Cut 1- Spanish Onion into quarters – place in the pot
Cut 1- Green Pepper remove seeds into quarters – place in the pot
1-Teaspoon of Ground Cumin – place in the pot
1-Teaspoon of Coarse Salt – place in the pot
1-Teaspoon of Black Pepper – place in the pot
1 1/2-Tablespoon of Olive Oil – place in the pot
4-Large Peeled Garlic Cloves – Take ur paring knife and cut a slit into them – place in the pot
3- Dried Bay Leaves

Mix all together — Gregory likes to use his hands but spoons work as well.
Fill the pot with water about 1 inch above the bean line, cover and soak overnight for at least 12 hours….

In the morning….
Check the water bean line and some of the water might have been absorbed so add more at least 1inch above the bean line
Bring to a high boil for about 5minutes, stir and reduce to low
Cook uncovered for about 2 1/2 hours…. Skim occasionally and stir – check the water line never let it dry out and check bean tenderness.
If you need to add water it must be warm.
After 2 1/2 hours the vegetables (onion, green pepper, cloves, etc.. should have basically dissolved to nothing)
Discard the bay leaves and remove the vegetables and place into a food mill most of them do not worry if you leave a few behind.
Add some liquid of the beans and a few beans to create a nice paste- remove from your food mill and add back to the pot….
Taste the bean tenderness most should have cracked and they should be tender not MUSH, not hard…
Continue to cook low heat…. Add your last 3-remaining bay leaves
Add some fresh cracked pepper – to taste.


Final Step…. Making the Sofrito!

A Skillet/Fry Pan will be needed
Finely dice/cube your remaining onion – set aside
Finely dice/cube your remaining green pepper remove seeds – set aside
Mince your remaining garlic cloves – set aside
Add about 1/4 cup of olive oil to the fry pan low heat until FRAGRANT do not smoke it at all
Add the garlic stir do not let it brown
Add the onion continue to stir until opaque and tender about 8-10minutes
Add the green pepper cook until tender
Add pinch of salt to taste
Add pinch of black ground pepper
Add a teaspoon of apple cider vinegar sometimes I use the cap of the bottle as the measurement
Add the cumin 1teaspoon
Stir – mix well making sure all flavors are combined
Remove from heat and add all contents to the beans that are still cooking at low temp.
Continue to cook ur beans for about another hour low heat – covered.

Gregory’s Notes: You’re basically done… The beans should be tender, the broth a bit thick and ur done… Set aside serve and eat or store in the fridge. Black beans should always be served with long grain white rice – but we sometimes use a kashi rice or brown but never yellow!