Apple Crumble Variations

I’ve been making a lot of apple crumble/crisps this year and I keep on forgetting my ratios, which then sends me on an Internet research hunt and then I make things up all over again. So I’m writing some things down!

My current preferred approach to the crumble topping:

  • 1 cup of oats
  • 1/2 cup of pecans, chopped
  • 1/2 cup of walnuts, chopped
  • 1/3 cup of all-purpose flour
  • 1/3 cup of buckweat flour
  • 1/4 cup of brown sugar
  • 1/2 tsp of salt
  • 1/2 tsp of cinnamon
  • 6 or 7 tbsp of unsalted butter, cut into pea-sized pieces and chilled

Mix it all together with your hands, pinching the small pieces of butter with your fingertips. Pour on top of your fruit mix and evenly spread it out.

Variations on the fruit:

When rhubarb is in season, I like to do a half-rhubarb, half-apple mix. I’ve occasionally added strawberries, but I think I generally prefer without. In the Fall, instead of rhubarb, I start using cranberries.

Here is last night’s mix:

  • 4 apples (honeycrisp) peeled and cut into bite-sized chunks
  • 2 pears, peeled and cut into bite-sized chunks
  • 1.5 cups of fresh cranberries
  • 1/2 cup of sugar
  • 1 tbsp of corn starch
  • pinch of nutmeg
  • few pinches of cinnamon
  • 1/4 tsp ground ginger
  • zest of 1 lemon
  • 1 tbsp lemon juice

In a large bowl, mix the sugar, corn starch, nutmeg, cinnamon, ginger, and lemon zest together. Peel and chop up the apples and pears, stirring them in as you add. Stir in the cranberries and finally the lemon juice. Pour into your baking dish, add the topping, and pop into the oven.

Bake at 350F for just over an hour.

Iterations on Portuguese Bread

I’ve been on a hunt to discover something akin to the Portuguese bread made by Something Natural in the 1980s on Nantucket, before they ramped up production volume and hurt flavor along the way. As I’ve experimented, I’ve made some nice discoveries. The closest I’ve come to the original flavor so far is a loaf using extra light olive oil (I’ve found this to taste a bit better than other variations of olive oil). However, yesterday I made a wonderful discovery when I tried adding dried/powdered milk.

Ingredients:
Bread flour: 600 grams (I use King Arthur)
Extra light olive oil: 100 grams (16.7% flour weight)
Active dried yeast: 14 grams (2.3% flour weight)
Dried milk powder: 40 grams (6.7% flour weight)
Salt: 14 grams (2.3% flour weight)
Water: 475 grams (79% flour weight)

Directions:
Stir the yeast, dried milk and salt into the bread flour in a big bowl and then mix in about 3/4 of the water. Then mix in the olive oil, and finally continue adding water until you have a nice sticky dough. Use a bit of oil to slick a work surface and place the dough there. Pat it down into a flattish, oval shape. There is a two-step kneading process. First, you’ll cut the dough. With a 6″ bread scraper (or a 6″ putty knife), cut into the dough at a 45 degree angle, essentially chopping it into pieces about an inch apart. For your mound of dough, you might cut it 5 to 7 times. Then push the dough together, turn 90 degrees, and repeat the process. Continue this process for 4 minutes.

Next, there’s a kneading technique I like for wet, sticky dough where you really just use your fingers and fingertips rather than your whole hand. Form the dough into a mound. Grab the edge of the mound furthest away from you. Flip the dough over so what was the top now slaps into the working surface. As you do that, stretch it towards you, and then fold the dough away from you, reforming a mound. Continue with this technique, occasionally forming the dough back together with the bread scraper. Knead for 10 minutes.

Clean out your bowl, dry it and oil the bowl with a bit of olive oil. Put the dough into the bowl, cover with plastic wrap, and let it rest for 2-3 hours. You can punch it down and let it rise again or move onto the next step.

Toss some flour on your work surface and gently move the dough onto the work surface, lightly rolling in the flour so it doesn’t stick. With your bread scraper, cut the dough in half. Form each one into either a ball and/or an oval, cover each with a towel or plastic wrap, and let rest for 20-30 minutes while you pre-heat your oven to 400F degrees.

I cook this bread on parchment paper that I slide onto a baking stone using a peel, but you can also just put it on an upside-down baking tray (on parchment paper). Cook for 30 minutes or so, until the inside reads 205F with an instant read thermometer. Once done, let cool on a rack for 30 minutes.

Two notes:

  1. The addition of the dried milk adds a wonderful softness to the flavor, and the crust browns much more (the top photo is the loaf with powdered milk, while the below excludes it). If you leave out the dried milk, the olive oil comes through even more for a great rustic flavor.
  2. It’s really important to begin with a sticky dough, otherwise the bread gets too dense.

Breaking Bread

I’ve long been more of a cook than a baker, simply because I don’t like to follow recipes, but recently I became determined to make good bread — in particular a good baguette. After trying a number of different approaches, I finally discovered the flavor I was shooting for with the pain a l’ancienne from The Bread Baker’s Apprentice. I have to admit it’s a bit startling how delicious this came out — better than 99% of the professional bakeries around where I live.

While I’m not going to duplicate the recipe here because if you don’t have the amazing book, you really should get it, I did want to record the dough ratio for future reference if I didn’t have the book on hand:

765.5g of bread flour
16g table salt
5.25g instant yeast or ~8g active dry yeast
609.5g of cool water (adding extra to get the right level of stickiness)
bake 550 down to 475F, done is 200 to 205F (93-96C)

Fennel Two Ways: Cold Salad and Hot Gratin

I’m a huge fan of fennel. In the summertime, I’ll make cold fennel salads, and in the winter, I’ll do gratins. I make these slightly differently every time, but here are the basics:

Fennel Salad

For 4-6 people
2 fennel bulbs (3 if they are small)
1 stalk of celery
mint (or fresh oregano)
1 navel orange
olive oil
salt and pepper
optional: mild, black mediterranean olives

Wash the fennel bulbs and remove the very tops so you just have the bulb. Remove the outer layer if it seems a little woody. Halve them and cut out the dense core, and then halve them again (so you have quarters). Using a mandoline at its thinnest setting, slice up the fennel (watch those fingers!) and place in a large salad bowl.

Peel the navel orange, separate the segments and slice them into half inch pieces. Add to bowl. (Note, when I first had this in Italy, it was served with amazing blood oranges, but I haven’t been able to get quality blood oranges where I live.)

Thinly slice up the celery and add to the bowl (the older photo used in this post had thicker slices of celery, but I’ve found myself liking a thinner cut).

Finely chop up a handful of mint, or fresh oregano.

Drizzle a little olive oil and a pinch of salt and pepper and mix up. The Italians also sometimes add cured black olives to this, sort of like a kalamata, but not quite as strong.

Fennel Gratin

For 4 to 6
3 or 4 fennel bulbs
Parmesan cheese
2 slices of farm bread for breadcrumbs
Unsalted butter

Get some salted water boiling in a large pot and butter a baking dish.

Wash the fennel bulbs and remove the very tops so you just have the bulb. Save the green fronds if you have them. Remove the outer layer of the bulb if it seems a little woody. Halve them and cut out the dense core. Lay them flat and slice into quarter inch slices.  Boil in the salted water for 5 minutes, drain, and then add to the baking dish.

Mix in about a half cup of grated parmesan cheese, a pinch of black pepper, and a drizzle of olive oil. Chop up some of the fine green fennel fronds and mix in.

For bread crumbs, I never buy store breadcrumbs. I just toast a couple of slices of farm bread until lightly brown, and then chop it up pretty finely. I prefer chopping to a food processor because I like having different (and larger) sizes. Sprinkle the bread crumbs on top.

Add a bit more grated cheese to the top, and dot with unsalted butter.

Bake at 375 F for 30 minutes.

Pickled Pork Loin and Onion

It’s always nice when an experiment succeeds. I like pickling ramps and onions. I like brining pork. I wondered what would happen if I combined the two. In this case, I created a pickling brine and used it on both red onions and pork loin, which were then served together. Big hit. The key is doing the upfront work several hours ahead so that the pork can take in the flavor.

For the brine itself, I referenced two old posts of mine and Zen Can Cook to create the pickling liquid. Here was tonight’s version:

Pickling Brine
1 cup rice vinegar
1 cup water
1 tbsp salt
1 tbsp honey
2 tbsp sugar
1 tbsp coriander seed
1 tbsp dried rosemary
1/4 to 1/2 tsp chili pepper flakes
a few black peppercorns
2 or 3 bay leaves
1 cinnamon stick (or 1/2 tsp ground cinnamon)
pinch of celery seed (optional)

Combine the ingredients in a small pot, bring to a boil then simmer for 1 minute.

Halve then thinly slice a red onion and place in a dish big enough to marinate the pork loin (I cooked two in this case). Pour the hot brine over the onions and let cool for 20 to 30 minutes. You can pour the brine liquid through a strainer to remove the seeds and spices, although tonight I did not bother and the remaining seeds did not bother anyone.

With a fork, remove the now-pickled onions to a bowl. Cover and keep in the fridge until serving time.

The brine should still be in your marinade dish. Stir in 1 tsp of mustard and 1 tsp of soy sauce. The add the pork loins. Cover and marinate in the fridge for several hours (at least 3 or 4 is my recommendation).

When it comes time to cooking, remove the pork from the liquid and grill until cooked but not dry. With pork loin I think that learning the appropriate firmness of the meat is far more effective than using an instant-read thermometer (which I like using on bigger cuts).

Let the pork rest for 5 minutes then slice and serve with the pickled onions on the side.

This pairs well with a garden salad or a variation of my 3 bean salad.

Lamb Shanks, Lentils and Red Wine

lamb-shank-lentils-plated

1 lb black lentils (french/puy lentils can be used instead)
5 lamb shanks
1.5 vidalia/sweet onions, finely diced (or red onions)
4 cloves of garlic, minced
3 carrots, halved across the length
1 stalk of celery, halved across the length
2 tbsp olive oil
3 tbsp pork lard (optional)
bottle of red wine (such as a cotes du rhone)
~2 cups of water
1.5 tbsp minced rosemary
3 bay leaves
handful of parsley, tied together with kitchen string
salt
pepper
big pinch of ground nutmeg
big pinch of ground clove
big pinch of ground cinnamon

Preheat oven to 250F.

Sear the lamb shanks, 2 or 3 at a time so that you do not crowd them, on medium heat in a large dutch oven or pot. Set aside.

Turn off the heat for a few minutes to let the pot cool. Turn on the heat again to medium-low and add the olive oil, then the onions. Cook the onions for 5-10 minutes until they start to turn translucent, stirring to make sure they do not stick and burn on the bottom of the pan. Add the minced garlic and cook for a couple minutes.

Because I wanted to make sure that the lamb did not dry out, I also added some pork lard, which I render myself when braising pork shoulder, but alternatively you could just cook the dish with a few pieces of bacon (discard towards the end of cooking) which would add a nice smokiness.

Add the lentils and cook for a couple of minutes, stirring often. Then stir in the bottle of red wine (personally I like using a reasonably priced but drinkable bottle of wine from the south of France for this purpose).

Stir in a half-teaspoon of salt and add the carrots, celery, bay leaf, parsley and rosemary. Add the shanks back in and immerse them as best you can.

Cover and cook in the oven for 1.5 hours at 250F, or if you are not using a pot that can go in the oven, on the stove-top on very low heat.

Taste for salt and add more as needed, along with a few pinches of ground black pepper and the cinnamon, clove and nutmeg. Stir in 2 or 3 cups of water. Cover again and cook for another hour or so.

lamb-shank-lentils-stewing

All of the above can be done the night before, reducing the amount of time needed before the meal. Just let the pot cool and then put the entire thing in the fridge overnight.

At this point, I remove the meat from the lamb shank bones, trimming them of excess fat and cartilage but keeping the meat in large pieces. However, add the bones back to the pot, discarding right before serving. I discard the carrot and celery at this point, and add more salt and pepper (and possibly some rosemary, either minced or in stalks) to taste.

If you do split the cooking process overnight, just warm the pot up again over a low flame and then return to a 250F oven, uncovered, for a final hour of cooking.

To serve, make sure that the carrot, celery, bay leaf, parsley, and rosemary stalks (if any) are all discarded. Either plate directly or ladle into a serving bowl.

Smoked Beef Braise

smoked-braise-pot

Yesterday for a dinner party I decided to add a new flavor to a beef braise: smoke. The results were quite a hit when combined with the braising sauce.

The cut was a 4 pound boneless chuck. I gave it a dry rub of:

3/4 tsp black peppercorns
1 tbsp coriander seed
1 tbsp ground paprika
1/5 tbsp kosher salt
1/2 tsp dried oregano

The peppercorns and coriander seed were ground in a mortar and then mixed with the other components before applying the dry rub all over the beef.

dry-rub-mortar

To smoke the meat, I used a Weber kettle grill and smoked the meat for about an hour. It’s important to smoke *before* you braise, not after. I used about a half-chimney of royal oak wood charcoal (I prefer that to briquettes), and about 4 chunks of cherry wood, which had been soaked in water for over an hour ahead of time. Once the coals were quite hot, I spread them on one half of the grill bottom, and put a pan filled with some water on the other side. Make sure you place the meat above the pan, and not directly above the coals (i.e. you want indirect heat). In this case, I ended up closing both the bottom and top vents, letting some air in only periodically. I made sure the temperature didn’t rise above 250F/300F because my goal was to get some smoke flavor, not dry out the meat.

smoked-braise-smoking

smoked-braise-smoke

The Braise
2 onions (spanish or vidalia), chopped
2 carrots, chopped
4 garlic cloves, peeled
bouquet garni of parsley and bay leaf (tied with white kitchen string)
2 cups of a dry white wine
beef broth or water

After an hour of smoking, I brought the meat back inside. I seared both sides on high heat in the dutch oven for about a minute a side, removed the beef to the side, and deglazed the bottom with a little bit of water. One of the onions, chopped, went on the bottom of the pan, and the beef was placed on top. Then I spread the remaining onion, carrot and garlic around and wedged the bouquet garni in the side. Two cups of white wine were added, and enough beef broth to bring the liquid to just over a third of the way up the meat. I had made a beef broth earlier in the day with beef shank, but you can just use water or all wine if you want.

The oven had been pre-heated to 295F and the dutch oven, covered, went in for 5 hours. I let everything rest while guests arrived and we started the meal, and as we got closer to this course, took the meat out of the pot and popped it into the 295F oven in a baking dish to stay warm. The liquid fat at the top of the braising liquid was skimmed off, the bouquet garni removed, and then I used an immersion blender to puree all the vegetables into a sauce.

The last step was probably the most important. Even with just an hour of smoke, the meat had absorbed a lot of the smoke flavor, and on its own was a bit more “BBQ” than I was going for (albeit delicious). But paired with the sauce of the braising liquid, the combination balanced out perfectly into a delicious mix. Suffice it to say that there were no leftovers. Unfortunately, I was moving a bit too fast in the later part of this process to take pictures, but wanted to record this one as a success.

We paired this with some broccoli rabe that had been parboiled and then sauteed with a bit of garlic, lemon juice and hot pepper flakes. Oh, and a 2004 Barolo that we’ve been saving in our basement for years.

Lime and Manchego Corn Salad

manchego-corn-salad

This summer my friend Veronica made a delicious corn salad one evening for a family bbq, and I’ve been riffing off of it ever since.

5 or 6 ears of corn, cooked and kernels removed
juice of 4 or 5 limes
large handful of cherry peppers, halved
half of a small red onion, finely diced
Half a serrano pepper (or a jalapeno), seeds removed and minced
handful of cilantro, chopped
manchego cheese to taste

First, I juice the limes and chop the red onion, and macerate the onion in the lime juice while working on the rest of the salad. You want a fair amount of lime juice so if your limes are dry, use more of them. For the corn, if you have the ability to cook them over a grill, blackening them in their husks, that is preferred. However, if that isn’t possible, you can also husk them and boil them for 5 minutes. Cut the kernels off the cob and put in your bowl. Halve the tomatoes, chop the cilantro, mince the hot pepper (if fresh peppers are hard to come by, use hot red pepper flakes), and stir it all into the bowl, adding the lime and red onion.

Add a pinch of salt and grate manchego cheese on top to taste. Stir about a half cup of grated manchego in, and keep on going until you have the taste you like.

Personally, I think this salad is nice at room temperature or even a bit chilled, so will often cover with wrap and put in the fridge until 30 minutes before serving.

summer-evenings

Lime and Jalapeno Brined Pork Chops

I’ll have to add some photographs later, but I wanted to record this experiment for future use.

Brine (for two pork chops)
2 limes
2 garlic cloves, minced
1 red (or green) jalapeno pepper, very thinly sliced
handful of cilantro, chopped
1.5 tsp salt
1 tsp sugar
red vinegar
olive oil

Quarter the limes and squeeze the juice into whatever container you plan to use for brining. Add in the garlic, jalapeno, cilantro, salt, sugar, vinegar (guessing 1/4 cup) and olive oil (guessing 2 tbsp worth). Mix everything together and then add the pork chops, thoroughly coating them in the mixture. Add in the squeezed lime quarters and put in the fridge for several hours.

To cook:
Pre-heat oven to 400F.

Remove the pork chops from the brine and scrape off as much garlic, cilantro leaves, etc as you can from the meat (scrape back into the container).

Heat a cast iron frying pan until it just starts to smoke, and sear the pork chops for 2 minutes on each side. Pour the brine over and around the chops and put the pan in the oven. The cooking time will depend on the thickness of the chops (and timing of when you removed from the fridge). For an inch-thick chop, expect it to take 9-12 minutes in the oven.

Shiitake and Manchego Risotto

I think there are three key things to a good risotto. First, making a decent broth. Second, constant stirring. Third, not overcooking it.

I’ll often have broth in the freezer, made with the remains of a roast chicken, but in this case, we were without, so earlier in the day I made a turkey-based broth.

Turkey Broth

2 turkey drumsticks (or thighs)
2 large onions
4 large carrots
4 stalks of celery
2 turnips
handful of brown or white mushrooms
large handful of parsley
4 or 5 bay leaves
dry vermouth or white wine

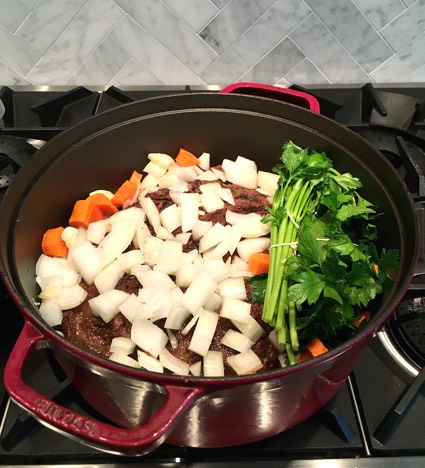
Chop the all vegetables coarsely.

In a large pot, heat it up with a high flame until a drop of water sizzles. Drizzle a little olive oil in the pot and then brown the turkey drumsticks. Remove the turkey to the side and deglaze the pan with some dry vermouth or wine (i.e. pour in about half a cup and scrape up the brown bits on the bottom of the pan with a spatula).

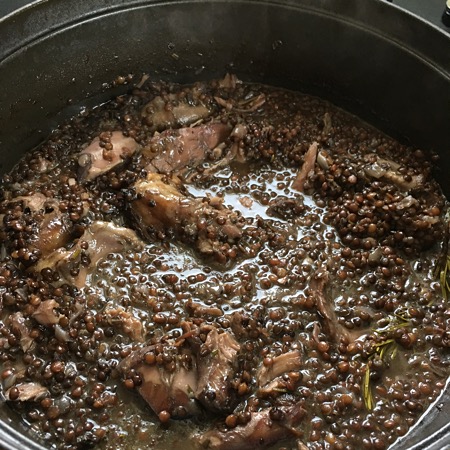
Lower the heat to medium and add in the onions. Let the onions turn translucent and then add everything else back into the pot, including the turkey. Add another cup of vermouth or wine, and then fill the pot with cold water until the level of the water is above the top of the vegetables by a couple inches. Bring to a boil, then reduce to a simmer and simmer for 3 hours, partially covered, adding more hot water from a kettle if it drops below the tops of the vegetables.

Remove and discard the turkey and vegetables with a slotted spoon, and then pour the broth into a large bowl through a strainer. If you want to make your broth even richer, add the broth back into the pot and put in fresh vegetables and cook for another few hours.

Shitake and Manchego Risotto

your broth (ideally 10-12 cups worth)
3 tbsp unsalted butter
olive oil
2 cups arborio rice
1 large shallot, diced
1/2 vidalia or spanish onion, diced
large handful of shiitake mushrooms, thinly sliced
1/2 cup of thawed frozen peas
2/3 cup of dry vermouth or white wine
zest of 1 lemon
1 cup of finely grated manchego cheese
large handful or parsley, finely chopped
salt and pepper

Prep all of your ingredients ahead of time, because once the stirring starts, it is full-on. You’ll get a shoulder workout in.

In a saute pan, melt 1 tbsp of butter on medium-low heat and then add your shallots and onions. Cook until they start to turn translucent and add in the mushrooms. Cook for 5 minutes, stirring occasionally. Set aside.

Have your broth, which should be hot, in a bowl with a ladle to the side of your stove top.

In a large pot, melt the butter and a little olive oil on medium heat. Add in the rice and let it cook, stirring periodically, for 2 minutes. Add in the vermouth and stir until the liquid is mostly (not entirely) absorbed. Add a ladel of broth and stir until the liquid is mostly absorbed.

Stir in the shallots, onions and mushrooms, and keep on adding in ladels of broth, one at a time, allowing each amount of broth to be mostly absorbed. Stir in a half-teaspoon of salt and 2 pinches of ground black pepper.

After about twenty minutes of this, taste the risotto. You want to taste for salt and pepper as well as the doneness of the rice. You want to cook the rice to a just-about al dente state, which, just like with pasta, means that it *almost* soft but still has a bit of a bite to it.

When you feel like you are almost there (having continued to stir in single ladles of broth), stir in the peas, lemon zest, cheese and parsley. Continue to stir for 2-3 minutes, keeping the risotto moist (but not swimming) with broth as needed, just long enough for the peas to cook but not so much that they lose their bright green color. As you do this, do a final taste for salt and pepper and adjust as necessary.

Serve!

(then with any leftovers, make risotto balls wrapped in chard!)