Andouille and Yellow Eye Bean Stew

yellow eye bean stew

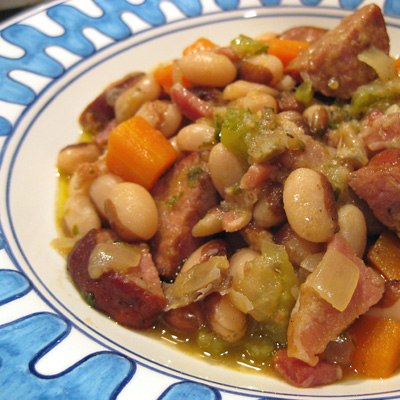
On a cold evening, I like settling down to a healthy bean stew. This one is particularly simple to make, and lets the smokiness and spicy heat of andouille sausage do much of the work.

1/2 lb dried yellow eye beans*
1 smoked andouille sausage (approx 10″ long)
3 slickes thick cut bacon, sliced into 1/2 ” pieces
1/2 large onion, chopped
2 carrots, roughly chopped
2 celery stalks, chopped
handful of parsley, chopped
splash of dry vermouth or dry white wine
1 cup chicken stock (optional)
1/4 to 1/2 tsp salt

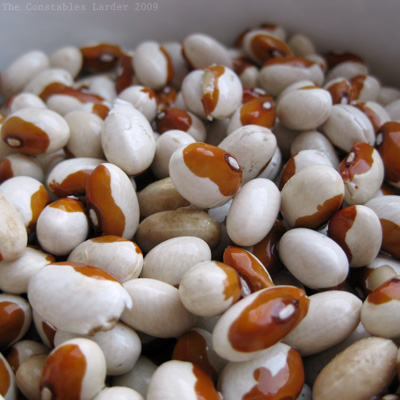
yellow eye beans
Yellow Eye Beans

I like to soak my beans whenever possible to speed cooking time, but in any case make sure you rinse the beans and check for any small pebbles. Fill a large pot with water 1 inch above the level of the beans, bring to a boil, then let simmer, loosely covered for 30 minutes. You want the beans to be no more than al dente by the time you move them into the stew pot.

Halve the andouille sausage lengthwise and then cut into 1/2″ wide pieces.

While the beans cook, in a heavy bottomed pan (I was using a 3″ deep cast iron pan), cook the bacon on medium heat for 2 or 3 minutes, then add the sausage. Before the bacon turns crispy, remove the meat to a side bowl, add a splash of olive oil to the pot, and add in the onion.

Cook the onion, stirring, for a few minutes, then add in the carrots and celery. Pour in a splash of dry vermouth and scrape up anything on the bottom of the pan. Toss in the parley, 1/4 tsp of salt, and the meat. Lower the heat, and let simmer.

At this point, reserve a couple cups of the bean broth (more if you do not have chicken broth), and add the beans to the pot. Pour in a cup of chicken broth and then add the bean broth until the liquid is just below the top of the vegetables. Let simmer, stirring occasionally, for another 40 minutes or so, until the beans are tender. Check for salt along the way. I used a little more than 1/4 tsp, but your choice of bacon and sausage can affect saltiness a great deal, so don’t add too much too soon.

Serve this by adding a little freshly chopped parsley and drizzling some olive oil on top.

Note: I left garlic out of this particular dish, but it would go quite well. One could also serve this dish with a garlic, parsley and olive oil pistou if you wanted that flavor kick.

Note on beans: I really liked the yellow eye beans from Rancho Gordo — they were firm and mild in taste, and a little more interesting than great northern. If you do not have yellow eye, then I think great northern, flageolet, or vallarta beans would all be nice alternatives.

While this is a fairly classic bean dish, I think I will submit it to My Legume Love Affair, a blog event I always enjoy, hosted this month by The Well Seasoned Cook.

Chard-Wrapped Pork Meatballs

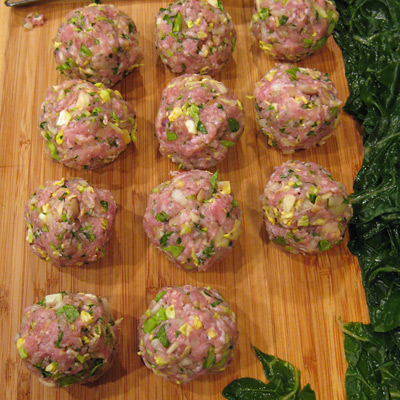
pork meatballs

The other week I tried wrapping pork meatballs in chard leaves, and then poaching in chicken stock. The results were delightful. The meatballs were incredibly moist and the flavor subtle. I tried making the meatballs the same way without wrapping them, and the results were must less interesting and it was easier to dry out the meat.

What I still have not figured out yet, however, is what the best thing is to serve with these. I tried white rice but the meatballs have such a subtle flavor that they want a stronger complement I think… or a sauce to go with. Then I tried making red wild rice with porcini mushrooms but I do not think that was quite the thing either. So I’m going to move away from rice and do some more thinking and experimenting. In the meantime, I wanted to get a record of the recipe up here.

Chard-Wrapped Pork Meatballs

1 lb ground pork shoulder
large bunch of swiss chard leaves
6 cooked chestnuts, finely chopped
4 medium brussel sprouts (or 1/3 cup cabbage), finely chopped
2 tbsp parsley, finely chopped
1/4 tsp salt
pinch of black pepper
2-3 cups of chicken broth (ideally homemade)
splash of dry vermouth

Bring a large pot of water to boil and preheat oven to 350F while you do the following.

Wash your chard leaves and slice away the middle stems. Set aside. Chop up about 1/3 cup of the chard stems and place in a large bowl with the pork, chopped chestnuts, chopped brussel sprouts, parlsey, salt and pepper. Mix thoroughly together with your hands, then shape into 1.5 inch meatballs.

Parboil the chard leaves for 30 seconds in the boiling water, then gently drain. Wrap each meatball in chard leaves (it might take two leaves to full wrap), and place in a pie dish. Then pour in chicken broth until you are about 3/4 of the way up the sides of the meatballs, and add a splash of dry vermouth or white wine. Cook at 350F for 45 minutes to an hour, occasionally basting broth over the tops of the meatballs. When the meatballs feel firm, they should be done.

pork meatballs wrapped
Just before pouring the broth in

Now just to find the perfect complement to these guys. I welcome ideas!

P.S. a marvelous vegetarian recipe is chard-wrapped risotto.

Review: Artisan Bread in 5 Min a Day

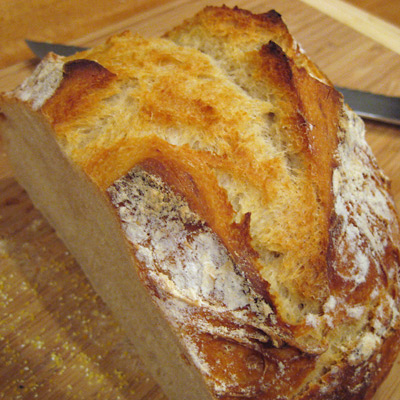
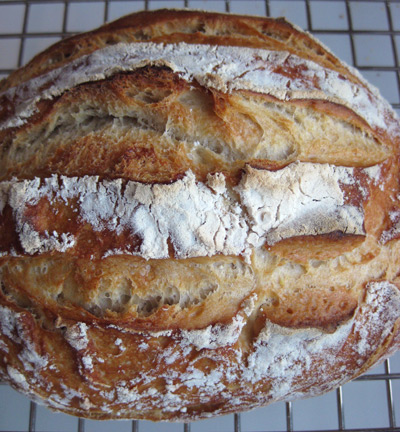
artisan bread

Artisan Bread in Five Minutes a Day
, by Jeff Hertzberg and Zoe Francois, came out about a year ago and positive reviews have been percolating around the blogosphere for some time. Recently, I decided to pick up the book and try my hand.

First of all, other than making pate brisee for savory pastry dishes, I have historically not enjoyed baking at all. I’m a cook rather than a baker (Lisl usually does all the baking in our household). So with that context, I’ll come out and say that I am really happy with this book. The process is extremely easy and the results delicious.

We have tried making bread purely in a breadmaker, doing a combo breadmaker-oven approach, the no-knead method Bittman wrote about long ago, and now this. This is my favorite method so far combining ease and flavor, and I look forward to exploring the Artisan book further.

The instructions are easy and clear (and make sure you read them!). You might also check out the corrections they have posted on their website. Two notes from authors: before you bake, let the dough (however you shape it) rest for at least 40 minutes (I did 40 minutes on the dot and results were great), and slash the top of the dough right before you put it in the oven.

I would be well into my third batch of dough if I hadn’t broken my baking stone by pouring water on it when it was really hot (the water was intended for the broiling pan on the rack below… fumble fingers!). I would actually mix up double the size of the basic recipe if I had more room in my fridge, but I don’t think I can squeeze bigger than a 5.5 quart bowl in there.

Lastly, I’ll note that one of the authors, Zoe Francois, has a great blog at Zoe Bakes and there is an official book blog here. Watching Zoe interact on Twitter was the clincher in my deciding to get the book (not that reviews haven’t been great but, again, I usually don’t bake). It is wonderful to see people who want to be part of the community, rather than just pitch something at the community. An increasing amount of the latter exists on Twitter (and all social media really), and I have no time or interest in such behavior. So I tip my hat to you Zoe, and thank you and Jeff for creating such a wonderful book.

Update P.S. as I was writing this, Peter over at Kalofagas was trying out this book as well and twittering his progress. He sounded as positive as I am.

artisan bread

A Winter Menu: Braised and Seared Pork Shoulder

winter menu

Picture a room with a roaring fireplace, the clink of silverware and careful placement of a wine glass, and the low murmuring of well-dressed guests enjoying their food to the detriment of general conversation.

Now make the room smaller. No, even smaller – don’t worry, I won’t be offended. Take away the fireplace (I wish!), silverware (never did justify splurging on that), and most of the guests (oh yes, and the well-dressed part). You see, when most of your friends have kids, one needs to provide more than 24 hours notice, which in turn requires being organized. Somehow the only thing I was organized about was the food (what a surprise, my wife says).

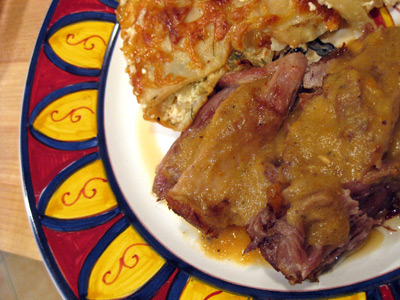
Still, we managed to throw a little ad-hoc dinner party on Friday night. The cornerstone of the meal, a braised and seared pork shoulder, I will share here. A pork shoulder does not require a lot of hands-on attention, but it does demand time. Time to season. Time to braise. And best of all, time to eat over the course of a luxurious meal with good company. I did not take the time to do much in the way of photography, but you will forgive me, won’t you?
pork shoulder, crisp

Braised and Seared Pork Shoulder

As always, start off with the best ingredients you can. I had picked up a 5lb, on-the-bone pork shoulder from Fleishers, which carries the best pork I have found in this part of the country. I don’t have a picture of this particular cut, but as you can see in my Pork Shoulder Braised w Dried Chiles post, Fleishers leaves the skin and fat on the shoulder. Leave it on! Just score it with a sharp knife in a criss-cross fashion through the skin and into the fat (if not already done) so you can rub in salt and spices.

Dry Rub
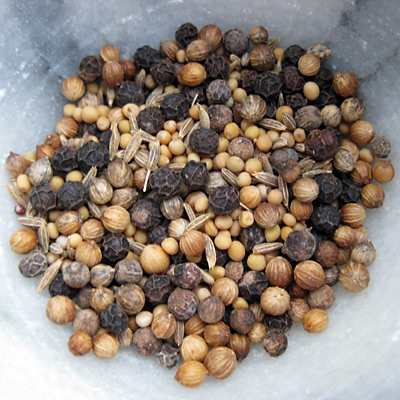
1/2 tsp coriander seed
1/2 tsp mustard seed
1/2 tsp black peppercorns
1/2 tsp cumin seed
approx 2 tbsp salt

Braise
5 lb on-bone pork shoulder (or slightly smaller boneless)
1 large spanish or vidalia onion, roughly chopped
3 medium carrots, roughly chopped
2 celery stalks, roughly chopped
1/2 tsp juniper berries
2 bay leaves
3 cups of homemade chicken stock (or water)

One to three days before you are making the braise, wash and dry the pork shoulder. If the skin and fat remains on the cut, score it in a criss-cross fashion with a sharp knife. Grind up the coriander, mustard, pepper and cumin seeds. Rub about 2 tbsp of salt all around the pork shoulder, then rub in the ground spices. Wrap it back up and place back in the fridge until you are ready to cook the braise.
pork shoulder rub

On the day of the braise, remove the shoulder from the fridge and let it come to room temperature for about 20 to 30 minutes. Pre-heat the oven to 325F.

Scrape off as much of the dry rub as you can and reserve the spices (on the side, or just spoon into the chicken stock you will be using).

On high heat, heat up a couple tbsp of olive oil in a dutch oven big enough to hold the shoulder. Get the oil hot enough that a drop of water sizzles and pops, then sear the shoulder on all sides for about 2 minutes a side. Turn the heat down to low, and remove the pork shoulder to the side.

Toss in the onion and stir so that it does not burn in the still-hot dutch oven. Cook for a few minutes until it starts to turn translucent, then pour in a little of the chicken stock to deglaze the bottom of the pot.

Place the pork shoulder on top of the onions, and scatter in the carrots, celery, juniper berries, and bay leaf. Pour in the chicken stock (or water) and turn up the heat to bring the liquid to a simmer. Make sure the spices you took off the shoulder before searing are added back in.

Cover the pot and place in the oven and braise for about 4 hours, turning the shoulder once or twice. If you feel like the liquid is bubbling a little too hard, lower the heat further another 10 or 15 degrees.

Completing the dish
When the braise is done, carefully remove the shoulder, now very tender, to a carving board. Remove the fat and skin from the top of the shoulder (it should slide off very easily), and place to the side (if you desire, you can make a lovely heart-attack-inducing crackling out of this by adding some more salt and spices and tossing back in a 450F oven on a baking tray, until crispy).

Skim and remove the liquid fat from top of the braising liquid. Using an immersion blender, blend together the braising liquid and vegetables remaining in the pot into a thick gravy (if no immersion blender, remove several large spoonfuls of liquid and vegetables to a food processor and puree).

Carefully carve 3/4 inch slices from the pork shoulder. It will fall apart some, but that is fine; this dish is not about looking neat, but rather tasting amazing. Heat up a large non-stick frying pan on high heat, and then sear both sides of your pork shoulder slices for about 30 to 60 seconds per side. Plate, pour the gravy on top, and serve. This pairs nicely with a solid Rhone red wine.

Other menu notes:

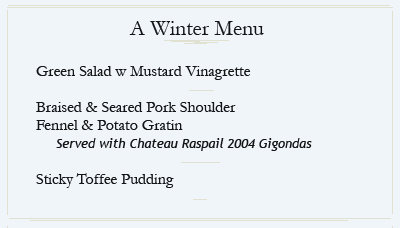
The bulk of the meal is very rich, so if you want a starter, keep it very light. I recommend a small green salad with a mixture of radicchio and lettuce, a few sliced cherry tomatoes, and possibly some endive and/or walnuts. Whip up a dressing with olive oil, red wine vinegar, a tiny dash of balsamic vinegar, grain mustard, salt, pepper, and dried basil or thyme. I like to serve this with a crisp white wine or a fairly dry sparkling wine.

The potato and fennel gratin was a larger version of the recipe you can find in this post (link), albeit using more half-and-half than heavy cream, a bit more fennel than before, and jarlsberg cheese instead of gruyere.

The pork shoulder recipe was inspired by this one from an old Gourmet, but I made a fair number of changes. I did like their idea of searing the braised meat at the end, and enjoyed the extra texture this added to the mouthful, however if you want to omit this step the braise will be completely delicious without.

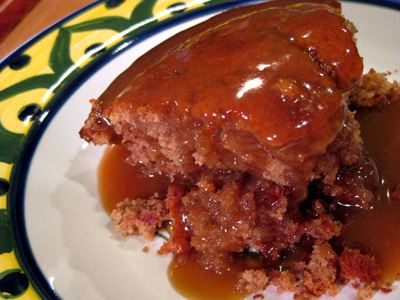
Lisl finished off the meal by making a sticky toffee pudding from a Jamie Oliver recipe. It was delicious but I know she wanted to make some changes, so we’ll post our version when it comes to life.

We finished off the meal with tea and a few of us partaking in Acquavite, an Italian pear brandy. Yes, it was an indulgent night.
sticky toffee pudding

Baked Halibut

I was mentally preparing to braise a pork shoulder today when I happened upon Kalofagas this morning. One look at Peter’s grouper baked in parchment paper, and my brain said, “now this is what you want!” Lisl and I are both suffering from colds, and the light taste of Mediterranean summer just seemed perfect. Indeed, it was so.

A segue: I’m very picky about the freshness of my fish, and until I find a fishmonger I trust, I tend to stay away. When I lived in San Francisco a decade ago, I would trek out to the Chinese markets in Sunset because the freshness was so superior to the normal supermarkets. We’ve now been in Rye, NY for two years, but I will admit that it took Peter’s post to get me to test out a fish market in Port Chester. The upside is that I was very impressed. One look at the eyes of the whole snappers behind the glass and I knew that they dealt in fresh fish.

Back to this recipe, the amounts here feed two quite nicely. It’s a delicious, fast meal to put together, and the ingredients are quite similar to how I like to cook mussels. The below is similar to Peter’s recipe, but not identical, so I recommend you check out his blog as well if you haven’t already.

Baked Halibut

A 1 lb halibut steak (or filets)
1 small red onion, thinly sliced into rings or half-rings
2 cloves garlic, minced
half a green pepper, chopped
3 campari tomatoes (or a handful of cherry tomatoes)
1/4 cup dry vermouth
pinch of dry basil
several leaves of fresh oregano
lemon
salt and pepper

Pre-heat oven to 400F.

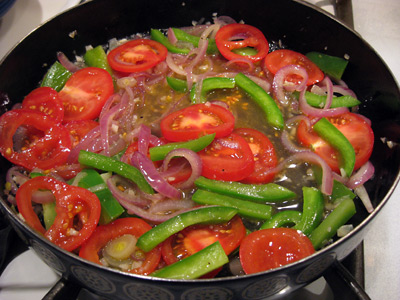
Heat up a splash of olive oil on medium-low heat and saute the onions and garlic for a couple of minutes. Then add in the green pepper, saute for a few minutes. Then add in the vermouth and a couple pinches of salt and pepper. Cook for a few more minutes then remove from the heat.

baked halibut veg

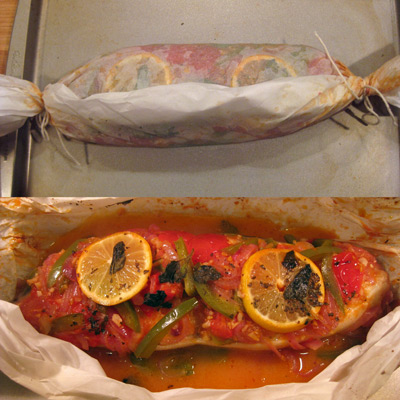
Lay the halibut on a piece of parchment paper that extends several inches past the length-wise ends of the steak. Sprinkle a little salt and pepper on top, then spoon out the vegetables and liquid on top of the fish. Sprinkle a pinch of dried basil leaves on top, dot a few oregano leaves around, and place two slices of lemon on each end of the steak. Fold the sides of the parchment paper up towards the middle and tuck one over the other and refold a few times to create a seal and get the paper snug with the fish. Twist each end of paper and tie off with kitchen string.

Place on a baking tray. If you have too much parchment paper hanging off the ends to fit in the oven easily, trim with scissor. Bake for 15 minutes, then check one of the packets. If you have a steak, remove the backbone from the middle, carefully half the fish, and plate. Spoon the delicious broth over the top.

baked halibut wrapped
Note: bottom image above is after baking

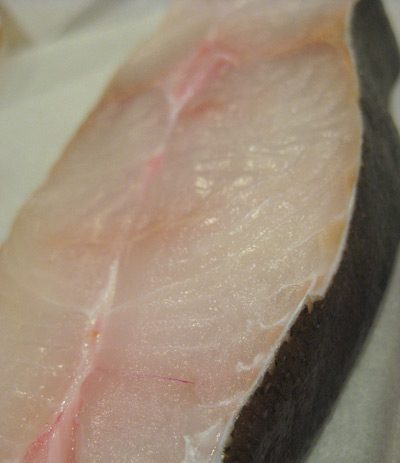
I kept the below picture of the halibut steak because it interested me. I can’t quite put my finger on why; perhaps because it has that grainy, soft-focus, de-saturated look I adore in Orangette’s pictures.

halibut

P.S. Now that I’m cooking fish again, I have to tackle an interesting but never-attempted technique: baking a whole fish packed in salt.

Snowfall meals

snow evening
Just after the snowfall

Theoretically, there are about 7 weeks to go before munchkin No. 2 arrives. Our lives are definitely consumed between work and preparations for that event, but we are getting some enjoyable cooking time in, just not the kind of creative cooking that might lead me to blog frequently.

I had an amusing experience the other day during one of our hypnobirthing classes, where we were supposed to imagine the kitchen in which we felt most comfortable, and then imagine the smells coming from your favorite comfort food. What would you imagine?

I ended up in my mother’s kitchen. I could psychoanalyze that one for a while (wait, stop, why are you saying that about me? Hey. Stop!), but I choose to believe that until I get a 48″ inch cooktop, I will never be satisfied with my own kitchen, so hers was the best option. I’ve had a lot of great meals out of that kitchen as well. Unfortunately, I don’t forsee conquering that particular cooktop milestone anytime soon, but there it is. We all must aspire to something. Don’t play any tiny violins for me — I still feel lucky to no longer cook in a Manhattan shoebox.

snow morning
The next morning… a photo cannot do justice to the light on the trees

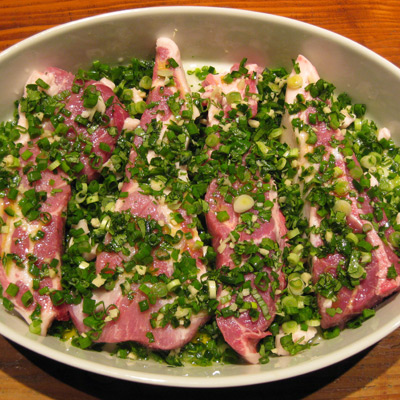
This weekend, I revisted a simple but delicious pork dish where I bake pork slathered in cilantro, spring onions, ginger, jalapeno peppers and white wine vinegar (see recipe). Country style ribs from Fleishers were the perfect excuse.

While my favorite methods for cooking pork are braising or grilling, I find baking at 350F to be an excellent option when you don’t have time for a braise and your grill happens to be under a foot of snow. The broiler just gets so damn smoky (I nearly smoked out some dinner guests the other weekend broiling a pork tenderloin) and this kind of baking does a nice job keeping the moisture inside the pork, even if you haven’t had time for a long marinade.

cilantro and ginger baked pork

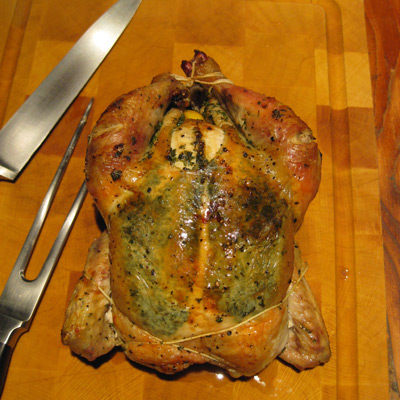
We also roasted a chicken. Snow… roasting chicken… aren’t they perfect together? Like peas and carrots, only “chicken” and, um, “roasting”.

Our favorite method for roasting a chicken comes from Jamie Oliver’s Naked Chef, where you stuff herbs under the skin, stick a lemon in the cavity, and roast a 3lb bird at 425F for about an hour. Lisl adds softened butter under the skin as well. I love to toss root vegetables (carrots, potatoes, turnips, parsnips, celery root) around the chicken as well.

roast chicken
Lisl normally does the trussing. My attempt here looked like the chicken escaped from a padded room.

We took the leftover root vegetables from the roast chicken and made a stew with chickpeas, cranberry beans, and kale (with some oregano, basil, and a homemade vegetable broth). Any other time of the year, it might have felt too starchy, but it was perfect for a cold day.

Later today we get a new president. I’ll be very happy to see him take office, and hope that feeling remains for a long, long time.

P.S. if anyone else tries to make the spinach, meat and ricotta lasagna from the January Gourmet, get more moisture into the dish and add more cheese to the top. Just saying.

Chili on a Snow Day; revisiting recipes

Something about the quiet hush of snowfall transforms the external world into an ethereal alternative universe, and makes you want to curl up on the couch with a good book. Or in my case, make a big pot of chili.

Lately, I’ve been revisiting old favorite recipes and I thought I would post a medley of thoughts and photographs. Below are some notes on a braised-pork chili, swiss chard and leek gratin, and mac and cheese.

chili snow

Braised Pork Chili
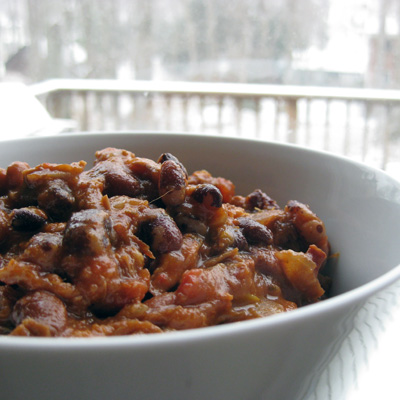
I’ve been playing around with different chili recipes, but have returned to one I posted back in October (link) as my favorite. I have decided that I prefer pork to beef in chili, and meat that has been braised before the chili is made. The texture of the meat is just so much better! This time around, I had braised a 5lb pork shoulder earlier in the week for a different meal, but saved the majority of the meat for the chili.

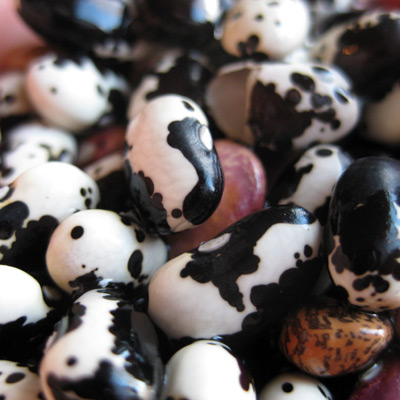
vaquero beans
The black and white Vaquero beans are like little cows, in bean form that is!

I followed the old recipe fairly closely, but this time did not save any of the braising liquid and just used more of the bean cooking liquid. I used 1/2 lb of Vaquero beans and 1/2 lb of Pebbles beans for this chili (both from Rancho Gordo), and loved the darker coloration that came with this choice. I also threw in a dried chipotle chile to add a touch of smokiness, although probably could have used more than one to make the flavor influence more clear, and instead of fresh jalapenos, I crumbled up two small red hot chile peppers I dried in the summer.

Swiss Chard Gratin
Another favorite recipe from last year was Alice Waters’ Swiss Chard Gratin (link). This time I made it with leeks instead of onions, used more of the chard stems than Waters calls for, and bumped up the quantity of breadcrumbs. I like cooking this in a cast iron frying pan, so there is only one dish to wash.

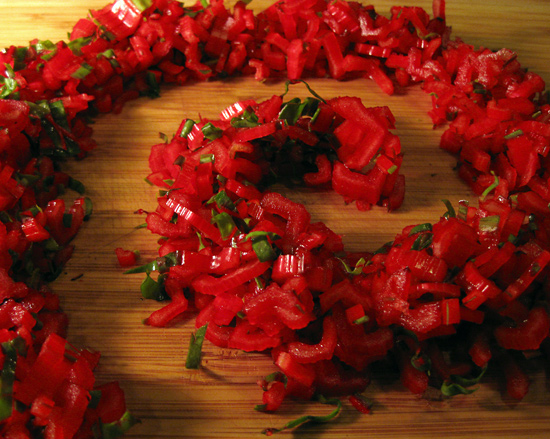
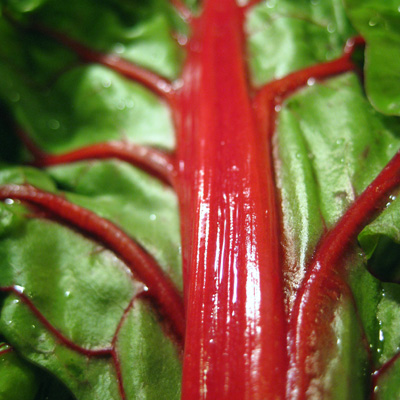
Lisl and I ate this as a vegetarian meal unto itself earlier in the week, with a small glass of red wine to cut through the richness of the gratin. Delicious! I was so captivated by the color of the chard stems that I decided to get ambitious and take a photo of the stems chopped up for the gratin, and submit it to Click, the photo contest put on be Bee and Jai at Jugalbandi, which has “red” as its theme this month.

red swiss chard

Mac and Cheese
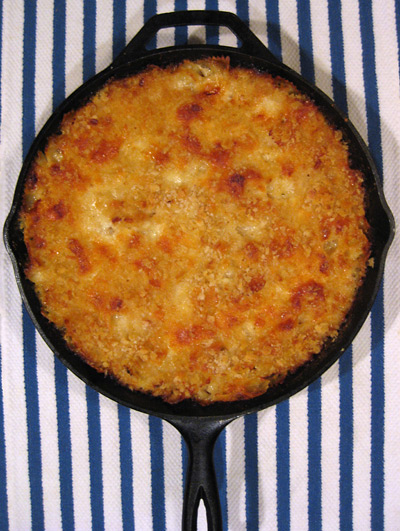
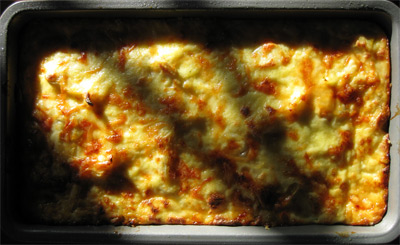
I have been meaning to explore other macaroni and cheese recipes, but when the craving hit one day last week, I went back to the tried and true recipe I adore (link), and which I believe I originally adapted from a Gourmet magazine. This time I bumped up the amount of cheese and breadcrumbs I had on the top. Isn’t the browning on top marvelous? I had to use farfalle since the pantry was pretty bare, but I prefer to make it with penne. So good!

mac and cheese

Now I think I’m off to make Recipe Girl’s roasted mushroom soup and enjoy the snow cascading down outside. Here are a few miscellaneous pictures from the week that I also liked:

chili bowl
Chili, Monterey Jack cheese, and rice

swiss chard leaf
Swiss Chard

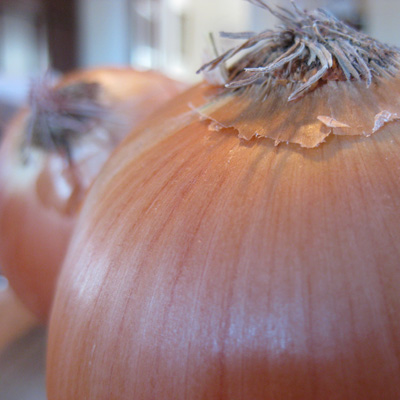
onion
Onions are fun to chop with the new Santoku knife Lisl was kind enough to get me for Christmas.

And into 2009 we go; some 2008 favorites

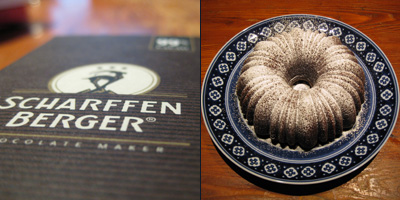
I hope everyone has had a wonderful turn into the new year. We’re holed up in the Catskill mountains, surrounded by snow and enjoying some time in the kitchen. The last few days have been very blogger-inspired, with a chocolate and whisky cake from Orangette, an artichoke pie from Kalofagas, and an olive and ham loaf from Stacey Snacks — all quite good.

chocolate cake
Whiskey-Soaked Dark Chocolate Bundt Cake, from Orangette (this is really good, but for full disclosure I’ll note that I’ll be reducing the level of bourbon next time!)

artichoke pie
Artichoke Pie, from Kalofagas (I halved the recipe to fit in a loaf pan, and added bacon)

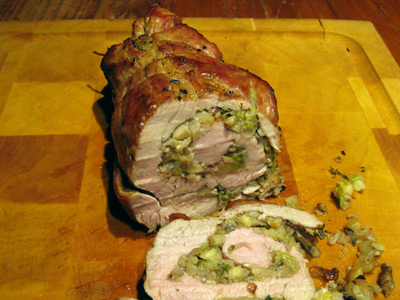
I also did an experimental dish, which I want to continue to refine, where I butterflied open a pork tenderloin into as thin and wide a piece as I could, sauted a “stuffing” of napa cabbage (market was out of savoy cabbage), onion, chestnuts and thyme, rolled and tied it all up, and broiled it. It was quite good, but I need to hone the recipe before posting. I was actually reminded of this flavor combination by a twitter from Kelly at Sass & Veracity.

pork-tenderloin

My 2008 Favorites

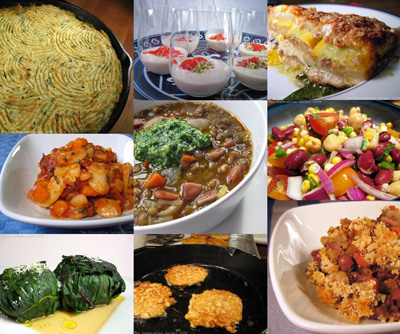
2008 roundup

Constables Larder is a very young effort, only starting last summer, but I am like many in taking stock at this time of year to look backwards and forwards. I find it funny that a lot of people are turning to their blog stats to post their “best of 2008”. A blog is typically a very personal effort, and so I would much rather see a list of the author’s favorites, rather than those of the audience (although both can be interesting). In that spirit of editorial discretion, or egotistical self-indulgence depending on your perspective, here are a few of my favorites from the year:

1. From Provence to the Catskills: this was a huge feast we threw, including a marvelous Alice Waters pork braise, as part of the inaugural Foodbuzz 24, 24, 24 blog event, which is now a monthly series. (Foodbuzz has enabled me to get to know so many interesting food bloggers, and I look forward to watching the site’s evolution)

2. Chard leaves stuffed with risotto: this is a recipe from Mark Bittman in the NY Times that is ever so simple, but had to have been one of my most satisfying meals of the year

3. Moqueca de Peixe: a Brazillian recipe for cooking fish that I discovered via Saveur – it is now my favorite recipe for fish (I also did a nice riff on this for chicken)

4. Gigantes with Tomato and Fennel: this is a dish I constantly order in Greek restaurants, and thanks to Peter at Kalofagas (who I had the distinct pleasure of meeting when he visited New York City), I was finally given a reference point to make a version of the dish myself

5. Shepherd’s Pie: this is an old staple dish of mine (and one of the most popular posts on this blog), but what really made this fun was the dynamic of blogosphere mutual inspiration and idea sharing. After seeing the post, Kali Orexi made this Greek-inspired version, which inspired me to go in a middle eastern direction.

6. Summer bean salad: just looking at that picture (middle right, above) makes me miss summer, with the produce so fresh and everything light and delicious! This salad, inspired by Susan’s salad series at Food Blogga, was a perfect meal unto itself on a hot day.

7. Peasant bean stew: Stacey teases me mercilessly about the number of bean dishes on this blog, but it is true that in 2008 I really took to cooking legumes in a big way. I’ve always loved them at restaurants, but rarely found recipes in cookbooks that really worked for me. In 2008, I set out on my own exploration of this ingredient, enjoying the discovery of Rancho Gordo among other things, and had a number of successes, such as this cassoulet-inspired dish.

8. Eggplant, zucchini and basil gratin: it was probably hard for this dish not to be successful, since it had fresh vegetables and gobs of cheese and olive oil, but the richness didn’t overwhelm. It was great, satisfying comfort food and vegetarian at that — and while Lisl and I remain carnivores, we continue to try to limit the amount of meat we are consuming (less quantity, higher quality)

9. Lentil soup with tarragon and pesto: 2008 was a year for improving my knowledge in certain categories, including beans, braises, and soups, and I made good progress. I was very happy with this soup and the use of pesto, part of a Hay Hay Donna Day theme, as a pistou.

10. Corn fritters with jalapeno dipping sauce: this was another non-fancy dish that just absolutely hit the spot, and which I discovered via the Wednesday Chef. The dipping sauce, a combination of jalapenos, rice vinegar, garlic and sugar, was killer. Truly happiness food.

Here’s to a great 2009. Come March, when Munchkin #2 is expected to make his arrival, things should get interesting. 🙂

Beef Brisket braised in White Wine

I’ll just come out and say up front that this is the best straight-up brisket braise I have ever done, and I’ve been tinkering with brisket recipes all year. It is easy to prep, and just requires a little patience with the slow cooking. So with no further ado:

Spice Rub
2 tsp salt
1 tsp spanish/smoked paprika (pimenton)
1 1/2 tsp oregano
3 bay leaves
1/2 tsp coriander seeds
1/2 tsp cumin seed
1/4 new mexico red chile powder

Main Ingredients
2 to 3 lb beef brisket (grass-fed if you can get it)
2 large carrots, roughly chopped
1 1/2 large onions, roughly chopped
6 garlic cloves, roughly chopped
1 28 oz can of whole, peeled tomatoes
1/2 bottle dry white wine
3 or 4 tbsp of olive oil

In a spice grinder, grind up the components for the spice rub. Remove the brisket from the fridge, wash it and pat it dry. If your cut has a large amount of excess fat, you can trim it but leave some for flavor and moisture. Apply the spice rub and let the brisket come to room temperature for about 30 minutes.

Preheat oven to 275F.

In a large dutch oven, heat up the olive oil on medium-high heat until very hot (a drop of water will sizzle and pop). Brown the brisket on one side for 2 minutes, then brown the other side for the same. Remove the brisket to the side, and lower the heat to medium-low.

Add the onions and garlic into the pot and cook, stirring occasionally, until the onions start to turn translucent. Add in the carrots and cook for another couple of minutes, then pour in the white wine. Scrape the bottom of the pot with your wooden or plastic spatula to deglaze any remnants from the browning of the beef. Add in the tin of whole, peeled tomatoes and the accompanying juice. Do not break up the tomatoes.

Nestle the brisket into the liquid and vegetables, cover the dutch oven and place in the oven. Braise for 5 or 6 hours at 275F, gently turning the brisket every 1.5 to 2 hours.

Before serving, remove the dutch oven from the oven and carefully spoon out as much of the excess fat/oil from the top of the liquid around the brisket. Remove the brisket to a warm plate or a cutting board, and blend up the liquid and vegetables into a gravy using a blender, food processor, or an immersion blender (which is what I used, thanks to a lovely Christmas gift from my sister). Return the brisket to the dutch oven and cover to keep warm if you need a few more minutes to prep your dinner.

Serve by slicing against the grain (expect it to fall apart as you slice) and either present on a serving tray with the gravy on the side, or plate with several spoonfuls of the gravy on top and maybe a little fresh pepper.

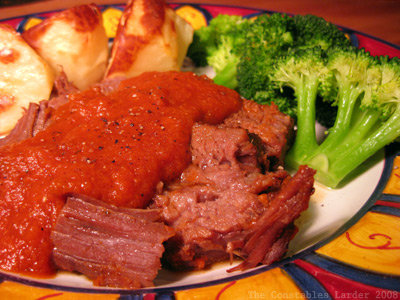
brisket braised in white wine, plated
I served this with a favorite treatment for potatoes, which is to peel, halve or quarter, and steam about halfway done. Then you bake them with a sprinkling of olive oil and coarse sea salt on top until fluffy and tender inside and browned on the outside. So good.

Previous Recipes: If you like beef brisket, you might try Brisket braised in Slab Bacon, Sweet Peppers and Squash

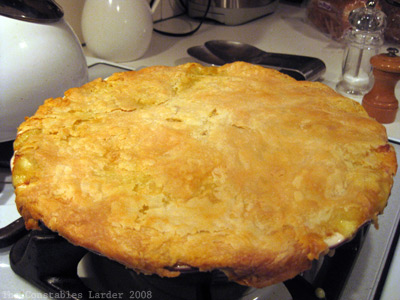
Chicken Pot Pie, the Basics

chicken pot pie

On Saturday, we crawled through traffic back up the Eastern seaboard and returned from visiting family in Washington DC. There are few things more soul destroying than hours stuck traffic. Naturally, I needed to make a chicken pot pie to recuperate. Chicken pot pie is scientifically proven to pack high levels of emotionally recuperative bosons and gluons by the ounce.

It is a little known fact that they plan to test FermiLab’s Large Hadron Collider by accelerating a chicken pot pie to the speed of light and thus duplicating comfort food conditions at the origins of the universe. It will either cause the end of the world, or it won’t; there appears to be some debate, which is comforting in and of itself.

Below is a recipe for a simple pot pie, and a decent framework for elaborating upon with other ingredients (leeks, peas, turnips, parsnips) and herbs (parsley, rosemary, oregano, tarragon, etc). Note: I hope you’ll excuse the hack-job of the pastry edging in the above picture… I was moving fast in a race against the clock for Munchkin’s dinner time.

Chicken Pot Pie

1.5 lb chicken breast, cut into 1/2 inch cubes
2 medium red potatoes, cut into 1/4 to 1/2 inch cubes
1 white onion, diced
3 medium/large garlic cloves, peeled, woody end removed, and minced
3 medium carrots, sliced into 1/4 inch rounds or smaller
3 celery stalks, cut into 1/4 inch slices
1 tsp ground savory (alternative: 1 tbsp parsley and/or 1/2 tsp dry thyme)
1/2 cup dry white wine
salt and pepper
olive oil
5 tbsp unsalted butter
1/2 cup flour
2 cups milk
2 cups chicken stock (or water)

Pastry
1 1/4 cup flour
1/4 tsp salt + a couple more pinches
7.5 tbsp butter
approx 5 tbsp ice cold water

Egg wash: 1 tbsp water, 1 egg yolk

Making the Pastry
For this pot pie, I decided to work off of Alice Waters’ savory pastry proportions from The Art of Simple Food. I was only making the pastry for the top, so reduced the amounts from the 2 cups of flour in her book, keeping with her proportions (hence the extra pinches of salt to get to around 1/3 tsp).

Cut the butter into 1/4 inch cubes and place in the freezer for 15 minutes. Fill a glass with ice water and place next to your food processor. Combine the flour and salt in a food processor and pulse a few times to mix. Add the butter to the processor and add 4 tablespoons of the ice water, pulsing the mixture between each tablespoon.

Remove the mixture to a clean surface and gently work it together. If it is not holding together at all, add another tbsp of the ice water. When the crumbly mixture is just holding together (you do not want it sticky or wet, and it is ok to have a little still crumbly), form into a rough ball, wrap in plastic wrap, flatten, and place in the fridge for an hour.

Preparing the Filling

Preheat the oven to 375F.

Bring some lightly salted water to boil in a medium sauce pot and boil the potato until just tender, no more than 10 minutes given the small cut. Drain or remove to a bowl with a slotted spoon, and keep the sauce pot around for the white sauce.

Heat a splash of olive oil in a large saute pan on medium heat and brown the chicken, then remove to the bowl with the potato. Lower the heat to medium-low and saute the onions and garlic for a couple of minutes, then add the carrots. Cook for 5 minutes, then add the celery, ground savory (or other herbs), white wine, and a couple pinches of salt and pepper. Cook for another few minutes then turn off the heat.

At this point, turn to the sauce pot: melt 5 tbsp of butter on medium-low heat, then wisk in the 1/2 cup of flour and cook for a minute stirring regularly. Theoretically, it is best to have your milk and stock (or water) already at a near boil, but if you haven’t had time or the energy to dirty another pot, it isn’t the end of the world just to add them directly now. Cook at a gentle simmer for another 5 minutes. (If you like your pie really rich, you can add 1/4 cup of cream too)

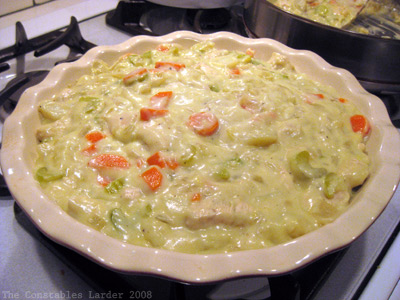
Stir the white sauce into the saute pan with the vegetables and taste for salt and pepper. Then stir in the chicken and potato. Spoon the mixure into your pie dish until it is near the edge.

chicken pot pie fill
Photo note: the mixture looks a little green-ish because of the ground savory.

Finishing the Pie
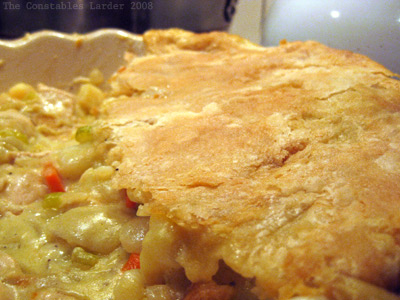
Remove the wrapped pastry from the fridge, and on a lightly floured surface, with a floured rolling pin, roll out your pastry into a thin layer an inch or so bigger than you need for the pie dish. Lightly flour the top, to prevent it from sticking, and gently fold the pastry in half or in quarters to safely lift it in one piece to the top of the pie dish. Crimp the pastry around the edge of the pie dish, and then cut off any excess pastry hanging over the edge with a sharp paring knife. Make some vent holes in the top with the knife (or a fork).

If you have the time, it is nice to mix an egg yolk with a tbsp of cold water and brush this egg wash on top of the pastry. (I did not, this time around)

Place the pie in the oven (which was pre-heated to 375F) for 45 minutes, then let cool for 10 or 15 minutes before serving.

chicken pot pie