Cole Slaw – just lemon, and hold the sugar!

Cole Slaw recipe
Summer picnics often mean cole slaw, but I’ll come right out and say that I hate most American cole slaw, primarily because of the insistence on making it sweet, not to mention the overload of mayonnaise. Bleaghh! (now you get to guess what sound I am intending when I wrote that word)

In my mind, a great cole slaw is a simple one. I inherited this simple recipe from my parents, and I’ve never run across a superior recipe. This is exactly what we made for a family 4th of July gathering yesterday:

1 green cabbage
4 lemons
2-3 carrots (or 1 really big one)
big handful of parsley
salt & pepper
Mayonnaise (Ed. I typically just use Hellmann’s, although my understanding from Lisl is that Aussie’s definition of mayo is a bit different so I’m not sure what a good off-the-shelf equivalent would be outside of the US)

With a long chef’s knife (8″ or longer), shred the cabbage as thin as you can (don’t be afraid to chop it up a little more if you feel your shredding job is a bit too chunky). Place in a large bowl. Peel your carrots, discarding the outside peelings, and then using the peeler, cut long, thin strips of carrot turning the carrot in your hand as you go so you are working all around the carrot’s circumference. Depending on the carrot, you may want to discard the woody inside core. I usually then quickly chop up the peelings a bit so that no piece is longer than an inch or two. Add the carrot to the bowl, as well as finely chopped parsely.

Squeeze the juice of 4 lemons into the bowl (can always increase or decrease number of lemons to taste). Halve or quarter the lemons and then squeeze into your free hand, keeping your fingers close enough together that you can catch and discard any lemon pits. Add a light amount of salt and pepper.

Estimating the amount of mayo is a “feel” thing that depends on how much you love mayo. I tend to err on the lighter side, but for a full cabbage this still ends of being between 4 and 6 big tablespoons. The key is to mix and taste as you go (like salt, you can’t really pull it *out* of the dish once in). You can also add more salt and pepper to your taste in this step.

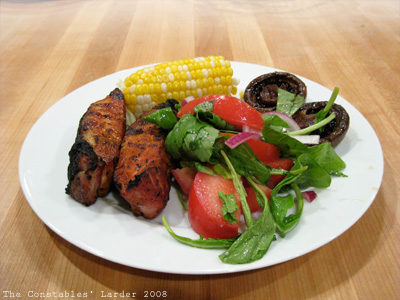
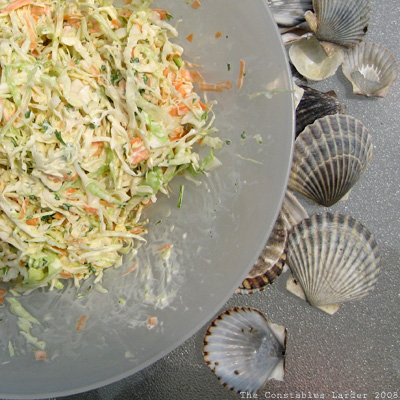
The result is a fresh and tasty cole slaw that goes great with a barbecue meal (which is exactly what we did). I’ve also done this recipe with dill instead of parsely and liked the results.

For an interesting and different take on cole slaw, check out the Lime and Peanut recipe over at 101 Cookbooks.

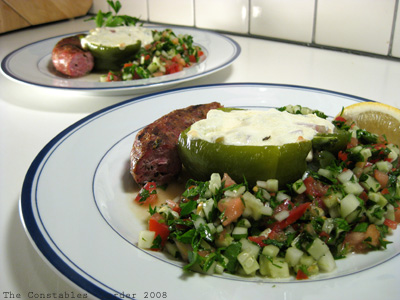
P.S. the scallop shells in the picture have nothing to do with the dish, they just happened to be on the table as the girls had been collecting shells on the beach earlier.

Bluefish Marinade

Bluefish Marinade
I write in a state the Aussies would describe as “shattered”. Combine drive + ferry + shopping + fractious and bored 3 yr old.

Imagine how pleased I was, however, to arrive on island and find out that my father had just caught two bluefish, and could spare the filets from one. Bingo! This dish was extremely simple, and while I would never call bluefish one of the world’s greatest eating fish, when it is super-fresh it can be quite tasty.

Bluefish filets, skinned
Big handful of cilantro, chopped
3 limes
1/4 cup of minced ginger
2 tbsp extra virgin olive oil
Big handful of grape tomatoes

In a baking dish, I marinated the skinned and cleaned filets in cilantro (aka coriander), minced ginger, and the juice of 3 small limes, making sure that all sides were nicely coated. I also added a couple tablespoons of extra virgin olive oil. I covered the dish with plastic wrap and placed in the oven to marinate for a couple hours, turning the filets two or three times during that process.

I removed from the fridge a little before putting in oven, allowing dish and fish to return to room temperature. Then I took a handful of grape tomatoes and quartered them, scattering the quarters around and on the fish.

I preheated the oven to 375F and baked the fish for about 15 minutes. The actual time will depend on the thickness of your filets. You can check for done-ness by gently prying into the flesh to make sure that it is entirely white (no translucency) and cooked. Serve with some fresh pepper. Note: I suspect this dish would also be good with some capers added.

Brant Point
View of Brant Point

Parsley is Food

Parsley Salad
I love parsley. I’ll chop it up and stuff it into burgers by the handful. Sometimes I’ll add it to stews in huge quantities. Tonight I whipped up a simple parsley, cucumber and tomato salad that was delicious.

The parsley salad was extremely easy. Wash a big bunch of parsley carefully and dry in a dish towel. Remove the leaves from the stalks, discard stalks, and chop up the leaves. I then took a cucumber, peeled it, and chopped that up into cubes about half a centimeter big. Last was a ripe tomato, which I also chopped up into small pieces. It all went into a bowl with the juice from two lemons, a bit of olive oil, a bit of rice vinegar, and some turns on the salt and pepper grinders.

Tomorrow we hit the road to Nantucket, so this was another “what’s in the fridge to use” evening. Somehow we ended up with a bunch of unused vegetables, and yet again an uneaten green pepper, so I made a different kind of stuffed green pepper. As in the previous recipe, I halved the pepper and seeded it, leaving the stem. I then steamed the halves for about 7 minutes, immediately cooled them under some cold water to slow the cooking, and preheated the oven to 350F.

Stuffed Peppers
In a saute pan, I put a tbsp of butter and some olive oil, let that warm up over low heat, and added some chopped up red onion, celery, fennel, and a big handful of basil. I added some sea salt and pepper to taste. After the vegetables had slightly softened, I turned up the heat and added about a quarter cup of white wine, letting that cook down for a few minutes until there was no excess liquid. Then I turned off the heat.

I let the vegetables cool for a few minutes, then chopped up some mozzarella cheese and tossed it in. What I wish I had also done was make some breadcrumbs in the food processor to add to mix. I stuffed the peppers with the mix, laid some slices of mozzarella on top, and popped it in the oven (in a small baking dish) for about 25 minutes.

The final part of the meal was a broccoli rabe Italian sausage that I grilled.
Parsley salad, plated meal

Dry Rub Pork Loin (boneless “ribs”)

Dry Rub Pork, Post Grill

1 tsp smoked paprika
1/3 tsp cayenne pepper
1 tsp ground black and red pepper
1 tsp salt
1/2 tsp ground coriander
1 tsp ground cumin
2 tsp brown sugar

Flat pork loin, cut into 6 boneless “ribs” about 4.5″ long, 1″ thick, 2″ high
1/2 cup beer
Soy Sauce, approx 3/4 tsp

I’ve long wanted to try a dry rub barbecue and tonight I decided to take the plunge.

First, the meat: Adams Fairacre Farms is probably my favorite NY market outside of Manhattan (in particular I like the Kingston market and found the produce and butcher to be a bit better than the Newburgh store). They cut their pork loin into flat boneless “ribs” which they call “family style”, and this is what I used tonight.

Next the dry rub: The spice measurements above are rough since I eyeballed proportions using a smallish kitchen spoon. I mixed the spices all together: paprika, pepper, cayenne, salt, brown sugar, cumin, ground coriander. If I had been less pressed for time (and trying to minimize cleanup), I probably would have blended it all together with a bay leaf as well. The measurements above were enough for the 6 smallish pieces of pork I was working with. I placed the rub in a baking dish and rubbed the pork pieces around until covered by the mix. I covered with plastic wrap and let marinate for about an hour on the counter (if longer, I would have placed back in fridge).

Dry Rub Pork Setup

I then mixed about half a cup of beer (I was drinking an excellent summery brew from the Ommegang brewery in Cooperstown, NY – their Witte Ale) with about half or a full teaspoon of soy sauce and brought out to the grill in a small bowl with a teaspoon.

On the hot portion of the grill, I seared one side of the pork then quickly moved to a more moderate heat. When I flipped to a new side, I repeated this process of searing briefly then returning to moderate heat. I took my beer/soy liquid and, using the spoon, gently poured some liquid over the pork periodically as it grilled. I probably grilled the pork for about 15 to 20 minutes, removing from heat when firm.

It came out absolutely delicious, with the cayenne providing a little kick but not excessively so. We rounded out the meal with some corn, grilled mushrooms, and Lisl whipped up a wonderful arugula, basil, tomato and red onion salad, dressed with olive oil, white wine vinegar and grey poupon mustard. Our teenage niece is visiting from Sydney, Australia (Lisl is an ozzie ozzie ozzie) and the meal was a hit. Score one! The whole thing was pretty efficient to execute and clean up after, and given that both of us had to go back to work, score two!

Dry Rub Pork, Full Plate

Tomato Beef braise, Fennel/Tomato salad, Cauliflower dinner

Tomato-based Beef Braise
It sometimes drives Lisl nuts when I create a two-color-palette meal, but I clearly have a tendency in that direction, as evidenced by the above photo. Today I got away with not having anything green on the plate! Granted that time for both of us was limited, but still there was enough to put together a decent meal.

This meal came about because the local butcher, the owner of an excellent store called Crisfields, sold me on a cut of what he called “super chuck” (once he starts pitching me on something, I usually fold like a house of cards). The steak was a 1.5 inch think cut of chuck, shaped not unlike a typical brisket cut, but with much more marbling.

Tomato Beef Braise
2 lb flat cut of chuck steak
1 yellow onion
4 carrots
3 celery stalks
2 tins of italian peeled tomatoes (14 oz)
Olive oil
Salt and pepper
Fresh oregano
Bay leaf

Heat a few tablespoons of olive oil in a dutch oven on the stove top on medium-high heat. Salt and pepper both sides of the beef and once the pot is hot, sear on both sides for a minute or two either side. Remove and set aside.

Chop up a yellow onion and 3 or 4 garlic cloves and saute in olive oil over low heat for a few minutes until onions start to turn translucent. Take 3 celery stalks and 4 peeled carrots, and put them in a food processor and pulse until very finely chopped (I wanted the flavor but not extra chunkiness, hence this step). Add to the pot and saute for a few more minutes. Add two tins of Italian skinless tomatoes and about half a cup of wine (in this case I used white but red would do). I think I added about two teaspoons of salt, a bunch of ground pepper, bay leaf (or two) and a nice handful of fresh oregano. Once this is all simmering for a bit, break up the tomatoes with your spatula and nestle the beef in the sauce. Spoon some sauce over top to make sure there is moisture on all sides of the beef.

In my case, I didn’t have the ability to start this recipe during the day, so I put it on when I went to bed the night before, and set the oven nice and low at 225F. In the morning I spooned away some of the melted fat, moved it all into another container, and placed in the fridge. That night after work, I put it back into the dutch oven, got it simmering again on the stovetop, added salt and pepper to taste, tossed in some more oregano, and left uncovered in the oven at 250F for another hour or two.

This ended up delicious and flaky, but so rich that I decided to serve it with some cauliflower, simply steamed, to have a healthy but neutral addition, and then whipped up a tomato and fennel salad to add a bit of acidity. This was probably my last braise for a little while, given the rapidly rising temperatures.

Cherry Tomato and Fennel Salad
Half a fennel bulb
A handful of cherry tomatoes

I sliced the cherry tomatoes into 4 slivers and placed in a bowl. The fennel bulb I washed then sliced as thin as I could with a sharp knife. Because I didn’t have a mandolin to cut it really fine, I decided to soften the fennel a touch by steaming it for about 2 or 3 minutes, then adding to the bowl. I dashed some olive oil, rice vinegar, salt, pepper, and lemon on top to complete.

P.S. I’m not going to give myself awards for food photography any time soon, not least because I am usually hungry so hurry it along, but it was nice to discover that I could manually set the white balance on my little Canon digital, and that helped remove the orange cast I was seeing with night shots. I can always aspire to be like Aun, a high school friend, who takes the dreamiest pictures of food ever.

Jamie Oliver’s Meatballs

This is one of my favorite recipes from Jamie Oliver’s cookbook The Naked Chef, with some alterations. A large cast iron skillet is very handy for putting this together and it can be a reasonably efficient process, especially if you’ve already got the tomato sauce prepped.

2 lb ground beef
2 slices of bread (I like a farm or stone white bread)
2 tbsp dried oregano
1/2 tsp cumin seeds, pounded in a mortar
pinch of red chilli powder (or half a small dried red chili, pounded)
1 tbsp freshly chopped rosemary
1 egg yolk (I think I used the whole egg)
olive oil
2 big handfuls of fresh basil
mozzarella cheese
parmesan cheese
salt and pepper

Tomato sauce (see below)

Use a food processor to make your breadcrumbs with your two slices of bread. In a big bowl, add the bread crumbs, dried oregano, cumin, chilli, rosemary, egg yolk, ground meat, 2 tsp of salt and some ground pepper. I often like to add some finely chopped red onion too. Mix it all up with your hands and roll into meatballs (I usually make them 1.5 or 2 inches in diameter).

Preheat oven to 400F

Heat 3 or 4 tablespoons of olive oil in your cast iron skillet over medium high heat. If you want to check whether it is hot enough, add a few drops of water and if it immediately pops and crackles then it is ready. Add a batch of meatballs and brown them all over, turning them with a set of tongs. Be gentle so that you don’t break them up.

If you only have enough meatballs for one layer in the skillet, add in enough tomato sauce to cover, your fresh basil (tear up the bigger leaves), and add some chunks of mozzarella cheese and grated parmesan. If you have more meatballs, you might do this in two layers. Cook in oven for 15 to 20 minutes, until cheese is golden.

Tomato sauce
You can certainly try the meatball recipe with a favorite tomato sauce, but Oliver suggests a simple and good recipe in the same cookbook, which is below:

1 large clove of garlic, finely chopped
2 tbsp olive oil
2-3 tbsp extra virgin olive oil
1 pinch of red chilli powder or a small dried red chilli, crumbled
2 tsp dried oregano
three 14oz cans of italian plum tomatoes
1 tbsp red wine vinegar
1 handful of basil or marjoram (or both), roughly chopped
salt and fresh black pepper

In a thick bottomed pan cook the garlic in the 2 tbsp of olive oil on low heat for a minute or two until golden, then add chilli, oregano and tomatoes. Mix gently — Oliver suggests letting the sauce cook for a while before breaking up the tomatoes so the seeds stay inside. Bring to a boil and gently simmer for an hour. Add the vinegar, then stir and chop up the tomatoes with your wooden spoon (they should be pretty easy to break up). Add your fresh basil or marjoram, add another 2-3 tbsp of extra virgin olive oil. (Frankly, I just use virgin olive oil throughout, rather than two kinds).

Mulitmedia seven-layer dip

Last night, I went to a friend’s house for drinks, where one of the snacks was seven-layer dip. It brought back great memories of my old friend Laurie Kesselman, who made an excellent version of this for many get-togethers on her roof in the West Village, as well as my baby shower and numerous other parties – she was a real pro at it. It’s really quite delicious and satisfying!

For those unfamiliar with this dish (i.e. Australians), it’s a great tex-mex vegetarian (usually) party dish that’s good for any season. The basic concept is layering beans, guacamole, sour cream, chopped up green (spring) onions, diced tomatoes, chopped black olives, and shredded cheese, or you can add in green peppers, jalapeno, ground beef, or anything else that takes your fancy. I went hunting for a recipe online and found so many – you can start from scratch with making your own refried beans, or make it up from seasoning mixes and pre-prepared dips from the supermarket. You can even serve the beans hot under all the other ingredients.

I really like the Food Network’s version, which uses lots of fresh herbs and lettuce and healthier substitutes for some of the ingredients, such as greek yogurt for the sour cream and rinsed canned black beans instead of canned refried beans – a picture and the recipe is below. But for pure entertainment value, take a look at this video on startcooking.com. Cool!


Food Network’s Six Layers and a Chip Dip
From Food Network Kitchens

2 cloves garlic
2 teaspoons kosher salt
1(15-ounce) can black beans, drained and rinsed
1 (15-ounce) can pinto beans, drained and rinsed
2 teaspoons chili powder
2 tablespoons water
1 tablespoon extra-virgin olive oil
2 cups lowfat shredded Cheddar
2 ripe avocados, preferably Hass
1 jalapeno, stemmed, finely chopped, (with seeds for more heat)
2 cups chopped romaine lettuce
1 1/2 cups nonfat yogurt, preferably Greek
1/2 cup fresh cilantro, leaves and some stems, roughly chopped, plus more for garnish
3 ripe medium tomatoes, diced
5 scallions (white and green), thinly sliced
Baked tortilla chips, for dipping

On a cutting board, smash the garlic cloves, sprinkle with 1 teaspoon of the salt, and, with the flat side of a large knife, mash and smear the mixture to a coarse paste. Put the garlic, beans, chili powder, water, and olive oil in the bowl of a food processor and blend until smooth. Spread in the bottom of a 2 quart casserole or gratin dish, or in individual sized dishes, as desired.
Scatter the cheese over the beans. Halve and seed the avocados, then mash with the jalapeno and another teaspoon of salt in a small bowl. Spread a layer of the avocado over the cheese, and then scatter the lettuce on top.
Mix the yogurt with the cilantro and then spread over the lettuce. Add a layer of tomatoes and finally scatter the scallions on top. Chill until ready to serve. Garnish with a few cilantro sprigs and serve with baked chips.

Sunday lunch: Caper Potato Salad and Marinated Pork

Summer Sundays are great for catching up with friends for lunch on our Rye deck. A perfect day sees the kids tearing around playing havoc with the toys while the adults relax under the umbrella enjoying beers and lunch. The hot weather at the moment is just right for salads and grilled meats – fresh flavors and mostly cold food. Today, we had a delicious grilled marinated pork, french style potato salad (without mayo) and a greek-ish salad of cucumber, peppers, cherry tomatoes, red onion and feta cheese.

Sunday Lunch 6-15-08

Pork marinade: Apple cider vinegar, coriander (cilantro), jalapeno peppers and a dash of soy sauce. We marinated the meat overnight and then grilled on the BBQ.

Potato salad: Boil small red potatoes until tender. Meanwhile mix dressing – minced shallot, parsley, 1/4 cup of white wine vinegar, 1 tbs Dijon mustard; whisk together while adding about 6 tbs olive oil in a stream; finish off with a couple of teaspoons of capers. Dice the cooked potatoes and mix with dressing while warm so they soak it up. Eat warm or refrigerated.

Chilled Avocado & Cucumber Soup (and photo struggles)

Tonight I played with a soup that would work on a hot evening, which combined a base inspired by the Food & Wine’s 2007 Annual Cookbook and a relish picked up from an old issue of Gourmet.

Soup base:
1 large cucumber, seeded and chopped
2 avocados, pitted and peeled
1 1/2 cups buttermilk
2 tablespoons red wine vinegar
1 1/2 tablespoons fresh lime juice
1 teaspoon sugar
pinch of salt
1 teaspoon ground cumin

Combine all the ingrediants into a blender and blend until smooth. Theoretically one could then strain this, but I found it smooth enough as is. The buttermilk adds a wonderful tang, not unlike a good natural yogurt.

Corn Relish
2 fresh ears of corn
6 cherry tomatoes
handful of cilantro
1 tablespoon of minced shallots
4 tablespoons fresh lime juice
1 tablespoon olive oil
pinch of salt
pinch of sugar

I find that the only useful thing the microwave can do, other than heating up spagetti sauce, is cooking corn.* Leave the corn in the husk, cutting off the excess on either end, and microwave for 2 1/2 minutes. Set aside and let cool before removing husk. Chop up the tomatoes and the cilantro, then combine in a bowl with the minced shallots, lime juice, sugar, salt, and olive oil. Husk the corn and with a sharp knife remove the kernals. Mix the kernals in.

When you serve the soup, dollop the relish in the soup and lightly mix in.

* my favorite way to cook corn is to leave in husk, soak in water, and cook on the grill for 15 to 25 minutes, depending on grill heat

The combination came out pretty well. What did not was the photo. Right now I’m trying to use a digital camera, and *thought* that I had enough light for the pictures, but as you can see below they came out in an orange-tinted shadow (the image on the right is a separate mushroom dish I tried that also suffered from the orange plague). Clearly I have some work to do understanding my camera’s settings, since I primarily cook in the evenings when natural light is an impossibility. [UPDATE: I just use a small digital camera (Canon SD1100) and first tried playing with the ISO speeds, but really the easiest solution to get decent shots is the manual white balance feature.]