Thanksgiving Pt 2: Potato & Fennel Gratin

While much of our Thanksgiving dinner was pretty traditional to our family, Lisl and I decided to change up the usual scalloped potato dish and add fennel to the gratin. Stacey, of Stacey Snacks, mentioned that Ina Garten had a great recipe, and I found a version on the Food Network website. I made a few changes, reducing amounts and layering rather than mixing in a bowl (I just love how attractive the layered approach looks when it comes out of the oven).

The results received universal approval from the adults at the table (munchkin, not so much, but the three-year-old palate is a frustrating thing to cook for). This was a convenient dish as well since I was able to bake it 90% done before the turkey took over the oven, and then just finish it off while the turkey rested.

Potato & Fennel Gratin, adapted from Ina Garten

4 to 6 medium-large idaho/russet potatos
1 large fennel bulb
1/2 large spanish or vidalia onion
1 tbsp butter
1 tbsp olive oil
2 cups gruyere cheese, thickly grated
1 3/4 cup heavy cream
salt and pepper

Thinly slice the onion. Remove the fronds and 1/4″ of the base of the fennel, cut in half, remove the core, and then thinly slice.

Preheat oven to 350F.

In a saute pan, heat the butter and olive oil on medium-low and cook the onions and fennel for about 15 minutes, stirring occasionally. While this is cooking, thinly slice (1/8″ or 2mm thick) the potatoes.

Butter the bottom and sides of a baking dish and place a first layer of potato, slightly overlapping each piece like fish scales. Sprinkle some gruyere cheese, a small amount of salt and pepper, and pour a little cream. Add a layer of half of your onion and fennel, and repeat with the cheese, salt, pepper, and cream. You will add another layer of potato, a layer of onion/fennel, and a final layer of potato, interspersing each one (including the top) with cheese, salt, pepper, and cream.

Place in the oven and bake for 1.5 hours until the top is nicely browned and the potatoes are very tender.
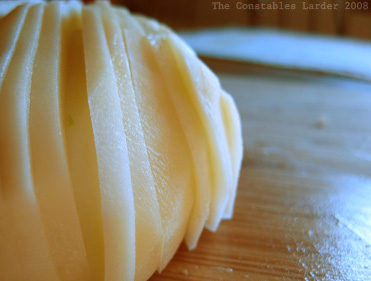
sliced potato

Thanksgiving Pt 1: Crostinis

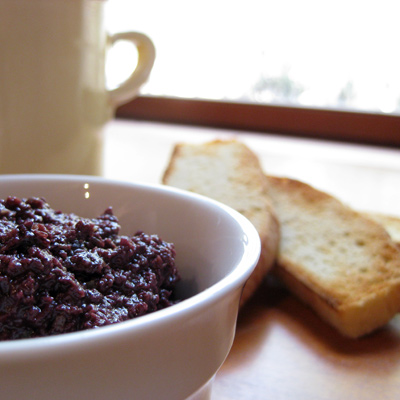
tapenade
Olive Tapenade

At many dinner parties, I’ve found that guests hit a dangerous period before you are ready to serve, where they are hungry enough to down all the cheese and crackers you can throw at them and in doing so throw off their appetite. For Thanksgiving dinner this year, I decided to offer a “snack” starter course with varied crostinis that both started the meal off in a delicious way, as well as controlling portions. They are quite easy to make, especially if you have access to the oven to toast your bread.

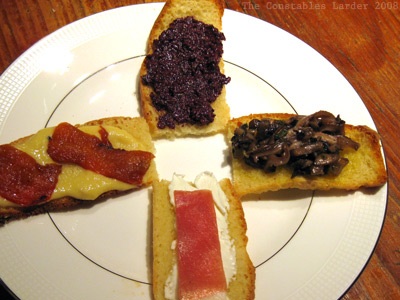
Four Crostinis

1. Mixed mushrooms
2. Olive tapenade
3. Hummus and roasted red pepper
4. goat cheese and prosciutto

You can serve these individually or just put a whole bunch out on a platter. The recipes for the first three components are below. Of course, for #4, I simply bought good goat cheese and imported prosciutto; I had originally wanted to try a combination of goat cheese, fig and a touch of honey but couldn’t find figs this time of year.

We served these on very thin, toasted slices of homemade sourdough. Lisl was kind enough to bake two long, flat loaves for me to use. The only pieces I basted with olive oil were the ones for the mushroom spread, but frankly, it would probably be a delicious move on all of them, time permitting.

crostinis
Our mistake was not toasting the bread slices in the oven before the turkey took all the room in there. We ended up using the toaster, which is much more work than you need when busy working on a big dinner.

Mushroom Spread
handful of finely chopped yellow onion (or shallots)
1 garlic clove, minced
7 or 8 cremini mushrooms, finely chopped
3 or 3 white button mushrooms, finely chopped
5 or 6 shitake mushroom caps, sliced into thin strips
1 tbsp butter
1/4 cup chicken or turkey stock
3 tbsp port
1 tsp fresh oregano, finely chopped
salt and pepper
olive oil

Melt the butter in a splash of olive oil in a heavy bottomed pan and saute the garlic and onion on medium low heat. Add the mushrooms, oregano, a couple pinches of salt and pepper, and cook for 5 to 10 minutes stirring occasionally. Turn up the heat slightly, and stir in the stock and port and let the liquid reduce. Cook for another 5 or 10 minutes, tasting for salt and pepper, and don’t hesitate to add a bit more port if you want to punch up that part of the flavor.

Brush the toasted bread with a little olive oil before adding the mushroom mixture.

Olive Tapenade
1/2 lb kalamata olives
1 1/2 small anchovy filets
1 tbsp small caper berries
1 clove of garlic
turn of ground pepper
juice from 1/2 a lemon
1 tbsp extra virgin olive oil

Combine all the ingredients in a food processor and blend. My family and I, we’re olive nuts, and this spread was a huge hit.

Hummus & Roasted Red Pepper

Making the hummus
Chickpeas
Tahini
Garlic cloves
Lemon juice
olive oil
salt
pepper

Frankly, I never make hummus exactly the same way; I do it by taste. I usually work from dried chickpeas and make batches with about half of a 1 lb bag. To cook, bring the chickpeas to a boil and then simmer for 1.5 to 2 hours until tender. You can do this a day or two in advance, if need be. I’ll start with by placing the chickpeas, 1 1/2 tbsp of tahini, 2 garlic cloves, juice from 1 or 2 lemons, and a couple pinches of salt in a food processor. Then I dribble in several tablespoons of olive oil as it blends. I’ll check for taste and add more of various ingredients until I am happy.

For the red peppers, normally I have blackened them whole under the broiler, then placed in a plastic or paper back for 10 minutes or so before peeling. This year my mother gave me the tip that it is easier to peel the peppers if you have already cut them into fairly flat strips. After trying that technique, I have to agree with her.

For the crostinis, I just put a thin spread of hummus on the toasted bread and then two small slivers of red pepper. It is easier for your guests to cut the red pepper in half so they aren’t trying to bite it in half with their teeth.

Thanksgiving planning

The clock is ticking. So far here’s what we’re thinking (subject to inspiration when I get to the market tomorrow morning):

Amuse: 3 crostinis: mixed sauted mushrooms; goat cheese with figs and honey; homemade hummus with slices of roasted red pepper; all on slices of Lisl’s sourdough bread

Starter: butternut squash soup with leeks and ginger

Main: Turkey and stuffing (using our usual recipe; the one year I tried a brine I wasn’t happy)

Side: potato and fennel gratin

Side: most likely a green bean dish, haven’t decided how simple vs complex
(I also think Lisl is making something with cranberries and something with sweet potatoes, but I have an aversion to both so do not have insight into her schemes! With the exception of middle-eastern tagines, I am just not one for mixing sweet fruit and meat.)

Dessert: I’m guessing Lisl will make an apple or pumpkin pie, and I believe that family coming to visit might be importing some dessert as well

Wine: plenty!

What am I thankful for? A lot:

Leaves

Minestrone, and the joys of making soup with Parmesan rind

minestrone soup

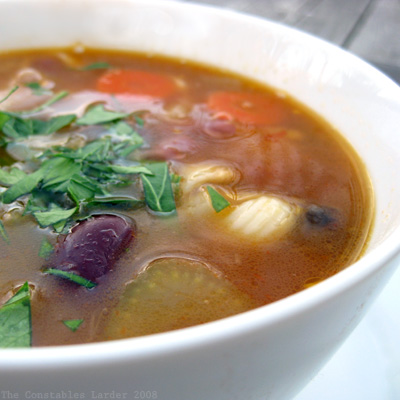
Today was the first time I’ve been really happy with my results with a from-scratch minestrone soup attempt, and I give all the credit to Stacey Snacks for suggesting the addition of a rind of parmesan cheese. Soooooooo much better.

This was a day for soup. Our town had a festival sponsored by the local businesses (the Christmas decorations are out in force already), and I got to stand around freezing while Munchkin happily leaped around inflatable castles like a maniac. Ah, energizer bunny. I had made the soup for lunch, but by the time I got back I wanted nothing more than another bowl. The cheese transformed a vegetable soup into a comfort dish.

1 large onion, diced
4-5 large garlic cloves, crushed and minced
4 carrots, chopped into circles
4 celery stalks, chopped
1 fennel bulb, chopped
6 white button mushrooms, sliced
1 rind of parmesan cheese
1 cans (~400gr) of cooked red kidney beans
1 can (~400gr) of cooked “young” red kidney beans
2 bay leafs
large handful of parsley, washed and tied into a bunch
handful of parsley leaves, finely chopped for serving
3 or 4 tbsp tomato paste
3 or 4 handfuls of dried small pasta shells
1/3 cup freshly grated pecorino cheese, plus a little more for serving
salt and pepper
olive oil
1 cup dry white wine
water (huh, what’s that? is that organic?)

Fill a kettle with water and bring it to a boil while you put the soup components together.

Heat 2 tbsp of olive oil in a soup pot on medium heat and saute the onions and garlic for several minutes, and then add the carrots, celery, mushrooms, fennel and the parmesan rind. Add a few pinches of salt and continue cooking, stirring occasionally, for 10 minutes.

Rinse the beans well in a collander and stir into the pot (Note: you can use two cans of red kidney beans, but I liked the texture difference of having normal and young kidney beans, the latter of which Goya sells as “small red beans” or Habichuelas Coloradas Pequenas).

Place the tied parsley on top, add the bay leaves, 6 or 7 whole peppercorns and the tomato paste, and then pour in the cup of white wine and the hot water from your kettle — add water until the level is over the top of the vegetables. Stir gently, bring to a boil, and then reduce heat, cooking covered at a gentle simmer for 40 or 50 minutes. Give it an occasional stir and make sure the tomato paste has disintegrated nicely into the soup.

In another pot, boil your pasta shells in lightly salted water until al-dente and then transfer the pasta to the soup pot. Depending on the desired consistency for your soup, add water from the pasta pot. Cook the soup for another 10 minutes, tasting for salt and pepper. Right before serving, stir in the grated pecorino cheese.

Serve with a little freshly chopped parsley and grated pecorino cheese on top.

Farroto with walnuts and beans

This has been a busy work week, so it is time to catch up. First off, I was glad to see the very positive reception to my note to the Foodbuzz community, calling for restraint with the “send to a friend” feature, which was leading to email overload.

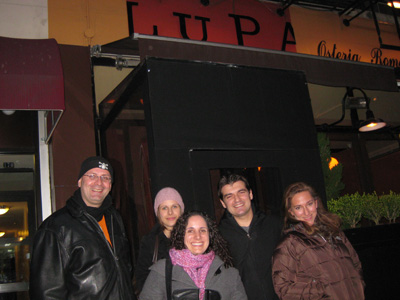
Second, I had a very enjoyable meetup with a great group of bloggers at Batali’s Lupa restaurant. That’s Kalofagas (whose being in town brought this gang together), Colloquial Cookin, Bacon & Rhubarb, Chefs Gone Wild, and Stacey Snacks below.
blogger lunch
It was a very friendly, unpretentious group of people and the conversation ranged all over the map. I had not been back to Lupa for about 8 or 9 years since its early days, and I have to say that I had an absolutely fabulous meal. The wine complemented my advil mercifully (I think it was a bit more walking than I was ready for, but I wasn’t going to miss meeting this bunch!).

Now, on to a vegetarian dish that I made earlier this week, adapted from a recipe by Lorna Sass in the Rancho Gordo cookbook (I thought I would give it another shot). I have discovered I really like farro. I find this word “farroto” to be rather amusing — it means farro cooked like risotto. I can’t decide if it is silly, harmless or pretentious, but I do admit that it is catchy and makes me laugh.

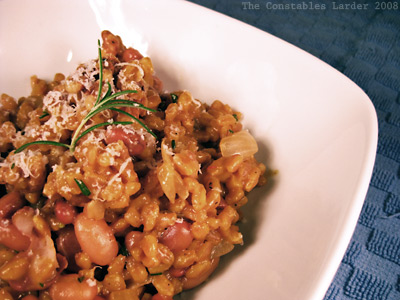
farro risotto
Farroto with Walnuts, Pecorino and Beans

With the recipe, I had to change a few things (including not having a pressure cooker or scarlet runner or marrow beans), and the result was healthy, filling and had a nice, nutty flavor. I enjoyed it quite a bit (including the leftovers for lunch), but Lisl thought it needed to be punched up with something green, like a big handful of chopped parsely. I’m thinking maybe some parboiled baby spinach? Or perhaps an earthy porcini angle? I’d love to hear your ideas on improvements.

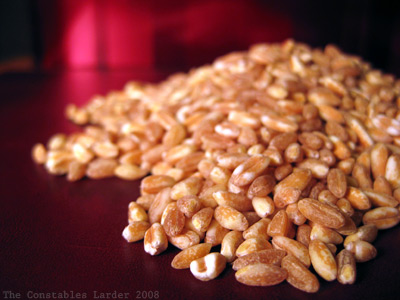
farro

Farroto with Walnuts, Pecorino and Beans
serves 4

1/3 cup dried Mayacoba beans (or a favorite bean)
1/3 cup dried Vallarta beans (or a favorite bean)
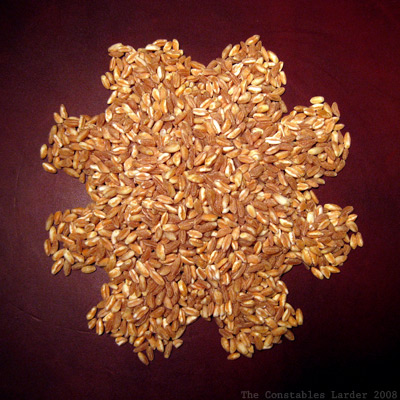
1 1/4 cups semi-pearled farro
1/3 cup dry white wine or vermouth
2 to 3 cups vegetable broth (or chicken broth if you are not vegetarian)
2 cups reserved bean cooking liquid
1 medium yellow onion, chopped
1/2 cup walnuts, coarsely chopped
1/3 to 1/2 cup freshly grated pecorino cheese (orig. recipe uses parmesan)
1/2 tsp saffron threads
1 tbsp finely chopped fresh rosemary (or thyme)
salt and ground pepper

After checking the beans for any small pebbles, place them in a pot and cover with cold water an inch over the top of the beans. Bring to a boil, then let simmer for 40 minutes to an hour, until tender. About 15 minutes before they are done, soak the farro in cold water in another bowl and then drain, discarding soaking liquid.

Remove the beans with a slotted spoon to cool, and leave two or three cups of the cooking liquid in the pot. Add 2 cups of vegetable or chicken broth and bring to a boil, then turn off the heat.

In a large saute pan with a high side (I like to use my large cast iron frying pan), heat up a tablespoon of olive oil over medium-low heat, then saute the onions until they start to turn translucent. Raise the heat to medium or just above, and add the farro, a pinch of salt, and stir for a minute or so. Then stir in the wine. Crumble in the saffron threads and begin stirring in the warm stock one ladle or 1/2 cupful at a time, treating it just like a normal risotto and not letting it get too dry. After about 3 1/2 cups of broth and 20-25 minutes, start checking to see if it is tender (but not mush). In my case, I found it took 4 cups and 30 minutes.

Turn the heat to its lowest setting, add another few pinches of salt and some grindings of pepper, and stir in the beans, walnuts, rosemary, and pecorino cheese. Taste for salt and pepper (gently stirring it in) — it will probably want a healthy amount in all.

Serve with a little extra grated cheese on top, and a medium-bodied red wine, such as a Rhone.

farro

Hopkinson, Cookstr, and Recipe Links

It is time for another installment of musings and recipe links.

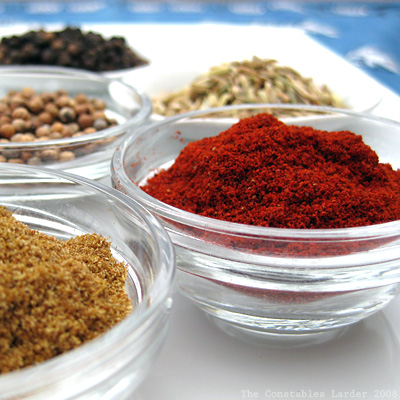
spices 1

Hopkinson and “mindless innovation”
My brain hit pause-and-spin when I read in NYTimes’ piece on Simon Hopkinson: “he is driven nearly mad by carelessly peeled potatoes, badly washed lettuce and what he views as mindless innovation. ‘Why on earth would anyone put cumin in mint sauce for lamb, or a Caesar dressing on bibb lettuce?’ he asked, wincing in genuine pain. ‘There’s no reason for it.’”

No reason for it? How exactly does Hopkinson think that our flavor combinations emerged in the first place? Did mirepoix emerge from Zeus’ thigh like Athena? Or perhaps innovation emerged via casual collisions on ancient street corners: “Hey you got your honey in my yogurt!” “No, you got your yogurt in my honey!” (I wonder how many people have seen the Reeses Pieces candy ad to which I refer)

Rules of flavor have emerged through trial and error over centuries. With trial, comes error! It might be bad, but don’t question the why. In ancient times, “fusion” happened through military expansion and today it continues via travel and trade. I do not believe that the door has been closed on originality or food innovation, either through flavor experimentation or today’s molecular gastronomy investigations.

cookbooks

Cookstr & Online Recipes
The other week, the NYTimes also had an article on Cookstr, a new recipe website being started by a former publishing exec which pulls in recipes from the cookbook stars and in doing so hopes to sell more books.

I am firmly in the camp that the Internet, and social media in particular, sells more books. Cookbooks are a purchase of desire, not necessity. If it was the latter, all you would need is a copy of How To Cook Everything, or Joy of Cooking, or The Cook’s Companion if you are down-under, and you would have more than enough to eat well. I believe that the blogosphere (and its hugely-increased word of mouth dynamic) is one of the strongest marketing channels for cookbooks. I have bought numerous books because bloggers I like have tried and shared recipes, and in doing so raved about a book. Word of mouth works because of trust; trust emerges through time and relationships, even tenuous ones. It means a lot more than a review from a stranger on Amazon.com.

While there are many places for recipes online, people still want to feel like they are making a “safe” bet before they labor over a stove, and nothing screams reputation more than a big name. I believe that Cookstr will do well and carve out a place for itself.

Looking ahead, I wonder if Cookstr be able to control the impulse to “shut down” the recipe sharing that goes on in the blogosphere. A natural inclination might be to become the “exclusive” source for their authors, or fight modifications like that misguided attempt by Cook’s Country earlier this year. Over the last several years, traditional media, PR and marketing has been fearful, controlling, and at times even threatening to social media, but it is a bit like trying to stop the tide from coming in (not to mention an excellent exercise in how to alienate your customer base).

I think that Cookstr will be wise to embrace and incorporate social media into their planning and product. Like any startup, no doubt they shall begin small, but over time we shall see if Cookstr’s founder, or his consultants, really understands this new medium he is embracing. I will note that Jamie Oliver did not come across well in his quote in the article. It smacked of arrogance and a refusal to acknowledge that his recipes come from a deep foundation of recipe sharing and evolution, but I’m going to give Jamie the benefit of the doubt since he seems like such a down-to-earth bloke and the wrong soundbites, out of context, can make anyone sound terrible.

Musings and misgivings aside, I look forward to Cookstr’s launch and am hopeful that they will be an excellent online resource.

Recipe Links
All that talking and finally some links! Here are some of my favorite posts from the last several weeks. I seem to be pie crazy at the moment!

Onion, Leek and Taleggio Tart

onion-tart1

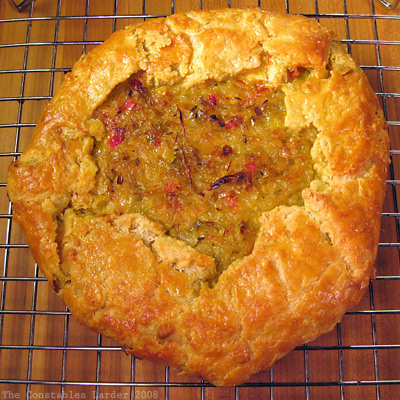
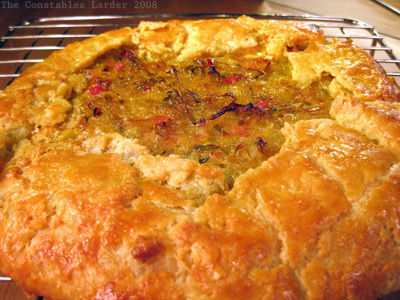
My cooking tends towards comfort food in general, and when I’m stuck inside on a rainy November day caught between a cold and recovery from surgery, I don’t need any additional excuses to crave comfort food. At least I was back on feet and able to tackle something in the kitchen. My latest challenge is savory pastry, so I set my sights on making an onion tart. Over twitter, Kelly from Sass & Veracity suggested adding taleggio cheese, to which I whole-heartedly agreed, and Lisl was kind enough to pick some up for me today when she was out.

I decided to stick with Elise’s method for making Pâte Brisée (the pastry) since it worked last time and I’m new enough to pastry making that if it ain’t broke, I shouldn’t try to fix it (don’t worry, the tinkerer will emerge soon enough). I’ll note that both times I have made this, the pastry needed more than 3 or 4 tbsp of very cold water. Tonight it was more like 7 or 8.

I made the pastry first because it needed to rest in the fridge for an hour or so, and then turned to the onions.

Making the Tart
3 or 4 leeks, cleaned, halved and finely sliced
2 or 3 large onions (spanish or vidalia), peeled, halved and thinly sliced
1 red (or green) jalapeno, seeded and finely diced
6 sprigs of fresh thyme (or a large pinch of dried thyme)
2 tbsp olive oil
2 tbsp butter
a pinch of salt
fifth to a quarter lb taleggio cheese, cut into 1/2 cubes
1 egg yolk and 1 tbsp water for egg wash

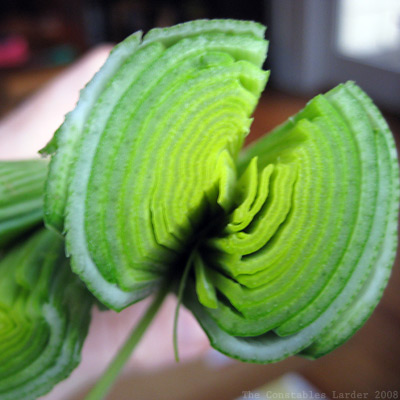
Make sure your leeks are well cleaned. Remove the very bottom of the leek, and then cut off the top a few inches above where the white transitions to green. With your knife, halve or quarter the top several inches of the leek and place it under a running faucet, opening up the layers with your fingers to remove any grit. Then thinly slice. Prep the onions by peeling, halving, and then thinly slicing. (By the way, I once read that if you keep a piece of bread in your mouth while you chop onions, you won’t have as severe a reaction. As far as I can tell, it is true!)

In a large, heavy bottomed pot (a pot with a high edge is easier than a saute pan here so that you don’t spill as you stir), heat up the olive oil and butter over low heat. Add the leeks, onions, thyme sprigs and a pinch of salt and slowly cook, stirrying occasionally, for 30 minutes. Add the jalapeno, and continue cooking for another 30 minutes, stirring occasionally. You want the onions to be soft and nicely caramelized. Turn off the heat and let cool. Taste for salt and pepper, but I found that very little salt was needed. You want the onions to be moist but not liquidy, so drain any extra liquid.

Preheat the oven to 375F.

When the onions are cool, chop up your taleggio cheese and have ready. Then take out a large baking tray and place parchment paper on top. Wisk up your egg wash (optional) and have everything ready for when you take the pastry out of the fridge.

On a floured surface, roll out your pastry into a thin 14″ circle. If it starts to stick to the surface below, lift it gently up (you can use the rolling pin to carefully “unroll” it from the surface) and dust a little more flour down. Carefully fold the pastry over onto itself (half) and then again (quarter), to move to the baking tray, and then unfold on the parchment paper.

Spread the taleggio cheese around, keeping within 2 inches from the outer edge, and then scoop the onion mixture on top. Fold the outside edge over, overlapping and gently pressing the folds onto the pastry below. Brush the egg wash on the top of the pastry and then place in the oven for 45 or 50 minutes. When golden brown, remove and cool on a rack (you do not want to leave on the tray and parchment paper or it might get soggy).

The dish was deliciously rich, and Lisl gave me a big nod of approval on the results of my pastry. Thanks for suggestion Kelly! It might not have been the prettiest pastry ever made, but comfort food isn’t meant to be some dolled-up, foam-covered, high-falutin’ thing after all!

onion tart

leeks

Beef Stew (our version)

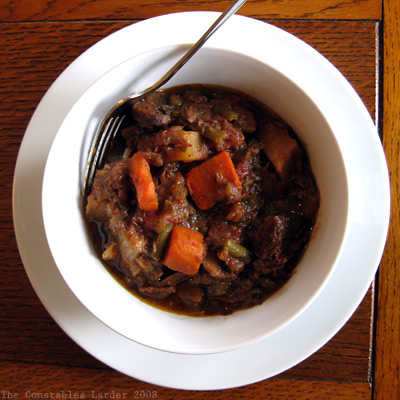
beef stew plated

I am chained to the bed today, fending off percocet-induced fuzziness after minor surgery yesterday (not to worry, I should be up again in no time). Lisl had to stay home from work to help me, and one lovely side benefit is the wonderful smell of baking bread wafting through the house. In between attempts to get work done, I’ve been catching up on food blogs, flipping through cookbooks, twittering more than usual, and trying to think how I can be as funny as Zen. I’ve decided that I need to accept my limitations. 🙂

I also decided to update my beef stew recipe on here since I made a big batch right before heading to the hospital (when I was still allowed to lift my dutch oven) and took a few pics of the process.

Most food bloggers probably have their own favorite beef stew recipe; ours comes from my mother, and one day many years ago I took notes as she put it together. She cooks the dish by feel so it is never exactly the same, but the basics are as follows:

2 medium onions, diced
2 cloves minced garlic
10 mushrooms (white or cremini), thickly sliced
2 pounds round or chuck beef
flour
5 carrots, thickly chopped
5 stalks celery, chopped
2 large russet potatoes, cut into large chunks
large handful of green beans, ends removed and cut into 1″ pieces
1.5 cups frozen peas
3 bay leaves
1 cup red wine
2 tbsp tomato paste
very large handful of parsley, chopped
1 tbsp oregano
salt & pepper

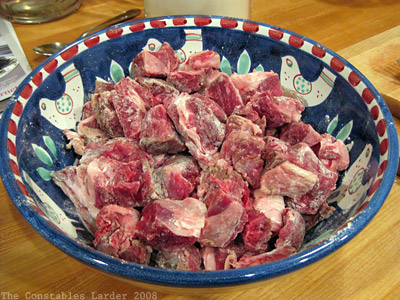
Trim some of the excess fat off of the beef, but leave some to add richness. Cut the beef into cubes of preferred size (I do rough cubes of about an inch) and lightly flour on all sides.

beef stew 1

Start boiling a kettle of water (or a medium pot) and pre-heat oven to 315F.

In a large oven-proof pot such as a dutch oven, heat some olive oil and saute the onions and garlic over medium-low heat. As they start to turn translucent, add in your mushrooms. Cook for several minutes

Remove the onions and mushrooms to a large bowl, add a little more olive oil to the pot, and brown the beef in batches over slightly higher heat (adding olive oil as necessary). Just brown the beef, do not cook. Remove the beef to the bowl with onions and mushrooms, and deglaze the bottom of the pot with some of the boiling water.

Your kitchen should smell amazing at this point. 🙂

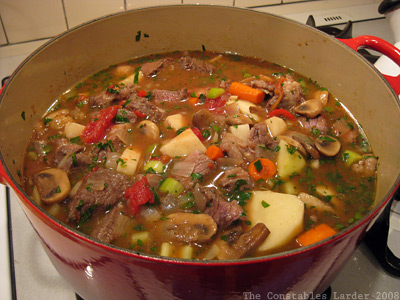
Turn the heat down to low, and then return the meat, onions and mushrooms to the pot. Add everything except for the green beans and peas. Add 1 tsp of salt (you’ll probably want more, but can add to taste later). Add the wine and then pour in boiling water until the water level is just below the tops of the meat and vegetables.

beef stew 2

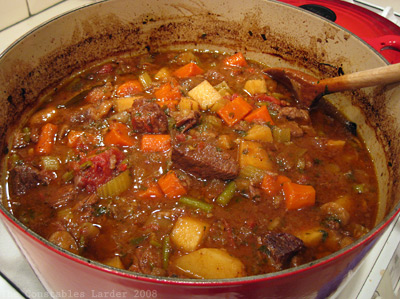
Bring to a bubbling simmer on the stovetop, then cover and place in the oven for an hour. After an hour, skim any excess oil off of the top, then stir in the green beans and peas, and taste for salt. Return to the oven for another 2 hours, periodically pulling it out for a stir. The longer you can slow-cook it, the thicker it should get as the vegetables break down and thicken the stew. (you don’t want to try to thicken it by boiling off liquid)

beef stew 3

I wait to add pepper until serving, and will often add some freshly chopped parsley. While it is very good on its own, we often serve with egg noodles or rice.

A few notes:
If you need to cook your stew on the stovetop, do your best to keep the simmer very light, and stir regularly especially if you have a thin-bottomed pot, because you do not want the bottom of the stew to burn. That happened to me once and the burnt flavor permeated the whole thing!

You can totally mix up the amounts of each vegetable to fit your flavor profile, or add more red wine to make it richer, or use rosemary instead of oregano, etc. This last stew I made (which is where the photographs came from) included some san marzano tomatoes, chunks of celery root, a jalapeno pepper, and we did not have any peas. It was delicious, but the base recipe my family likes to work off of is as described above.

Taking on the pastry challenge, and thumbs up on a Gourmet Veg. recipe

I’ve decided that in my quest to make great comfort/peasant food, I must become good at pastry. Historically, I’ve always leaned on Lisl for that task, because really, what’s not to avoid? There is so much conflicting advice out there! Use butter, no, vegetable shortening! Food processor, no, scraper, no, hands! Rest and chill, no, use directly! 2 to 4 tbsp of ice water max!!! but don’t be surprised if you use more! Isn’t this part of cooking meant to be a science?

Anyone who has read the last chapter of The Man Who Ate Everything knows what I am talking about — he researched a zillion different permutations for the perfect pie crust, and ended up getting a master demonstration from a baking queen who threw it all out the window and took him by surprise with her technique.

I made two decisions. I decided to avoid Crisco and stick to butter, and I focused my reading on three sources: a Nov 2004 Gourmet article I had on the shelf, a post from Shuna at Eggbeater, and a post from Elise at Simply Recipes. Because Shuna’s site was down earlier for some reason, tonight’s attempt at flaky pastry focused on Elise’s approach.

It wasn’t pretty.

It was a bit stressful.

But it actually turned out quite tasty.

One small step towards conquering my discomfort with baking.

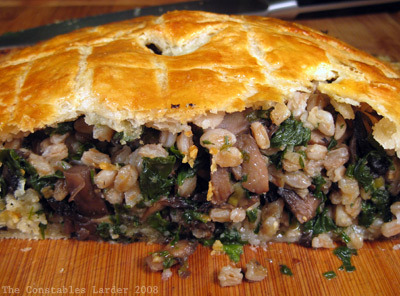
Lisl watched me work with bemused expression on her face, and some helpful advice. My target was a marvelous farro and mushroom pie recipe I saw in November’s Gourmet, in their vegetarian Thanksgiving menu. Most bloggers who tried this recipe agreed that it is wise to amp up the flavor a bit more than the original, but it is a good starting point and there are lots of different directions you can take the filling — I added spinach and parsley.  It was the first time I had worked with farro and I quite liked it.

Gourmet’s Farro and Mushroom Pie

farro pie

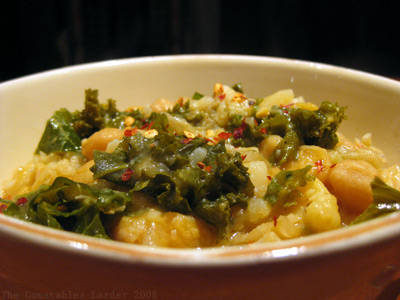
Chickpea Stew with Coconut Milk

chickpea kale stew

For Sunday’s dinner, I wanted to go vegetarian and hearty. This combination of chickpeas, potatoes, cauliflower, kale, and coconut milk really hit the spot. This was a real stick-to-the-ribs meal for a chilly fall evening.

Served 4

1/2 lb dried chickpeas
1 green pepper, de-seeded, de-stemmed and quartered
3 cloves of garlic, peeled

1 onion (spanish or vidalia), chopped
1/2 head of cauliflower, chopped into 1/4 to 1/2 inch pieces
2 medium red potatoes, chopped into 1/4 to 1/2 inch pieces
6 or 7 stalks of fresh kale, loosely chopped
14 oz coconut milk
1 to 1 1/2 cups of chickpea cooking broth or vegetable broth
1 tbsp tomato paste
10 sprigs of fresh thyme
1 tbsp ground cumin
1 tsp of salt, then to taste
ground pepper
hot red pepper flakes

After washing your dried chickpeas and checking for small pebbles, place in a medium sauce pan and fill with water 1 1/2 inches above the top of the chickpeas. Add in the green pepper and garlic, and bring to a boil. Simmer for several hours until tender, then save two cups of the cooking liquid, drain the rest and discard the pepper and garlic. (Note: you can soak the chickpeas overnight to speed this up, or just use canned, but make sure you thoroughly wash the chickpeas if you use canned)

Preheat oven to 350F.

In a large oven-proof pot, saute the onion on medium heat, then add the potatoes. Let this cook for several minutes, then add the cauliflower and the sprigs of thyme. Cook for a few more minutes, and then add the kale, coconut milk (make sure it is well stirred/shaken), the tomato paste, ground cumin, and 1 tsp of salt. We used about 1 1/2 cups of broth, but if you are using canned chickpeas or less potato, you might want to start with 1 cup and add as needed. Cover and place in the oven for an hour or so, checking periodically to give it a light stir. If it looks too dry, add a little more broth. Grind in a little fresh pepper and check for salt before serving. Finally, add some heat by sprinkling red hot pepper flakes on top when you serve.

Notes: if everyone likes heat, I definitely would stew it with jalapenos as well. I am thinking this might be good with some smoked paprika but have not tried that yet.