Meatloaf Meets Thanksgiving Stuffing

I love my mother’s meatloaf recipe. Maybe that is not unusual, but I always find myself satisfied when I make it, and I am invariably disappointed when I try meatloaf in restaurants. The recipe for the original recipe is posted here, and I hope you try it.

Tonight however, as a prelude to the looming Turkey Day here in the US, I changed things up a bit and brought hints of Thanksgiving “stuffing” into my meatloaf. The reaction was gratifyingly positive, so I deemed it blog-worthy. Apologies for the less-than-great photo above, but it gives you a sense of texture.

(Note: what kind of stuffing do I love? It comes from a 1973 NYTimes recipe for Thanksgiving turkey that my mother cut out and we have been making ever since, because it is just that good!)

Meatloaf
1 lb ground beef
1 lb ground pork
1 large onion (spanish), finely chopped
8 white button mushrooms, finely chopped
3 stalks of celery, finely chopped
10 large black olives, chopped
1/3 cup walnuts, chopped
1 tbsp fresh sage, finely chopped (if you love sage, add more)
1 cup finely chopped parsley
1 tbsp worcestershire sauce
2 tbsp ketchup or tomato paste
1/2 tsp salt
1 egg
bacon

Pre-heat oven to 425F.

Heat up a splash of olive oil in a saute pan, and saute the onions until transparent. Add the mushrooms and cook for several minutes, and then add the celery. Cook for another 5 to 10 minutes, then turn off the heat and let cool.

In a large bowl, combine everything but the bacon. (note: I mix it all up with my hands, well-washed before and after)

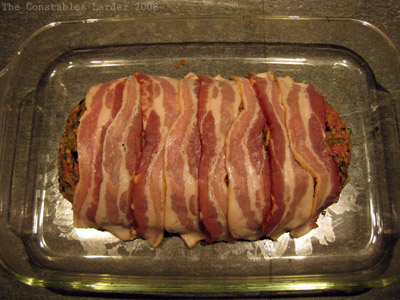
In a large baking dish, shape your meatloaf. I usually mold it into a roughly-rectangular shape about 1.5 to 2 inches high and 4 or 5 inches wide. Then drape slices of bacon across the top.

meatloaf prep

Place in the oven, and after 10 minutes, turn the heat down to 350F. Cook for another 50 to 60 minutes — if the meatloaf is firm, it should be done.

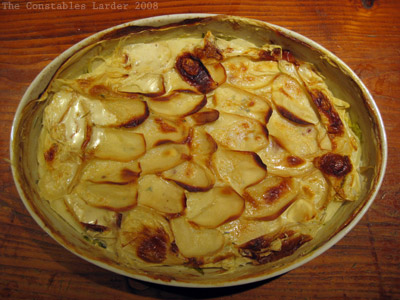
We served this with a potato, brussel sprout and celeriac gratin (in milk) — good, but I want to continue to tinker with that recipe and improve it before blogging.

potato gratin

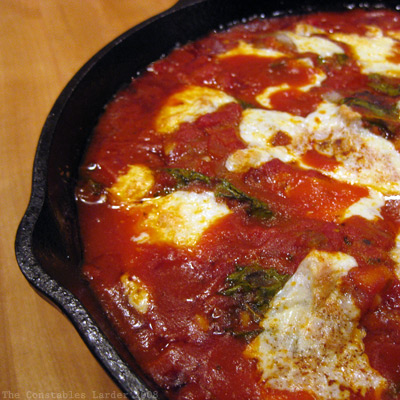
Stewed Meatballs with Arugula

stewed meatballs

What’s not to love about meatballs stewed in tomato sauce? It’s a timeless combination, no? I love to cook variations of a recipe I originally picked up from Jamie Oliver (I’m a big fan of his cookbooks). My original adaptation of the recipe is posted here. The other day, I remade it with some changes to the meatballs — there are so many directions you can go and still have it be delicious, as long as you don’t use spices that will conflict with your tomato sauce. The other major difference was the use of a big bunch of arugula instead of basil to add more body (I’m guessing that kale would be good as well).

For this variation, I created a simple tomato sauce that combined 20 oz of peeled san marzano tomatoes with some sauted onions and garlic, ground savory, dried oregano, a splash of red wine vinegar, and seasoned with salt and pepper.

Meatballs
1+ lb of ground beef
2 slices of italian / farm bread, pulsed into breadcrumbs
1/2 cup of finely chopped parsely
1 tbsp dried mexican oregano
pinch of hot red pepper flakes
healthy pinch of salt
1 egg

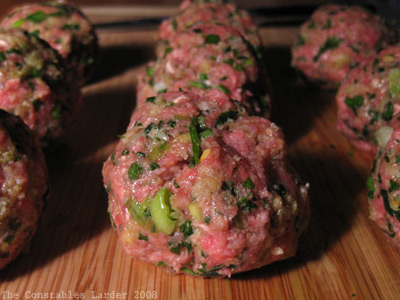
Combine everything and mold the mixture into meatballs. I made 9, each about an inch and a half in diameter. Then brown them in an oven-proof pan and then turn off the heat when browning is complete.

meatballs formed

Once the meatballs are ready to go and the tomato sauce meets your approval, turn off the heat to the tomato sauce and stir in a large bunch of torn arugula leaves (my guess is about 5 oz worth – considerably more than the amount of basil that went into the original recipe).

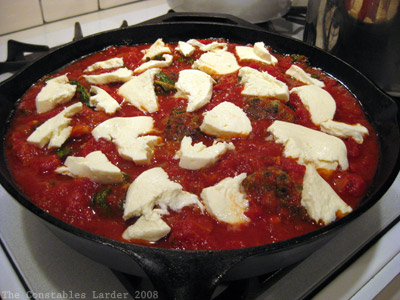
Pour the tomato sauce over the meatballs and add some chunks of mozarella cheese.

meatballs final prep

Place in an oven preheated to 400F and cook for 20 minutes.

Fennel Gratin, Roast Chicken, and a night to remember

At 11pm, I felt relief. A few minutes later, I felt admiration for McCain showing his true colors by conceding with dignity. Then Barack stepped up and said what we all knew was true: tonight we have only opened the door — now the hard work truly begins. We shall see what kind of President Barack Obama really becomes, but I am glad this country chose hope and change. Americans believe that our country is a beacon, and it is time we earned that belief once more. This country has a lot to do and fix, but tonight, I am happy.

But wait, food what when how?

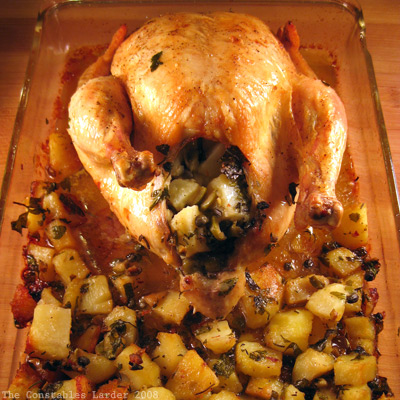
Tonight we made two dishes: a roasted chicken stuffed with olives and potatoes from Stacey at Stacey Snacks, and a fennel gratin from an Alice Waters recipe. Both were absolutely delicious.

Fennel Gratin, slightly adapted from Alice Waters’ The Art of Simple Food

2 large fennel bulbs
2 tbsp butter
1 1/2 tbsp flour
1/2 cup milk
1/3 cup fennel cooking liquid
Salt
pinch of ground nutmeg
pinch of hot hungarian paprika
pinch of hot red pepper flakes
1/2 cup grated parmesan cheese
1 tbsp of minced fennel frond

Cut the fennel bulbs in half and then into wedges. Mince up a small amount of the fennel fronds and set aside. Boil the wedges in salted water for 5 minutes. Remove the fennel with a slotted spoon and set aside. Reserve 1/3 cup of the cooking liquid.

Next, make a white sauce by melting the butter on medium heat, adding the flour, and cooking for a couple minutes, whisking constantly. Then slowly add the milk and fennel cooking liquid in small amounts, whisking as you go. Once the liquid is mixed in, lower the heat to a very soft simmer and cook for another 15 minutes. Turn off the heat and stir in a couple of pinches of salt, and the nutmeg, paprika, pepper flakes, and parmesan (note: Waters uses cayenne pepper instead of the hot paprika and pepper flakes).

Butter a baking dish and spread out the fennel wedges, and spoon the sauce on top. Bake in an oven set at 375F or 400F for 30 minutes or so (note: Waters calls for 375F, but we had the oven set to 400F since we were also finishing the chicken roast). When the tops are browned, remove, sprinkle with a little salt, pepper and the fennel fronds, and serve.

Comment: I found that the amounts for the white sauce led to a thick sauce that did not cover all of the fennel, but that actually ended up being a good thing, keeping the dish from being too rich and allowing you as the eater to choose what kind of mouthful you wanted.

chicken roast

The other part of the meal was a roast chicken with potatoes, olives, capers, rosemary and other good stuff. We spotted this recipe on Stacey Snacks (link), and Lisl prepped and cooked the dish. It was marvelous. Follow that link to the recipe, and listen when Stacey says to make sure that the potatoes are cooked before you put it all in the oven, because the potatoes stuffed inside the chicken will not cook all that much, even in the oven for 1 hr 15 minutes at 400F.

Happy election day.

Beef Pot Roast in Beer

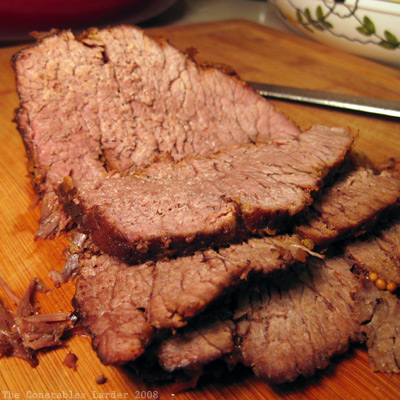
braised beef sliced

Yesterday I decided to do another braise, and since so many of my creations lately have been tomato-based, I decided to riff off of the spice rub from a recent recipe from Sass & Veracity, her Beef Chuck with Vegetables in Red Wine. I used a dark beer and had a few other alterations, but the direction definitely came from Kelly.

But first I wanted to touch on an interesting discussion that Kelly kicked off a few days later that was focused on food photography/blogging and revolving around “food photo snobbery”. You should read her blog and the comments it elicited, but to pull a few lines, Kelly wrote: “The problems begin when a judgment is made about the quality of the dish by looking at the photo alone. If this is all about photos, then why post a recipe.” She also noted to me “If one is taking the time to think about content and “readers” are only scanning the pretty photos, then blogging becomes as impersonal as a pretty cookbook can be.

I can’t resist going big picture for a second. This notion of quality is a recurring one in this era of online creation. When blogging first gained traction, there were (and are) debates over writing quality. YouTube, Flickr, and Second Life — wherever there is “user generated content” — all spur discussions of good versus ugly.

I love this video by Ze Frank (Internet artist/philosopher for lack of a better description), where he’s riffing on “ugly” MySpace pages, and how the lowered cost of creation tools is opening up design to everyone, which is a very cool thing. (Ze is a trip of non-stop ideas — I once shared a taxi with him on the way to a conference and thought my head would explode, but in a good way).

When it comes to food blogs, I appreciate authors who put effort into their pictures (and I count Kelly as one of those). Food photography is damned hard. I’m fighting with it constantly, especially since I do not use fancy equipment of any kind. I like a blog post that shares not just via words and measurements, but through images as well. I’ve probably driven half of you away by this point with all this text and just one picture so far! But I sally on! My personal preference leans towards more natural photos, just as my food preferences lean towards “peasant food” rather than foams and haute cuisine.

Photography is an art form, and as such quality is a subjective thing. Everyone should have confidence in their own subjective tastes, and ignore self-appointed critics. Look to improve, but not to be something you are not! Robert Henri, an influential early-20th-century American painter (he led the Ash Can School / Group of 8), nailed it when he said of art: “The man who has honesty, integrity, the love of inquiry, the desire to see beyond, is ready to appreciate good art. He needs no one to give him an art education; he is already qualified.” (I should note that the Group of 8 got hammered by the art establishment of the time, so it’s no surprise that Henri was saying “stuff your pedigree!”)

Now, speaking of un-fancy photos, on to the pot roast, I mean braise, I mean whatever the heck it is! This one spent part of the time in the oven, and then was booted to the top of the stove to make room for Lisl’s loaf of bread. If it is both a braise and a pot roast, that make it a broast?

And for the record, I find that it is very hard to take pretty photos of braises once plated. I tried for this meal and they were so damn boring, I left them off.

Beef Pot Roast in Beer

2 lb beef chuck roast
2 tsp coarse sea salt
2 tsp peppercorns
1 tsp mustard seed
1 tsp sweet paprika
1 tsp smoked paprika
1 tsp dried oregano
1 tsp brown sugar
6 slices smoked bacon, sliced into 1/2 inch pieces
base of a bunch of celery stalks
1 dark beer (I used a stout)
1 cup of water
2 large onions, loosely chopped
2 bay leaves
4 cloves of garlic, peeled
4 large carrots, peeled
Handful of medium red potatoes, peeled

Preheat oven to 350F. In a mortar, grind up your mustard seeds and black pepper, then mix in the other spices (salt, paprika, oregano, brown sugar). Rub the mix all over your roast.
braised beef rub

In a dutch oven on the stove top, cook the bacon until almost crispy, then remove. Sear the roast on both sides and remove, and deglaze the pot with the beer and water.

Add the roast back in, and sprinkle the bacon and onions around. I also chopped the “foot” off of some stalks of celery to add flavor, and tossed in an extra celery stalk, 4 cloves of garlic, and a couple bay leaves.
braised beef start

Let this cook for 20-30 minutes at 350F, then lower to 290F. At the hour mark, flip the roast. Let this cook for another 2 to 3 hours, flipping the roast once more, then basting it every 40 to 60 minutes or so. Keep an eye that the liquid doesn’t get too low, and add some stock or water if it does (with the heat set this low, I did not have to add more). Add the carrots and potatoes with about 1 1/2 hours left and turn them about halfway through.
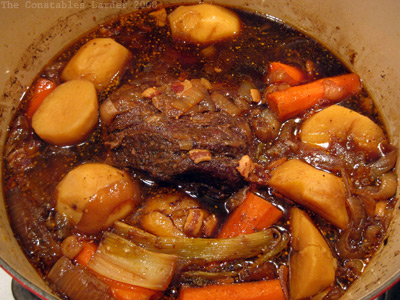
braised beef done

As noted, my pot was booted from the oven but I kept it warm at the lowest setting on our gas stovetop. I removed the roast, carved it across the grain (top picture), and served on a bed of egg noodles with the potatoes and carrots, generously spooning the fabulous liquid from the pot on top.
Roasted Pumpkin Seeds

pumpkin seeds

I love roasted pumpkin seeds and for some reason this is always the only day of the year I do it. Today, as an experiment, I tried the method from Simply Recipes where you boil the seeds in highly-salted water first, and then roast at 400F. This provides a “more balanced salt distribution,” as Heidi put it.

The result was good, I will say that. I split my seeds into three batches, one which was roasted with no additional spices, one which was dusted with a mix of ground coriander seeds, ground cumin seeds, and ground cayenne pepper, and one that was dusted with curry powder.

However, I learned that I don’t want more balanced salt distribution! I not only love the look of the salt crystals on the roasted seeds, I love the haphazard explosion of salt you get when you pop one (or 10) in your mouth. So in future I am going back to my usual method of cleaning the seeds, seasoning them, and roasting them at 375F in a touch of olive oil.

Happy Halloween ya’ll. I hope you had a fun one. Below are the two victims who gave up their seeds for our enjoyment. I love the little guy on the left — he was modeled after a pumpkin drawing that munchkin gave to me.

pumkins

Skirt Steak rolled w Mushrooms and Ginger

No picture tonight, but then this is more of a note-to-self since I was surprised by how much I liked this spontaneous concoction tonight.

Skirt steak (just under 1 lb)
1 tbsp butter
1 yellow onion
Large handful mixed mushrooms
1 tbsp fresh, finely minced ginger
fresh flat-leaf parsley, finely chopped
apple cider vinegar
olive oil
salt and pepper

Peel your onion, cut in half, and slice into very thin half-rings. Clean the mushrooms (I used white button and “baby bella” mushrooms) and slice very thinly. Note: our skirt steak was quite small – fine for two people, but if you are making a larger amount, increase the amount of onion, mushrooms and ginger.

Melt a tbsp of butter and a splash of olive oil in a saute pan on low heat, and then cook the onions until they turn translucent. Add the mushrooms and continue cooking on low heat until everything is well cooked. Add a small pinch of salt and stir in the ginger. Cook for a minute or two then remove from heat.

Cut the skirt steak into two 8-to-10-inch long strips (our skirt steak was about 4 inches wide). Tenderize with a mallet to thin and widen the meat. Sprinkle salt, pepper and parsley on each strip, then add a layer of the mushroom mixture to the top.

Roll each steak strip up tightly and tie each roll at both ends with two lengths of wet kitchen string.

Sear the rolls on two sides quickly on a grill or under a broiler (hence wetting the kitchen string), then transfer to a small baking dish. Drizzle a little olive oil and a tsp of apple cider vinegar on each roll, then place in an oven set to 350F for 10 to 15 minutes. Remove string and serve.

Campanelle with Rabe and Fennel Sausage

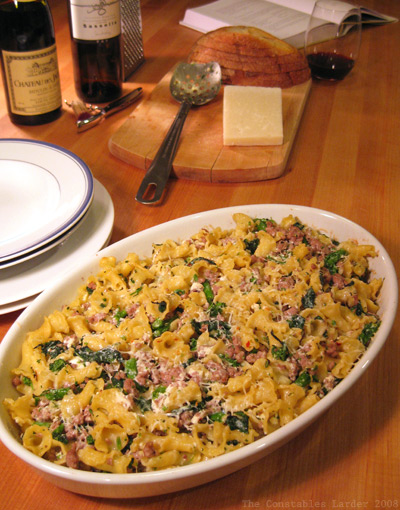
campanelle w rabe

Tonight we whipped together a relatively quick meal inspired by David Tanis’ marvelous cookbook A Platter of Figs, which I’ve raved about previously. In his “winter” menu, he bakes orecchiette with broccoli rabe (rapini) and homemade fennel sausage, and below is our spin. We’ve followed a number of his methods, with the largest differences being that he makes his fennel sausage (without casings) in a separate process, and we also added a touch of chicken broth to keep the dish from being too dry (which we felt it was on first attempt).

6 or 8 servings

1 lb dried campanelle pasta
1 lb brocolli rabe, washed
1 lb ground pork
4 garlic cloves, minced
1 tsp fennel seeds
1/2 tsp red pepper flakes (hot), plus a pinch
1 tsp salt, plus a pinch
1 tsp chopped rosemary
unsalted butter
1/4 lb ricotta
1/3 cup chicken broth
pecorino cheese

Boil the pasta until very al dente in salted water, then remove from the water with a slotted spoon and place on a large baking sheet to cool, drizzling some olive oil on top. Bring the water back to a boil and blanch the broccoli rabe for a minute, then drain in a collander and let cool.

Pre-heat oven to 400F

With a mortar and pestle, crush the fennel seeds and 1/2 tsp of red pepper flakes. In a large saute pan, warm a little olive oil on medium heat, then begin to brown the ground pork, using your spatula to break it into smaller pieces. Stir in the fennel and red pepper flakes from the mortar, and add half the minced garlic and a tsp of salt. Stir together well and when the pork is browned, remove from the pan, drain any excess fat, and set aside.

Roughly chop the broccoli rabe. Then, add a little more olive oil to the saute pan, set it over medium heat, and add the remainder of the minced garlic. Fairly quickly, because you do not want to brown the garlic, add the chopped broccoli rabe, the rosemary, a pinch of salt, and a pinch of red pepper flakes. Stir everything together and turn off the heat.

Combine the pasta, sausage, and broccoli rabe, and chicken broth in a large bowl and gently stir together. Add the ricotta, in small pieces, and stir that in. (Note: we used store bought ricotta, but we really want to make our own)

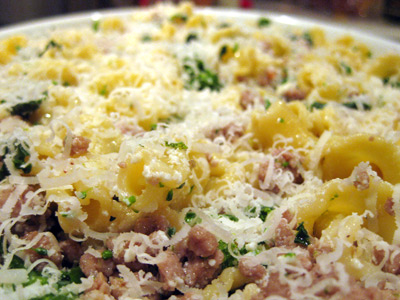
Butter a baking dish, and fill it with the pasta. Depending on the size of your baking dish, you may need to use two. Sprinkle a little pecorino cheese on top. At this point it will look like the below picture:

campanelle w rabe

Cover the baking dish and place in the oven for 15 minutes, then remove the cover and bake for 5 more minutes. Serve with some additional pecorino cheese grated on top or on the side.

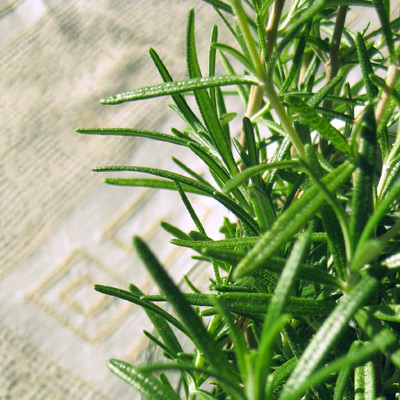
rosemary

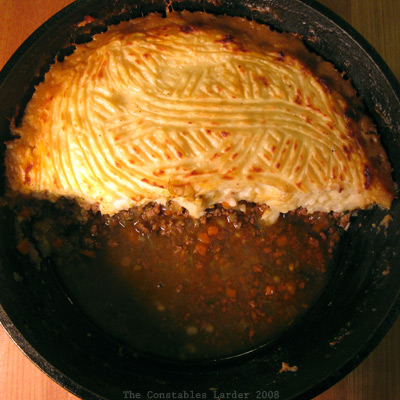
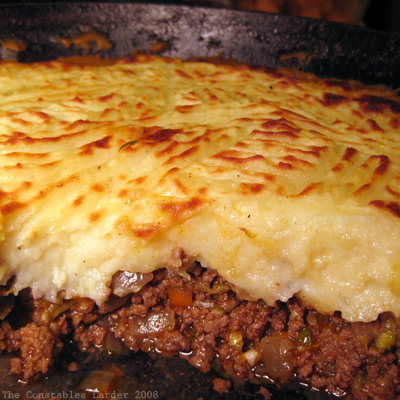
Shepherd’s Pie pt. 2 (riffing on Kali Orexi’s riff)

shepherds pie pt 2

This is where the blogosphere gets fun. The other week, I blogged our usual Shepherd’s Pie recipe. Today I discovered that Kali Orexi (aka Maria), a blogger also here in the New York area, made her version (link to her post). So tonight, I bumped my previous cooking plans and riffed off of her version (not having the exact ingredients in my pantry) and loved the result. Thanks Maria!

The key differences are adding grated cheese to the potatoes, and using a different spice base for the meat mix. In some ways, this version is richer than our usual and I was glad to have an Italian red wine with decent body to accompany. Then again, I’m always glad to have a full bodied red, who am I kidding!

Mashed Potatoes Topping
6 large red boiling potatoes, peeled
1 cup milk
2 tbsp unsalted butter
1/3 cup grated parmesan cheese (or pecorino romano)
salt and pepper

Boil the potatoes in lightly salted water until cooked all the way through (or steam them). You can cut them into smaller pieces to speed cooking. Drain the potatoes, return to the pot, add the butter and mash. Add 1/2 tsp salt, 1/4 tsp pepper, grated cheese, and 1/2 cup milk. Taste for salt. Continue adding milk until the mashed potatoes are quite moist without crossing over into being liquid.

The Base
1 lb of ground beef
2 large cloves of garlic, minced
1 1/2 medium onions, or 1 large, diced
3 medium carrots, diced
2 small/medium zucchini, grated
1 tbsp tomato paste
1/2 cup white wine
1/3 to 1/2 tsp ground cinnamon
1/3 to 1/2 tsp ground all spice
2 pinches of ground cumin
pinch of ground nutmeg
1 to 2 tbsp ketchup
salt and pepper

In a cast iron or oven-proof pan, brown the ground beef and use the spatula to break it up into small bits. Cook with a few pinches of salt, cinnamon and all spice. Remove any excess liquid and set aside.

Preheat oven to 350F

Add a little olive oil to the pan and saute the garlic and onions until the onions start turning translucent, then add the carrots and a few pinches of salt, cinnamon, all spice, cumin, a pinch of nutmeg and some ground pepper. Cook for several minutes, then add the grated zucchini and tomato paste. Once that is folded in and cooking, add the wine. Let this cook for several minutes and stir in the ground beef.

Cook it all together for another five minutes and taste for salt and spices (I kept the spices at a level where they were there but still subtle). At this stage, I wanted to sweeten the mixture up a little bit more, so added the ketchup.

If the mixture starts to dry out, add a little bit of water. Once you are happy with the taste of the mixture, turn off the heat and flatten the top of the mixture. Carefully spoon your mashed potatoes on top, and using the back of a fork, smooth it around. As noted before, I like to then decorate the top with the tines.

Place in the oven and bake for 30 minutes, then turn the oven to broil and let the top brown (but not burn). Let the shepherds pie rest for a few minutes before serving.

shepherds pie pt 2

Too many photo sites? + recipe links 10-23-08

food photo sites

Foodgawker, TasteSpotting, and Photograzing (Serious Eats) — three food photo sites that people flock to. They are similar, and you often see the same pictures across all three.

These sites are a fun place to discover interesting posts and drool on your keyboard (careful with that). With the right photo, they can also be great traffic generators for a blog. A number of bloggers are taking the approach of posting their pictures on all three, but since time is perpetually limited, I would prefer to pick one.

In terms of site speed, they all seem comparable, and all seem to be relatively well-built. I doubt I will have time to get a sense for relative moderation / posting speed. Serious Eats has a large following, but I do not know how much of their traffic is also using Photograzing. According to Compete.com (not the definitive word by any means), Foodgawker has a slight lead now over Tastespotting.

Unfortunately, all of them insist on cropping images to a square. Sure, it makes the page layout more beautiful, but my camera does not take square pictures, and that is not how I frame my shots. I notice that Etsy’s home page has a consistent landscape orientation for displayed images. I would love one of them to differentiate by embracing the non-square world.

So… which one do you prefer?

Recipe Links
I haven’t had time in a while to post my “wannamakes”, the amusing term someone applied to recipes you see and want to save for the future, so here is my batch since the last post (not including a few we already made and enjoyed):

Speaking of links, we enjoyed playing a part in Foodbuzz’s 24, 24, 24 blog event, and they just created a neat little video now up on YouTube.

And I shall end the post, since it gave me a good chuckle, with a link to The Haphazard Gourmet Girls’ alternative spelling/definitions for “locavore”.

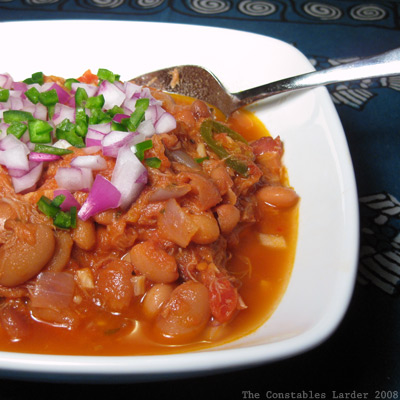
Doubled Braised Pork Chili

Chili (double braised pork)

I love chili, and this one is one of my best. I jokingly called it “double braised chili” because the pork shoulder is braised the night before, and then stewed in the chili the next day. I have also made the braise several nights before, served it as one meal, and saved the majority of the meat for cooking the chili.

Braising the Pork Shoulder (night before)
1 4lb bone-in pork shoulder or butt (upper part of shoulder)
3 dried ancho chiles, seeds and stem removed
1 dried chipotle pepper, seeds and stem removed
3 bay leaves
4 garlic cloves
2 tbsp salt
2 onions, chopped
1 green pepper, de-seeded and chopped (optional)
1 yellow pepper, de-seeded and chopped (optional)
2 cups dry white wine
water
olive oil

Pre-heat oven to 350F

Remove any excess fat from the pork shoulder. In a food processor, combine the ancho and chipotle chilis, bay leaves, salt and garlic and pulse until it is as finely chopped as you can get. Rub the mix all over the pork. In a dutch oven, lay a bed of the onions and peppers, and place the pork shoulder on top. Then pour in the wine and enough water to come a quarter of the way up the side of the pork. Cover and place in the oven, and after 20 minutes lower heat to 300F. Braise for 4 hours, turning the pork over halfway through. You can turn off the oven when you go to bed, leaving the dutch oven covered, and pick up the recipe in the morning.

You might also soak the beans overnight to speed things up the next day.

Making the Chili

Braised pork shoulder
3/4 cup dried pinto beans
3/4 cup dried mayacoba beans
3/4 cup dried vallarta beans
reserved bean cooking liquid
6 slices, thickly cut slab bacon
1 1/2 yellow onions, chopped
1 red onion, chopped
4 cloves garlic, minced
2 28 oz cans crushed or whole tomatoes (chopped)
1 1/2 tbsp tomato paste
2 jalapenos, sliced (with seeds)
2 tbsp ground cumin
1 1/2 tbsp dried mexican oregano
1 tbsp salt
3 bay leaves

Wash the beans and check for any small pebbles. In a large pot, cover with cold water, an inch over the top if they were soaked, and two inches if they were not. Bring to a boil, then lower heat, loosely cover and let simmer for about 40 minutes or until al dente. Remove beans and reserve the cooking liquid.

Remove the pork shoulder from the dutch oven, separate out the bones and excess fat, and using two forks shred the meat into bite size pieces. I used about 2/3 of the pork shoulder in the chili, saving the rest for lunch. Also reserve a ladel-full of the spicy braising liquid (albeit without the oil) and some of the vegetables.

Rinse and dry the dutch oven and place on stove top. Cut up the bacon into 1/2″ pieces and saute in the dutch oven until almost crispy, then remove from pan and turn off heat. Drain or spoon out excess bacon fat, leaving a tablespoon or so in the pan (or remove all, and add in olive oil). On medium-low heat, saute the onions and garlic until onions are translucent, then combine the rest: beans, bacon, shredded pork, spicy liquid/vegetables from the pork braise, tomatoes, tomato paste, jalapenos, and herbs. Add enough of the reserved bean cooking liquid (or stock, if that is your preference) until the chili is moist, but not yet soupy.

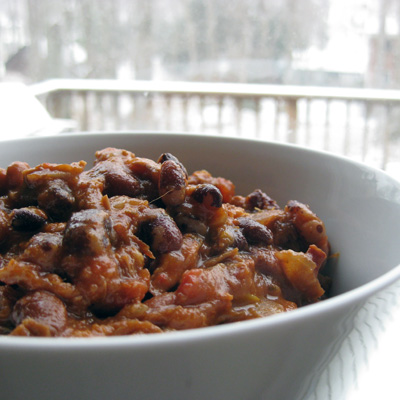
You can either cook this on the stove top at a very slow simmer or place in the oven at 280F. If the chili has too much liquid, let it cook uncovered for a bit (when I grabbed the above photo, it was still a bit too liquidy but still delicious). If it starts getting too dry, ladel in a little bit more of the bean liquid or stock you are using. Taste for heat, salt and spices and adjust to your fancy.

I usually cook this for several hours, giving the liquid plenty of time to concentrate and letting all the flavors mingle.

This chili was fantastic on its own, but we served with some raw chopped red onion, some freshly diced serrano pepper, and a dollop of greek yogurt.

Note on Beans
I have made this chili with various kinds of beans, and different amounts — do not feel bound to the above recipe at all. For a recent version of this chili, I used 1/2 lb of vaquero beans (which were hearty and darkened the chili to a wonderful color) with 1/2 lb of pebbles beans. A common mix in the US is pinto with red kidney beans and great northern beans.

chili snow