Fresh Shell Bean and Green Bean Ragout

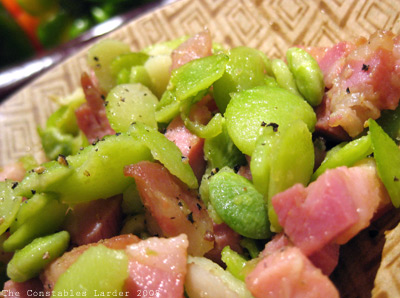
shell beans plated
(part of From Provence to the Catskills, our celebration held as part of of the Foodbuzz 24, 24, 24 blog event)

While we knew that the main course for our feast was going to feature a braised pork shoulder, we waited to select the side dishes until after we had seen the produce coming off of Gill’s farm. Among our bounty from the farm stand was some beautiful fresh cranberry beans and thin just-picked green beans. As the components of the main course were to be inspired by Alice Waters, that led us towards this recipe from The Art of Simple Food with big flashing lights. While I changed up the proportions somewhat and added a bit of lemon at the end, I left most unchanged and this recipe produced a lovely, clean flavored dish that complemented the braise nicely.

Fresh Shell Bean and Green Bean Ragout

1 1/2 cups of freshly shelled cranberry beans
4 cups of green beans
1 white onion, diced
2 garlic cloves, minced
2 tbsp chopped parsley
extra virgin olive oil
salt and pepper
juice of 1 lemon

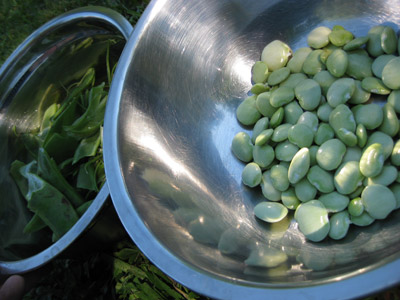
cranberry beans shelled

Place the cranberry beans in a medium saucepan and cover with water about an inch over the tops of the beans. Bring to a boil, then reduce to a light boil / heavy simmer and cook for about 10 to 15 minutes. Remove from heat when tender. Strain the beans, saving 3/4 cup of the beans’ cooking liquid for later, and run cold water over the beans to stop the cooking.

Top and tail the green beans and cut into 1 inch pieces.

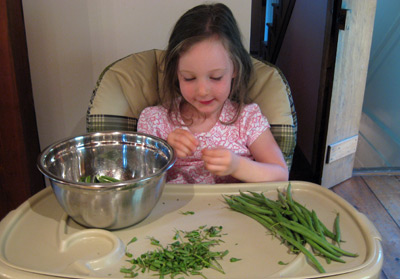
audrey helper
It helps to have a good helper!

Refill the saucepan (or use a different one) with a couple inches of water and bring to a boil. Add the green beans and cook for 3 to 4 minutes, then strain, and run under cold water to stop the cooking.

In a large saute pan, heat up 2 tbsp of olive oil and saute the onions and garlic over medium-low heat until the onions turn translucent. Add in the parsley, green beans, cranberry beans, and the reserved cooking liquid. Raise the heat and bring to a boil, then turn down the heat. Add the juice of 1 lemon and taste for salt and pepper as it cooks for a minute or two more. Serve with a drizzle of olive oil.

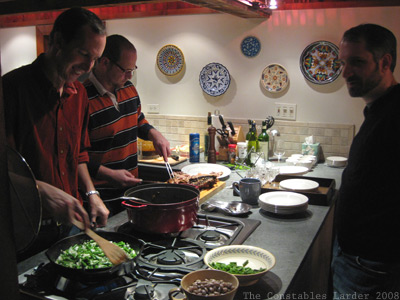
kitchen prepping main
I finished this dish while Mike G lent a hand carving the pork braise.

Romanos in sauce; Cuban Black Bean combinations

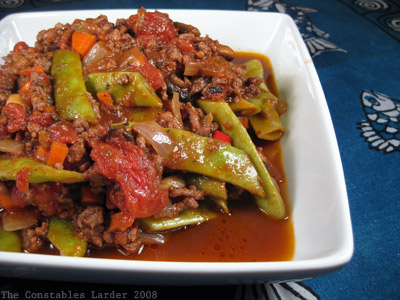
romano beans in sauce

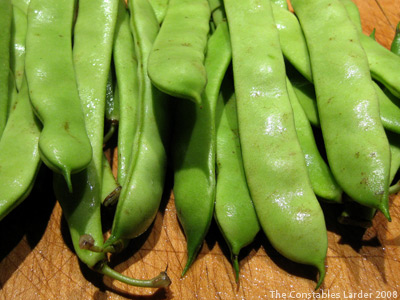
I discovered romano beans earlier this summer at our local farm in the Catskills and have been going back to them ever since, usually quick-sauteing or parboiling with minimal treatment such as lemon or a small amount of butter, or including in a cold tomato salad. I had not thought of slow cooking them with a rich sauce, but that’s where this bubbling fount of ideas called the food blogosphere comes in. Smitten Kitchen caught a New York Times article that I missed and brought this approach to my attention. So thanks Deb!

Tonight I wanted a hearty “one pot” meal, so I took a kind of bolognese approach and the result was delicious and filling.

Roma Beans

Romano Beans in Meat Sauce

serves 2

2 handfuls of romano beans
1/2 lb ground beef
1/2 onion, diced
1 carrot, diced
2 large white mushrooms, or handful of smaller, diced
6 skinless plum tomatoes
1/3 cup tomato puree
1/2 cup red wine
1/3 cup of water
oregano
sage

In a large saute pan, pour in a touch of olive oil and brown your ground beef, then set aside. Add a touch more olive oil, and saute the onions, then add the carrots and mushrooms and cook for several minutes. Add in the whole plum tomatoes without breaking them open yet, add the tomato puree, and return the ground beef to the pan.

Add a couple pinches of salt and ground pepper, a couple pinches of dried oregano (or a bit more if using fresh), and a pinch of dried sage. Add the wine and water (or if using canned tomatoes, as I did, some of the juice from the can). Stir gently so as not to break open the tomatoes, loosely cover and let cook on medium low heat for 10 minutes.

While this is cooking, wash the beans, cut off the ends, and cut the beans themselves to 2″ length or so to make more manageable to eat. A nice aesthetic touch I picked up from Alice Waters’ The Art of Simple Food is to slice the romano beans at a consistent 45 degree angle.

Break apart the tomatoes and taste for spices. Stir the beans into the pan, loosely cover, and cook on low heat for 30 or 40 minutes.

Part 2
Cuban Black Beans

I’ve already blogged this marvelous black bean recipe from Gregory Triana of Blue Cashew in High Falls, NY, so am just going to write a few notes here. Sunday was miserably humid outside, so we took refuge in air conditioning and that made making the beans possible. If you know you can be somewhat near your kitchen over a few hours, this is a great recipe for black beans, with a fabulous sofrito of green pepper and onion. See the recipe here. And you know I love Low and Slow cooking!

I make it differently almost every time, and often bump up the amount of green pepper, onion and cumin from the recipe. Making it is work, no question, but once made there are so many uses that are usually incredibly fast to put together.

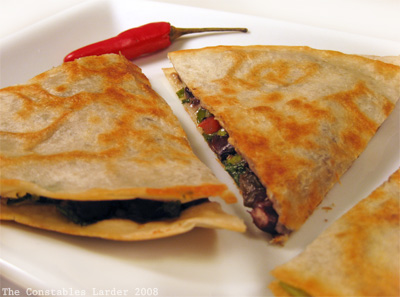
You can make great quesadillas, by adding some corn, scallions, hot peppers of some kind, cilantro, shredded monterey jack cheese, and in my case, some smoked ham:
Black bean quesadillas

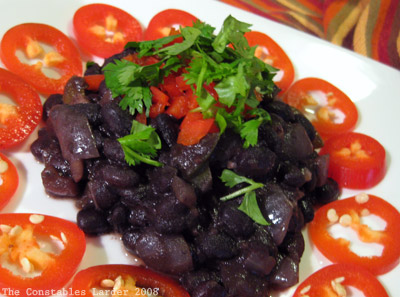
You can serve it as a side dish (that’s a sliced red jalapeno around it):

Black beans

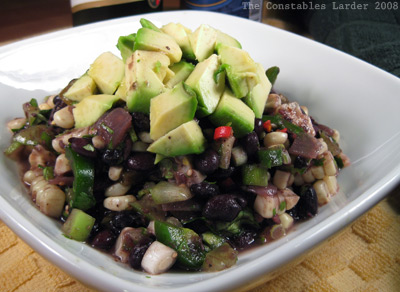
I’ll also mix it into a salsa, such as the below which has chopped tomatillos, a jalapeno, a red hot chili pepper, fresh corn niblets, cilantro, and the juice of two limes (obviously topped with some avocado). I think it’s an ugly picture (nothing to see here folks, move along!), but it tastes great with some chips!

black beans salsa

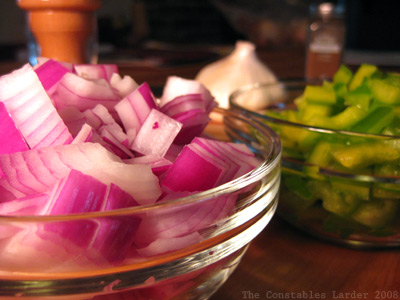
And finally, this picture has no bearing whatsoever, except that I snapped a pic of some ingredients going into the black beans and liked it:
black bean veggies

Why is it that tomatoes spelled with an “e” and tomatillos is spelled without? Ponder.

Lima beans & Pancetta; Weekend in Pictures part 1

I am in Los Angeles this week for work, and Lisl’s probably going to be too busy to post much, so we’ll have to settle for pictures from the weekend up in the Catskill mountains.

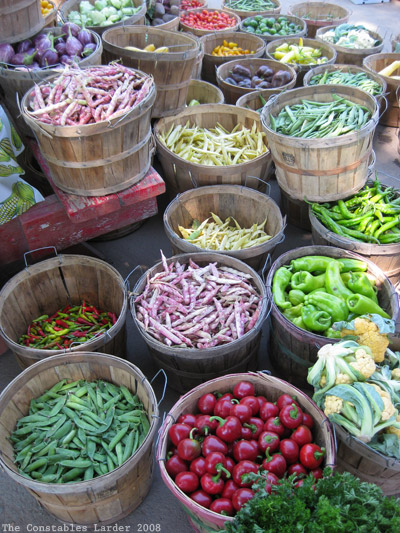
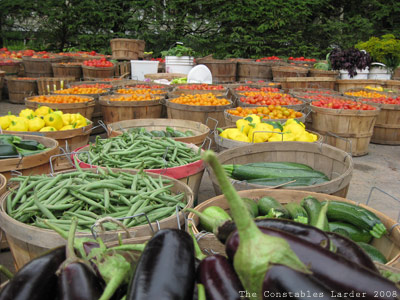
Other than the chili, it was a weekend of small plates, mostly vegetarian. Gill’s farm is still producing a wide range of produce, with cauliflower, lots of fresh beans, and hot peppers added to the mix.

Gill's

Lima Beans & Pancetta

lima and pancetta

This is a very simple side dish: shell the lima beans and place the beans into a pot of boiling water. Simmer for 8 minutes then drain in a colander and cool by running cold water over the beans. If you have time, remove the skins from the larger beans: quickly pinch the skin at the indent of the bean (where it was connected to the pod), then gently squeeze the bean out of the skin from the other side (the curve).

Chop up pancetta into 1/2 inch chunks (or desired size). Heat up a dash of olive oil in a pan, and saute the pancetta over medium heat until it just starts to brown. Lower heat, add a tablespoon or so of butter, and add the lima beans. Gently stir and cook it all together for a few more minutes, then serve with some freshly ground pepper.

shelling limas
Who says prep means being stuck in a kitchen! I took the fresh lima beans up the hillside to shell them under a tree.

Ellie
Our dog Ellie kept me company, carefully watching the antics of Lisl and Audrey as they washed the car. Ingredients to that latter effort included: soap, water, hose, sponges, buckets, and a fair amount of 3-yr-old squealing and giggles.

leaves overhead
The view over my head

Eggplant, Mint and Caper Salad

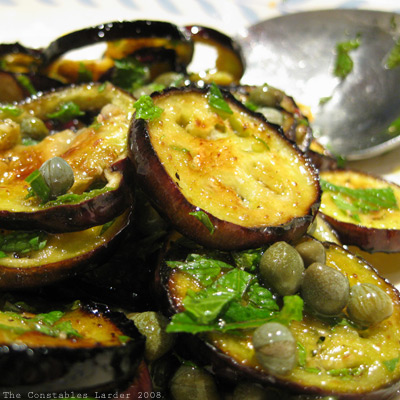
eggplant salad

The other small dish I tried for that meal was an eggplant, mint and caper salad spotted on Smitten Kitchen (follow that link for the recipe at Smitten Kitchen). I had to try this recipe because I love all three of those ingredients, but had *no* idea if I would like it all together.

The end result was surprising and interesting, and got a thumbs up from both Lisl and I. Like Smitten Kitchen, we used long, thin eggplants rather than the big dark ones you typically find in a supermarket.

My notes: keep a careful eye as you broil the eggplant, because mine was cooked a lot faster than the minutes in SK’s recipe and your oven is probably slightly different too. I also think next time I do it, I’ll slice the eggplant more like 1/3 inch thick rather than 1/4 inch.

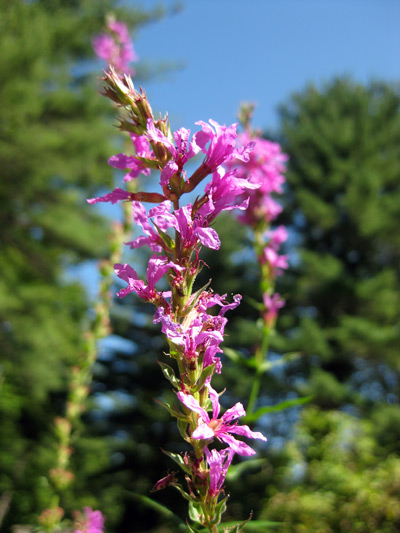
pink flower

Vegetarian Chili

The first project with my Rancho Gordo beans was a vegetarian chili using some of the fresh vegetables from the farm stand. This is another “get it all in the pot and let it cook for a while” dish. For this project, I used the Pebble beans, and of course you can use other, more commonly found beans (a common mix is kidney, pinto and great northern). The colors were a wonderful mix of browns and oranges — it was like Fall in a pot.

Vegetarian Chili

Serves 4 – 6, depending on bowl size 😉

1 lb pebble beans (or other bean mixture)
3 medium tomatoes
7 or 8 tomatilloes
2 red hot chili peppers
2 hot cayenne peppers (if available, otherwise use red chili peppers or jalapenos)
2 ears of corn (1 for chili, 1 for garnish)
2 onions (1 left whole, 1 chopped)
4 scallions, chopped
4 cloves of garlic, minced
2 bay leaves
2 tbsp ground cumin
2 tbsp fresh oregano, chopped (or half as much dried oregano)
salt
cilantro
natural greek yogurt
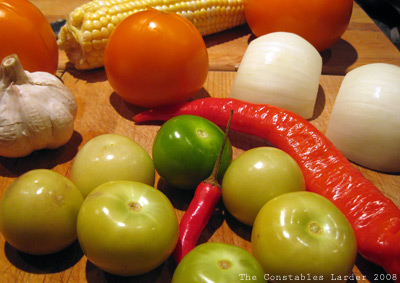
chili - ingredients
Just a few of the ingredients

Prepping the beans
Rinse and quickly pick over the beans to remove cracked beans or small stones. Soaking is optional (just requires longer cooking), but beans are easier to digest if you bring them to a boil for a couple of minutes, then turn off the heat to let them soak for over an hour. When done soaking, drain and rinse in a collander.
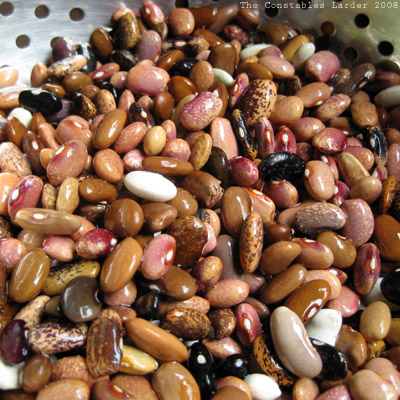
chili - beans
Rinsed Pebble beans, pre-soaking

Cooking the beans
Peel off the roughest outer layers of an onion and poke a few holes in it with a knife, making one large enough to insert a bay leaf. Place the rinsed beans and onion in a heavy bottomed pot (I like using my cast iron dutch oven), fill with cold water about an inch over the tops of the beans, and bring to a boil. Once the water is boiling, reduce to a simmer and cook for 45 minutes or so. Save at least 4 cups of the cooking liquid, and then drain the rest, putting the beans to the side in a bowl.

Cooking the Chili
Preheat the oven to 280F.

Chop up the onion and scallions, mince the garlic, and saute in the dutch oven on medium-low heat with a little bit of olive oil. If you have time to skin and de-seed your tomatoes, do so, then roughly chop them up and add to the pot. Remove the husks from the tomatilloes, dice, and add to the pot. Cut the kernels of an uncooked ear of corn and add to the pot. Add the oregano and ground cumin, 2 tsp of salt, and 2 of the hot peppers, minced. Finally add in the beans and a cup of the bean-cooking liquid, and mix it all together gently. As you will see in the below picture, I also kept and added the whole onion from cooking the beans.

Cover and place in the oven.
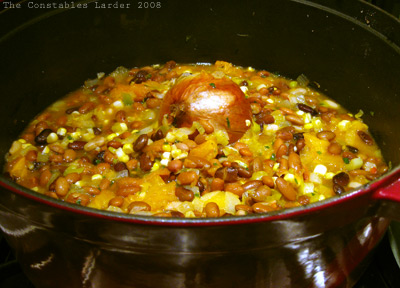
chili - cooking

At this point, you can cook on low heat for as long as you have (or can bear), but at least another hour. Check every 30 – 45 minutes and add more of the bean-cooking liquid if it is looking dry. I probably ended up adding at least two cups of liquid. About an hour in, I removed the whole onion and added a fresh bay leaf. Continue to taste for the desired balance of cumin, salt and heat from the fresh peppers, and adjust accordingly. I used 2 red chili peppers and 2 fresh cayenne peppers, but with fresh peppers heat can really vary so treat carefully if you have a sensitive palate. When you add more heat, let it cook until your next checkpoint before tasting again and adding.

Depending on your desired texture and aesthetics, if you want to thicken up the chili, put one or two large spoonfuls of the chili in a food processor and roughly puree, then stir back into pot. (Note: it isn’t quite as pretty if you do this, but you do a get a wonderfully thick “comfort food” texture.)

Before serving, chop up some fresh cilantro and cook an ear of corn (method of cooking is of no matter – I microwaved it still in the husk for 2.5 minutes) and cut off the kernels. Add a dollop of yogurt (or sour cream) to each bowl and garnish with the fresh corn kernels and cilantro. Other nice garnishes are diced sweet red pepper, grated cheese, and diced red onion. It can be fun to serve each garnish in an individual bowl so your eaters can take their pick.
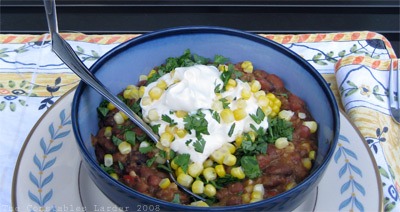
chili - served

Additional notes:
Using the oven isn’t necessary, but I find that it reduces any risk of burning at the bottom of the pot (a handy thing if you get tied up by, say, a mischevous 3 year old and forget to check on it for a bit) and makes it easier to keep the chili at a low simmer. In my case, I actually started the chili yesterday evening and left it in the oven with the heat turned off when I went to bed (while placing the extra bean-cooking liquid in the fridge). When I woke up, I added some more liquid to the pot, brought it all to a boil again on the top of the stove, and then placed back in the oven for a few more hours.

If you don’t have fresh hot peppers, you can use chili powder, but remember to start light (say, a tsp or two) and build up to the desired heat level, and you might also scale back the garlic, cumin, and oregano since chili powder is a mix of spices.

Finally, those of you who have been reading this blog are picking up that I am more about country/peasant/comfort food than haute cuisine. While I had to resist mightily from adding any meat to this chili dish, it came together well and was a filling and truly delicious meal.
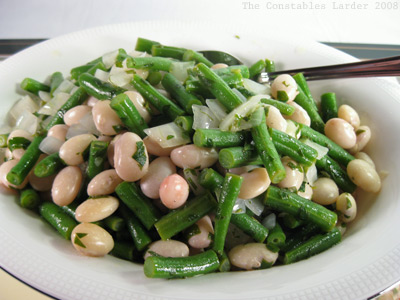
Geeking out with beans

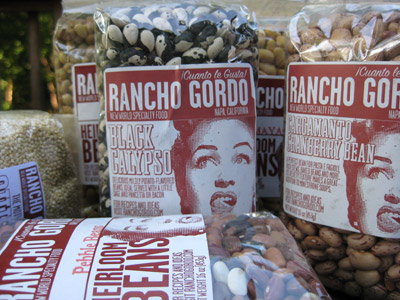
Rancho Gordo
My Rancho Gordo beans came today! Let the games begin!

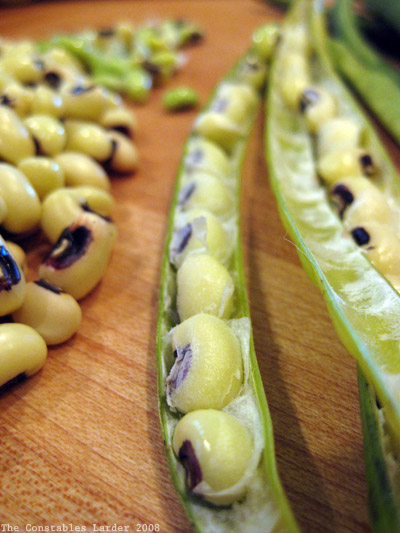
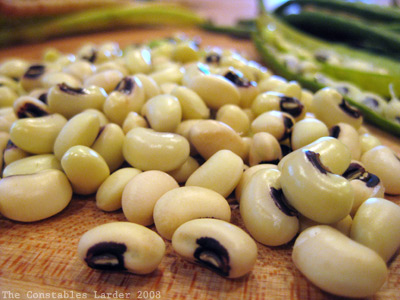
fresh blackeyed peas

When we dropped by Gills farm stand last weekend, they had fresh black-eyed peas. Some of the pods were really green and soft, with young, green beans that hadn’t fully developed (you can vaguely see them in the background above, out of focus). To any black-eyed pea experts out there: does that mean they were picked too soon?

fresh blackeyed peas

And Now For Something Completely Different…
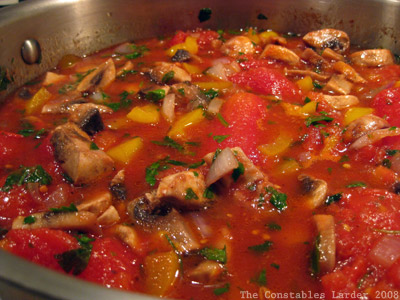
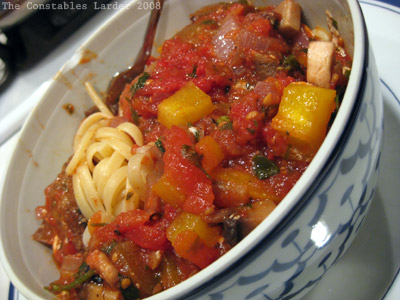
Tonight my attention was starting a lamb and lentil (part of the geeking out with beans day) braise which will be finished off tomorrow when I get home from work. So for dinner we whipped together linguine with a simple tomato sauce. Once upon a time, I used to think you had to cook a tomato sauce for hours but it’s really not true. Tonight’s version took about 40 minutes and was great.
quick pasta sauce

Chop and saute an onion in olive oil, followed by chopped mushroom, sweet yellow pepper, and a whole bunch of parsley. Let it all cook for a few more minutes, then add a can of whole, peeled tomatoes with some salt and pepper. Simmer the sauce for 30 more minutes before breaking up the tomatoes into smaller chunks with a spatula. Taste for salt and serve on some al dente linguine. Fresh, simple, fast, healthy, tasty and filling. All good descriptors for a work-night meal.

linguine

Lastly, we’ve created an email for the blog for anyone who wants to contact us but doesn’t want to leave a public comment: larder -at- constable -dot- net. Pardon my spelling it out that way, but spam bots are such a scourge!

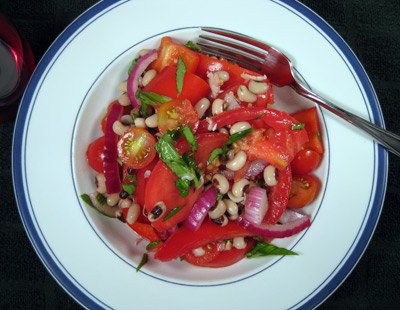
Tomato & Black Eyed Pea Thai-inspired Salad

Tomato & Black-eyed Pea Salad
If you are looking for ways to use your summer tomatoes, and want to try an interesting salad dressing, you might enjoy this combination. I used a Thai-inspired base dressing normally used in Yum Nuea, but then mixed with basil (in Yum Nuea, you add cilantro, ginger and serrano peppers).

The resulting salad was a satisfying meal unto itself (the black-eyed peas were critical to making it hearty), and an interesting new flavor which we enjoyed.

The following amounts served two

Dressing
2 tbsp cup lime juice
1 to 1 1/2 tbsp fish sauce
1/2 tsp sesame oil
Several drops of dark soy sauce

1/2 cup of black eyed peas
2 ripe medium or large tomatoes
Handful of cherry tomatoes
1 red pepper
Red onion
Handful of basil leaves
Several leaves of lemon basil

Cooking the black-eyed peas: I put the black-eyed peas in a bowl to soak in the morning before heading to work, but that is optional. In any case, put the beans in a pot of cold water about 1 inch over the top, bring to a boil, then lower to a gentle simmer and cook until tender (about 25-30 minutes if soaked, and another 15 minutes or so if not). I made a larger batch, but used roughly half a cup in the salad.

In a small bowl, combine the dressing together, finalizing amounts to taste (start with minimal soy sauce and add drops to taste — like you experience with salt, if you go overboard with soy sauce by accident, you are better off starting over than trying to fix).

Cut a few thin slices of red onion, break into smaller pieces, and soak in the bowl with the dressing while you finish the rest of the salad.

Slice your large tomatoes into thin crescents. Halve your cherry tomatoes. Remove the stem, seeds and inside of the red pepper and chop into bite-sized pieces. Do a loose chiffonade of the basil leaves, i.e. cut into very thin strips (note: I didn’t bother rolling up the leaves before cutting, which is a common chiffonade approach).

Combine everything into a bowl, toss, let sit for just a few minutes, toss again and serve. We paired this with a nice rose.

Chickpea Stew (and mag cover whimsy)

chickpea stew
Tonight I adapted a recipe from the Sept 2008 edition of Food & Wine, a chickpea and spinach stew (original recipe here). I can’t resist saying, the cover of the magazine absolutely cracked me up. It read:

our 20 best fast recipes ever

So does a food mag have to be like Cosmo now? And I query: do they really come up with 20 new best sex positions each month? (I refer to Cosmo there, not F&W, although I guess that could be an interesting editorial direction…) . At least F&W stuck to a round number, unlike Details which prefers things like 133 ways to look great… I’m imaging the editorial cutting table: “sorry Boss, we tried to make it to your 135 quota but just couldn’t get there!

Enough amusing myself — onto the food! This is a great dish, and while I’m sure the original recipe is good, I had to go my own direction. I diverged from F&W in a number of ways: smaller portion, longer cooking (I know … efficiency yada yada yada but it’s a STEW, not a chickpea stirfry for crying out loud), and slightly different ingredients (for one, I can’t stand raisins in cooked food but that’s just me — I’m a “savory” type).

Chickpea Stew

1/2 lb of dried chickpeas (approx)
7 oz bag of baby spinach
1 medium yellow onion or half a large vidalia onion
3 roma tomatoes
1 medium garlic clove
small pinch of saffron
1 tsp hot hungarian paprika
1/2 tsp cumin
1 tbsp tomato paste
1 bay leaf
salt and pepper
olive oil (extra virgin if you have it)

The Chickpeas
You can easily use a can of pre-cooked chickpeas, but I don’t like the taste of the liquid you get with canned beans, so I try to cook from dried beans whenever time permits (one also has more control over tenderness that way). Before I went to work this morning, I soaked about half of a 1 lb bag of dried chickpeas in a bowl of cool water.

Rinse the chickpeas, placed them in a medium pot and covered with water about an inch above the chickpeas. Bring them to a boil, lower heat to a simmer, and cook for about an hour (you can add things like a carrot, onion, parsley stems, or bay leaf if you feel inspired). If you don’t have time to soak, but want to use dried beans, you’ll probably need to let them cook for another 40 to 60 minutes. Once your chickpeas are done, save three cups of the cooking liquid, drain the pot and return the chickpeas and 1 cup of the cooking liquid to the pot.

tomato crosshatch

The Tomatoes
I skinned and seeded the Roma tomatoes. If you are in a hurry, you can skip this step, but it is a nice touch. To skin a tomato, cut a shallow X at the bottom (I find with the oblong roma tomato, it is easier with slightly bigger crosshatch cuts than normally needed) and place it in boiling water for about 30 seconds. Once it cools, the skin should come off easily. Quarter the tomatoes and use your fingers to gently scoop out the seeds. Then loosely chop into smaller pieces and add to the pot with the chickpeas. Turn on the heat and get the chickpeas, liquid and tomatoes to a simmer.

The Onion
Chop your onion and saute it with a tablespoon of olive oil until it just turning translucent, then add to the pot. Keep the saute pan handy for the spinach (below).

The Spices
Mash a medium-sized clove of garlic with the flat of your knife and remove the skin. Then chop and place in a mortar. Add the ground cumin, hot paprika, 1/4 tsp of salt, and (very optionally, given the price of saffron) a pinch of saffron threads to the mortar. Pound into a paste and then add to the stew pot, along with a bay leaf, the tomato paste, and 1/2 cup of the reserved liquid (if you forgot to reserve any, just use water). Stir and keep at a low simmer for 20 minutes.

You want the stew to be slightly liquidy but not soupy, so continue adding the reserved liquid as needed as the stew thickens, stirring periodically. Add salt and pepper to taste (I estimate that I added another 1/4 tsp of salt here). You might also decide to add more cumin if you want a stronger spiced meal.
Adding the Spinach
As the stew is lightly simmering, saute the baby spinach in a tablespoon of olive oil for a couple of minutes until it has just cooked down. Drain in a collander and press on the leaves to drain the extra liquid. Mix the spinach into the stew pot and let simmer for another 10 or 15 minutes, adding any extra reserved liquid to achieve the consistency you want, and tasting for spices.

When you serve, you can drizzle a little more olive oil and/or grind a little black pepper on top of each bowl. I ate this with some grilled sausages, but frankly it would be a great, very satisfying meal unto itself with a big hunk of good bread. I want to try it again adding carrots, parsley, and another version with more heat from hot peppers.

Sunday Easy: black bean grilled cheese with roma beans

Sunday was a gorgeous, remarkably cool day in the Catskills and we visited some friends for a feast of a lunch. We didn’t have much time for dinner but I whipped up some fast and yummy “comfort food”. I have no idea what it should actually be called – “black bean grilled cheese” sounds about right (although not a sandwich).

My base was some unused black beans left over from Saturday night (an experiment with Poblano peppers that went horribly wrong – “don’t ask, don’t tell” is my policy for that dog’s breakfast kthxbye). Thankfully this meal came out delicious. Redemption! (although, smoked ham and a layer of melted jack cheese? what a shoo-in!)

Black bean Fry

Black Bean Grilled Cheese (for lack of a better name)

The following amounts served 2 and 1/4 people pretty well

Smoked ham, cubed, about a cup’s worth
Cooked black beans, about 1 1/2 to 2 cups
1/4 lb Monterey Jack cheese
1 tsp Ground cumin
1/2 tsp Paprika
Salt
Breadcrumbs

Cut hickory smoked ham into 1/4 inch cubes. Heat a dash of olive oil in a cast iron frying pan (or a pan you can place in the oven) and lightly brown the ham, stirring regularly, on medium-high heat. Lower the heat and add a 1 1/2 cups of cooked black beans (pre-made or canned). Add 1/4 cup of water, then 1 tsp of ground cumin, 1/2 tsp of paprika, and some salt to taste.

Stir in the spices and let cook for about 5 to 10 minutes together, adding small amounts of water if needed – you want it moist but not soupy. Turn off the heat, and sprinkle grated monterey jack cheese over the top, and then add a light layer of breadcrumbs. Place the pan under the broiler to brown the cheese and breadcrumbs — depending on how close the pan is to the broiler heat, this can happen really quickly. This will melt the cheese and the toasted breadcrumbs will add a nice texture.

Note: if you are working with dried beans, you’ll need to start a couple of hours earlier. Place in a pot with a bay leaf (and/or half an onion), cover with water, and bring to a boil, then simmer for about 1 to 1.5 hours until tender. Keep an eye on the water level and add more if it falls below the top of the beans. I’ll also note that I almost never use bought breadcrumbs — rather I just put a couple of slices of farm bread in a food processor.

Roma Beans
Washed roma beans

I served the black bean concoction with some roma beans from our local farm. I’d never cooked roma beans before, but they looked great and the nice lady at the farm stand said to treat them just like green beans. I nipped off the ends and boiled them for about 3 minutes and tossed with a small amount of salt and butter, and they were wonderful.

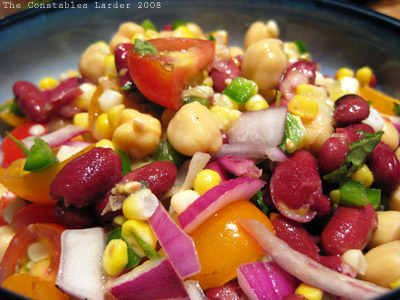
Summer Bean Salad

Bean Salad
We’re back up in the Catskills and dropped in at our favorite local farm stand. I got to walk into the fields and pick a peck of fresh parsley, which is always fun for a city boy like me. Continuing on the vegetarian bent, and armed with fresh corn, tomatoes and peppers, I whipped up a simple bean salad (I was put in the mood by Food Blogga, who had gone with more of a Southwestern bent).

1 can red kidney beans
1 can chick peas
1/2 red onion, loosely chopped
big handful of red and orange cherry tomatoes, quartered
2 (hot) fresh jalapenos, seeded and finely chopped
2 ears of corn
2 lemons
olive oil
fresh oregano
fresh lemon basil
salt and pepper

Thoroughly rinse the kidney beans and chick peas in a colander, removing any loose skins. Let drain, and add to salad bowl along with the tomatoes, red onion, and jalapeno.

I normally prefer to grill corn, but time was limited so I cooked each ear of corn (with the husk still on) in the microwave for 2 min, 40 seconds. After it cooled slightly, I removed the husk (be careful not to burn yourself) and then cut the kernals off the cob with a sharp knife, setting the cob pointing vertical and slicing downward, then rotating to do another downward cut (note to self: see if there’s a better way).

I wanted a really clean flavor for the salad, so kept the dressing simple by combining the juice of two lemons, some olive oil, a small handful each of chopped oregano and lemon basil, and some salt and pepper. We didn’t have time to let it all marinate together, but when a salad like this is well mixed you get a wonderful combination of flavor with each bite.

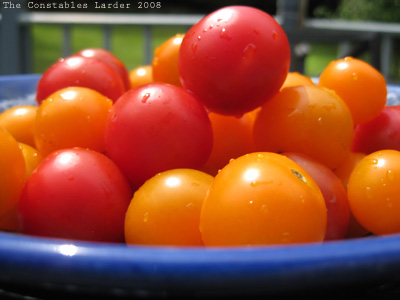
Cherry Tomatoes
Better than candy!
Gill's Farm
Right off the farm.
sunflower

Zucchini Falafel (thank you Haalo)

Falafel
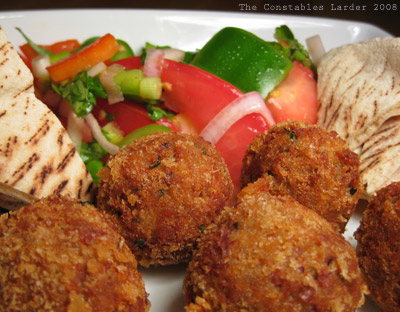
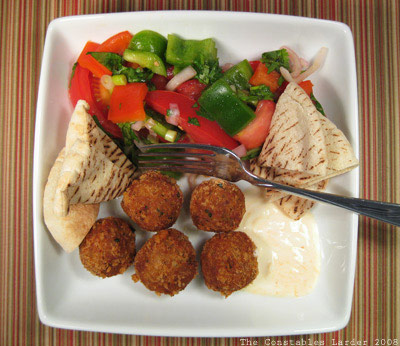
Last night I decided to try the Zucchini Falafel recipe from Cook (almost) Anything at Least Once. Let’s just say that when both Lisl and I go back for thirds, it’s a winner. I’m not going to duplicate the recipe here since you can follow that link above to the source, and I followed it pretty closely for once. My comments: I decided to fry them in about an inch of corn oil (the diameter of my falafels were about an inch) and the result was delicious and crispy. If you would prefer to bake, Haalo has some tips in this comment (link).

I served them with a dipping sauce of natural greek yogurt mixed with a few drops of Sriracha hot chili sauce. I also whipped up a basic summer salad of tomatoes, peppers, shallots, spring onions, and cilantro with a dressing of olive oil, lime, rice vinegar and a few drops of sesame oil (yes, I’m definitely on a cilantro and lime kick right now).

Photography vent time: I’m definitely getting frustrated with my Mac and Photoshop CS3. I’ve been working out how to get the lighting and white balance adequate with my digital camera, but the radical difference between how colors are typically presented on Macs versus PCs makes it very hard to trust how an image is going to appear to others (on Macs these images might appear a bit washed out, while on PCs the saturation might seem fine). I am enjoying the visual art learning curve of food photography, but this is an irritant!

Falafel

redpepper