Mags to Blogs + Recipe Links

There was a time when I hit the magazine racks once a month to choose a magazine out of the Gourmet, Saveur, Bon Appetit, and Food & Wine selection. I never knew which title I would want each month. I bought them for inspiration and the fabulous photography (who doesn’t love some good food pr0n?). But I have to admit, I’m wondering why I would spend the money on magazines at all when I can barely keep up with excellent posts from food bloggers.

There are so many blogs where the photographs are great, the culinary ideas delicious, and the writing down to earth. Not to mention that in the foodiesphere, it is participatory, i.e. you can have a conversation or send someone a smile through comments, email, or a vote on sites like Foodbuzz. I admit that we currently have subscriptions to Food & Wine (which used to be my least favorite, but may actually now be my most favorite) and Gourmet, but I have to wonder for how long. How do those magazines raise the bar to compete?

I now have 55 food blogs in my RSS feeder (luckily food blogs are much easier to scan and follow than other blog categories), and it continues to grow. Here are a few links to recipes over the last week or so that I want to try (in no particular order):

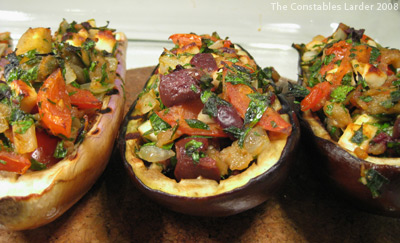
Stuffed Eggplant with Greek Flavors

Stuffed Eggplant
Lisl found herself missing authentic Greek food this weekend, and we had picked up some lovely young eggplants at the farm on Sunday. What she really wanted was Papoutsakia, which has ground beef and cheese, however there hadn’t been any time to pick up meat at the supermarket so I went vegetarian. I found a recipe on Epicurious that I modified to my needs, and was happy with the net results.

3 small to medium eggplants
2 large handfuls of fresh parsley, chopped
1/2 cup feta cheese, chopped into small cubes
1/2 cup of black kalamata olives, pitted and chopped
2 medium tomatoes, chopped or cut into thin strips
1 yellow or vidalia onion, chopped
2 cloves garlic, minced
olive oil
salt and pepper

Cut the eggplants in half lengthwise and score them in a crisscross fashion with a sharp knife, making sure not to cut all the way through to the skin. I used a metal teaspoon to scoop out the meat in the middle of the eggplants, making sure not to dig too close to the skin, and creating little eggplant “boats” (the scoring makes it easier to scoop the meat out and helps define the thickness of the edges).

Lightly salt the flesh side of the boats and place down on some paper towel to drain for about 20 minutes. Chop up the scooped eggplant, salt and let drain in a colander for 20 minutes. Then try to pick up any extra moisture with a paper towel.

Lightly coat the top of the eggplant boats with olive oil and either grill (face down) or broil (face up) the eggplant for about 5 minutes, being careful not to burn them. Then in a skillet, add several tablespoons of olive oil and cook the chopped eggplant until golden Add the onions and garlic and cook until the onions are almost translucent. Turn off the heat and add the tomatoes, parsley, feta and olives. Salt and pepper to taste. If the mixture seems too dry, add a touch of water to moisten it up, since it will dry some when baked.

If your kalamata olives are not pitted, smash each one with the flat side of your chopping knife (kind of like peeling garlic). This should make it pretty easy to remove the pit with your fingers.

In a baking dish, fill each boat with a hefty portion of the stuffing and if you want, drizzle a tiny bit more virgin olive oil on top. Now the Epicurious recipe calls for broiling the dish for another 5 minutes, however I found that the eggplant boats needed to cook (melt) a little more, so I would recommend baking for 15 minutes at 350F before turning on the broiler for a few minutes at the very end.

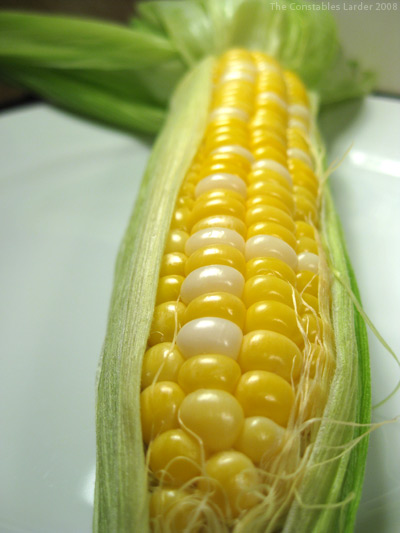
We ate these with some fresh corn and it was quite satisfying, although with more time it would have been fun to add some other Greek elements to the plate.

Stuffed Eggplant

Sunday Easy: black bean grilled cheese with roma beans

Sunday was a gorgeous, remarkably cool day in the Catskills and we visited some friends for a feast of a lunch. We didn’t have much time for dinner but I whipped up some fast and yummy “comfort food”. I have no idea what it should actually be called – “black bean grilled cheese” sounds about right (although not a sandwich).

My base was some unused black beans left over from Saturday night (an experiment with Poblano peppers that went horribly wrong – “don’t ask, don’t tell” is my policy for that dog’s breakfast kthxbye). Thankfully this meal came out delicious. Redemption! (although, smoked ham and a layer of melted jack cheese? what a shoo-in!)

Black bean Fry

Black Bean Grilled Cheese (for lack of a better name)

The following amounts served 2 and 1/4 people pretty well

Smoked ham, cubed, about a cup’s worth
Cooked black beans, about 1 1/2 to 2 cups
1/4 lb Monterey Jack cheese
1 tsp Ground cumin
1/2 tsp Paprika
Salt
Breadcrumbs

Cut hickory smoked ham into 1/4 inch cubes. Heat a dash of olive oil in a cast iron frying pan (or a pan you can place in the oven) and lightly brown the ham, stirring regularly, on medium-high heat. Lower the heat and add a 1 1/2 cups of cooked black beans (pre-made or canned). Add 1/4 cup of water, then 1 tsp of ground cumin, 1/2 tsp of paprika, and some salt to taste.

Stir in the spices and let cook for about 5 to 10 minutes together, adding small amounts of water if needed – you want it moist but not soupy. Turn off the heat, and sprinkle grated monterey jack cheese over the top, and then add a light layer of breadcrumbs. Place the pan under the broiler to brown the cheese and breadcrumbs — depending on how close the pan is to the broiler heat, this can happen really quickly. This will melt the cheese and the toasted breadcrumbs will add a nice texture.

Note: if you are working with dried beans, you’ll need to start a couple of hours earlier. Place in a pot with a bay leaf (and/or half an onion), cover with water, and bring to a boil, then simmer for about 1 to 1.5 hours until tender. Keep an eye on the water level and add more if it falls below the top of the beans. I’ll also note that I almost never use bought breadcrumbs — rather I just put a couple of slices of farm bread in a food processor.

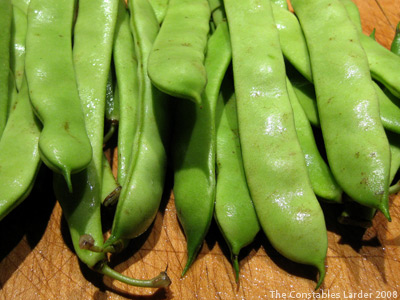
Roma Beans
Washed roma beans

I served the black bean concoction with some roma beans from our local farm. I’d never cooked roma beans before, but they looked great and the nice lady at the farm stand said to treat them just like green beans. I nipped off the ends and boiled them for about 3 minutes and tossed with a small amount of salt and butter, and they were wonderful.

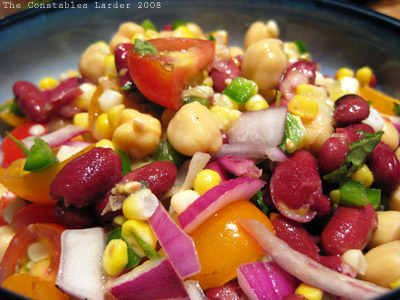
Summer Bean Salad

Bean Salad
We’re back up in the Catskills and dropped in at our favorite local farm stand. I got to walk into the fields and pick a peck of fresh parsley, which is always fun for a city boy like me. Continuing on the vegetarian bent, and armed with fresh corn, tomatoes and peppers, I whipped up a simple bean salad (I was put in the mood by Food Blogga, who had gone with more of a Southwestern bent).

1 can red kidney beans
1 can chick peas
1/2 red onion, loosely chopped
big handful of red and orange cherry tomatoes, quartered
2 (hot) fresh jalapenos, seeded and finely chopped
2 ears of corn
2 lemons
olive oil
fresh oregano
fresh lemon basil
salt and pepper

Thoroughly rinse the kidney beans and chick peas in a colander, removing any loose skins. Let drain, and add to salad bowl along with the tomatoes, red onion, and jalapeno.

I normally prefer to grill corn, but time was limited so I cooked each ear of corn (with the husk still on) in the microwave for 2 min, 40 seconds. After it cooled slightly, I removed the husk (be careful not to burn yourself) and then cut the kernals off the cob with a sharp knife, setting the cob pointing vertical and slicing downward, then rotating to do another downward cut (note to self: see if there’s a better way).

I wanted a really clean flavor for the salad, so kept the dressing simple by combining the juice of two lemons, some olive oil, a small handful each of chopped oregano and lemon basil, and some salt and pepper. We didn’t have time to let it all marinate together, but when a salad like this is well mixed you get a wonderful combination of flavor with each bite.

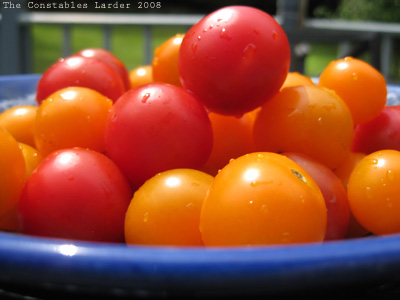
Cherry Tomatoes
Better than candy!
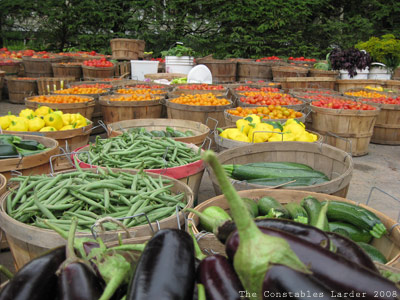
Gill's Farm
Right off the farm.
sunflower

Zucchini Falafel (thank you Haalo)

Falafel
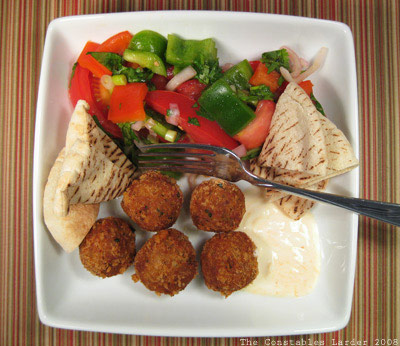
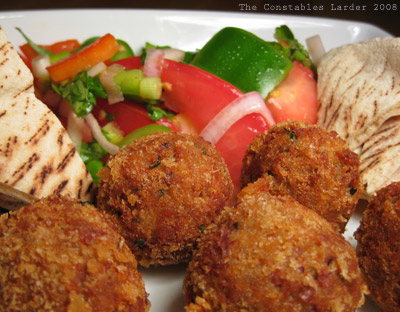
Last night I decided to try the Zucchini Falafel recipe from Cook (almost) Anything at Least Once. Let’s just say that when both Lisl and I go back for thirds, it’s a winner. I’m not going to duplicate the recipe here since you can follow that link above to the source, and I followed it pretty closely for once. My comments: I decided to fry them in about an inch of corn oil (the diameter of my falafels were about an inch) and the result was delicious and crispy. If you would prefer to bake, Haalo has some tips in this comment (link).

I served them with a dipping sauce of natural greek yogurt mixed with a few drops of Sriracha hot chili sauce. I also whipped up a basic summer salad of tomatoes, peppers, shallots, spring onions, and cilantro with a dressing of olive oil, lime, rice vinegar and a few drops of sesame oil (yes, I’m definitely on a cilantro and lime kick right now).

Photography vent time: I’m definitely getting frustrated with my Mac and Photoshop CS3. I’ve been working out how to get the lighting and white balance adequate with my digital camera, but the radical difference between how colors are typically presented on Macs versus PCs makes it very hard to trust how an image is going to appear to others (on Macs these images might appear a bit washed out, while on PCs the saturation might seem fine). I am enjoying the visual art learning curve of food photography, but this is an irritant!

Falafel

redpepper

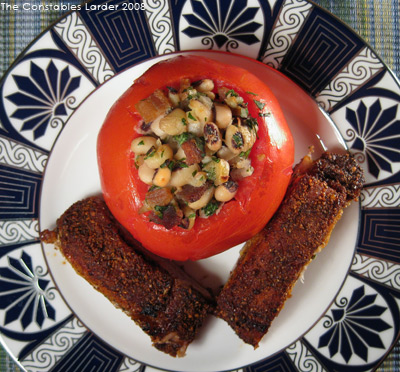
Dry Rub Pork #2, Stuffed Tomatoes with Black-eyed Peas

dry rub pork and stuffed tomatoes
Well this was — hold on, I need to pour another glass of wine — an interesting night but the results were actually delicious (yes, miracles happen). You are going to say, you did WHAT with your oven in July heat? Well, let’s start with confessions. I left the grill on last night and so ran out of propane —

hey wait a sec, it was a long day of work and I was tired!
yeah?
well, that’s what my wife said too.

Anyway, the salient point is that outdoor cooking was out. I got home from work and the first question as I fed the munchkin was (well, the first question after, no you can’t “eat that plum / watch tigger and poo / pick mummy up from the train” … before eating your dinner) … ahem, was “what has to be used?” Answer: pork loin, the black-eyed peas I didn’t use for the salad the other day, and a couple of fat tomatoes.

DRY RUB PORK
I’ve fallen in love with dry rubs. Tonight’s combination came out really nicely (query: do they all?):

1 tsp salt
1 tsp brown sugar
1/2 tsp coriander seeds
1/2 tsp whole black peppercorns
1/2 tsp cumin seeds
1/2 tsp mustard seeds
1/2 tsp smoked paprika

I ground up everything but the salt and brown sugar in a spice grinder (okay it was Lisl’s coffee grinder but we won’t go there, will we? no, I didn’t think so). I had just over a pound of “family style” pork loin and so rubbed the spice mixture over it and let sit for about 20-30 minutes.

Since my grill was not an option, I broiled the pork on both sides in the oven for 2 minutes each side on a high rack (and sitting on a broiling pan), and then dropped it down to the middle of the oven and baked it at 300F for about 1.5 to 2 hours. Halfway through I pulled it out of the oven and dribbled olive oil and some apple cider vinegar on the top. Result? Killer. The outside crust was crunchy and the lower-heat cooking kept the inside moist. I should note that the pork loin was still in one piece, not sliced into “boneless ribs” as some butchers are doing these days — if you have smaller pieces you’ll have to reduce cooking time to keep the pork from drying out.

STUFFED TOMATOES WITH BLACK-EYED PEAS

2 large tomatoes
1.5 cups cooked black-eyed peas
1 handful of Italian parsley
1 large shallot
Red wine vinegar
olive oil
salt & pepper

In my case, I already had some leftover black-eyed peas, but if you are starting from scratch: soak 1/4 lb of black eyed peas for several hours, then drain, cover with fresh water, bring to a boil, then simmer loosely covered for 30 minutes (note: if you don’t have time to soak, no worries, just cook until tender, probably another 20 to 30 min).

Mince up a shallot and lightly saute it in some olive oil (note: if you want to save the extra cleanup, skip the sauteing and just mix them in raw).

Chop up a large handful of Italian (flat leaf) parsley.

Combine the peas, shallots, and parsley in a bowl. Add a pinch of salt and ground pepper, a teaspoon of red wine vinegar, and a tsp of virgin olive oil. Add more vinegar to taste. Keep on mixing and adding salt until you are just a hair past how much salt you would normally have in the dish.

Take your tomatoes and carve off the tops of both (just like taking off the top of a pumpkin). Carefully take a small spoon and scoop out the flesh and seeds in the middle of the tomato, and let any liquid run out.

Get the oven up to 450F. Stuff the tomatoes with the mixture, place in a small baking dish, dribble some olive oil on the top and around the sides of the tomatoes, and place in the oven for 20 minutes. It should all melt together nicely when you cut into it.

Final Notes:
Another confession (there’s been a lot of that in this post it seems): you’ll see in the picture at the top something in the stuffed tomato that looks suspiciously like bacon. That’s because it is bacon. I had a misguided notion, but I can say that both Lisl and I had enough forkfuls missing the bacon that we were convinced it was much better without. Which is why I have the gall to put the vegetarian tag on this post, since my vegetarian friends can make the stuffed tomato dish. We’ll just pretend the bacon never happened. Photoshop, anyone?

Bittman, back to basics

A colleague of mine recently pointed me to Mark Bittman’s speech at the TED conference, which definitely shares an interesting perspective on trends in American eating and the impact of the livestock industry on the environment.

He also was kind enough to send me two Bittman cookbooks, including How to Cook Everything. I really like what I have read so far — it is unpretentious and back-to-basics. I don’t think that anybody, in any profession, is ever so far advanced that they cannot benefit from a return to the basics, let alone someone like me who still a relative beginner in this realm. Bittman, for example, has a whole section on beans — not just bean recipes, but an explanation of different kinds, dried versus canned, and the theory behind different approaches to cooking beans. That kind of information is surprisingly hard to find.

One can copy a complex Boulud recipe and certainly learn a lot by doing so, but to truly treat food like an art medium (which is why I love it), you need to understand the root theory and the building blocks. Painting is no different — prior to the 20th century’s foray into abstraction, artists were trained by drawing simple building blocks. Cezanne once wrote, “treat nature by means of the cylinder, the sphere, the cone, everything brought into proper perspective so that each side of an object or a plane is directed towards a central point. Lines parallel to the horizon give breadth … lines perpendicular to this horizon give depth.

Still, there are basics and then there is the scientific foundation (how far people go usually depends on their artistic versus engineering bent). You don’t need to know what a monosaccharide is to cook, but there is an interesting blend of chef/chemist/innovator emerging these days (or maybe it’s always been here and I’m just clueing in now). Ideas in Food is an interesting blog that balances exploration without the reader needing a chemistry PhD.

Speaking of basics, I haven’t been writing here about the very simple dishes I do (last night’s speed meal was grilled lamb with a fennel seed, lemon & yogurt dressing, and steamed broccoli) because I figure they are boring. Still, in food as in life, the basics are important and I look forward to doing some more hands-on exploration of Bittman’s cookbooks.

P.S. I have no segue into this, but check out this very funny New Yorker bit on Fourteen Passive-Aggressive Appetizers

Preserving Roma Tomatoes: redux

A few weeks ago, I posted about making a simple pasta sauce that stunned me with its flavor because we were using these incredibly sweet preserved tomatoes given to us by a good friend who lives in Harrison, NY. I asked her to fill me in on the process they went through, and she was kind enough to oblige with the below description. This summer Lisl is hoping to join them as they undertake the process once again, so hopefully we’ll get some good pictures:

“It was a hot and steamy August day when we assembled in my mother-in-law’s garage to make the sauce (or gravy, as it is referred to in these parts). By the time I arrived the garage was already set up with an industrial size pot on a burner placed in the center of the space and a couple of restaurant size pots on a stove top. On one side of the garage was a tressel table with well over 100 empty jars, small and large, awaiting the finished product.

Angela had purchased 4 bushels of Roma tomatoes from a New Jersey farmer. Each one had to be cut into quarters and the seeds and juice squeezed lightly out and then tossed into the big pot. I worked with my mother-in-law, sister-in-law and twelve-year old niece for hours quartering tomatoes and tossing them into the gently boiling pot, stirring occasionally. As the pot filled up, we began with the two back-up pots.

Some time after we finished quartering the tomatoes, Angela set up the machine for removing the skins and any pulp or seeds. The machine reminded me a lot in appearance of an old meat grinder my grandmother had used when I was a child. The sauce that came out was of a fairly thin sauce consistency, but the by-product – the skin and pulp that had been removed – was very thick, rather like tomato paste. Angela explained that we had probably not been quite diligent enough in squeezing out the tomatoes in the first place ( I was probably guilty here – as a novice it pained me to see all what I saw as ‘good stuff’ going to waste), but that this was just a base sauce that could be used in preparing a wide range of dishes.

The sauce was put back on the burner for a while, and a little salt added, if I recall correctly. A couple of basil leaves were placed inside each waiting jar, then finally the boiling sauce was poured with great care into each. The jars we sealed with the two-piece preserving lids – the top placed on then screwed down as tightly as possible (with great care to avoid burning), to be followed by a little pop as the suction sealed the jar tight. “

Black-Eyed Peas, Cilantro Salad

Black Eyed Pea salad
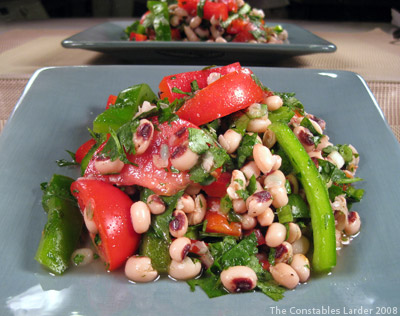
While I will probably always remain an omnivore, I’ve been trying to eat more vegetarian meals. Tonight we went with a black-eyed peas & cilantro/lime salad, roughly inspired by a Saveur recipe, that came out really nicely.

For 2 full servings
1/4 lb. dried black eyed peas
1/2 yellow onion
1 green pepper
1 red pepper
fresh cilantro (coriander)
fresh flat-leaf parsley
2 medium tomatoes
3 spring onions (scallions)
1 jalapeno, or some pickled jalapeno slices
3 limes
extra virgin olive oil
salt & pepper

Soak your black-eyed peas overnight or for several hours during the day. Cover with water in a pot with half a yellow onion and bring to a boil. Lower heat and cover, letting simmer for about 30-35 minutes or until tender. When done, remove onion, drain in a colander and cool by running cold water over the peas. When fully drained, add to salad bowl.

Remove seeds from your green and red peppers and chop to desired style (I chopped them up about 1.5 to 2 inches long, 1/3 inch wide), then add to bowl.

Take a very large handful of fresh cilantro and loosely chop, removing any excess stalk, then add to bowl. Take a handful of flat leaf parsley (discard the stalks) and more finely chop, and add to bowl.

Cut 2 medium tomatoes into eighths, and add to bowl. De-seed a hot jalapeno pepper, then chop and add. If you don’t have access to fresh jalapenos, a handful of pickled jalapenos loosely chopped will still work well.

Thinly slice 3 spring onions (scallions) starting in the white and cutting as high into the green as you can (where the green is still fresh), and add. (Optional: slice up and add some red onion)

Squeeze the juice from 3 fresh limes over everything. Add 4 tbsp of extra virgin olive oil (that is a guess — it could have been more since I never really measure my olive oil amounts; really you should do it to your own taste).

Mix up your salad, but try to be gentle so that you don’t mush up your peas. Let it sit for 15-20 minutes so that the peas start to take on the flavor of the lime and olive oil.

Add salt and freshly ground pepper to taste. I found that I used more salt than I normally use in a greens-based salad, so add salt carefully as usual, but be prepared to taste and add more.

We served this with Presidente beers (a Pilsner-style beer from the Dominican Republic). While I didn’t think of it at the time, some lightly toasted pita bread would also make a nice accompaniment.

P.S. this keeps overnight in the fridge really well (possibly even better) since it all marinates together.