Photos: Ramp Pickle

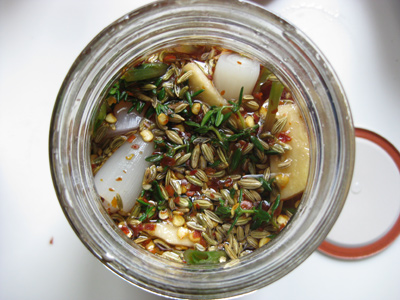
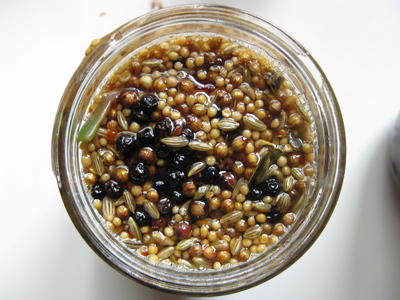
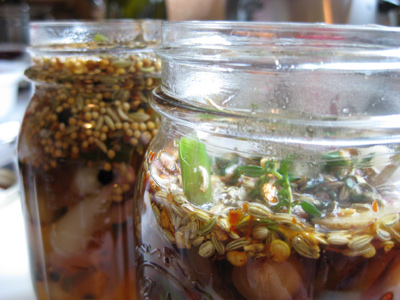
While I am tossing up photographs, I thought I would include a few pictures from earlier this year that never made it onto the blog, due to startup mayhem.  Back in April, when ramps were in season, I had compared two pickle recipes: Stephane’s (which he had adapted from someone at the Union Square Farmers’ Market) and one from Amanda Hesser.  Stephane’s recipe continues to be my favorite.

With no further ado, here are the pics:

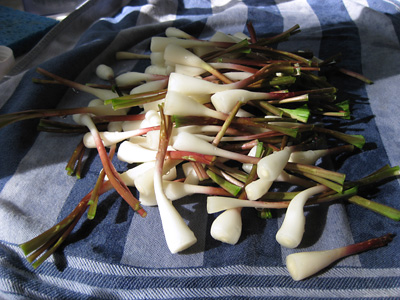
This was getting near the end of the ramp season, so they were pretty fat.

On the off-chance that Stephane’s blog one day disappears, here are the key ingredients:

  • 3 bunches of ramps, white parts only
  • 1 cup rice wine vinegar
  • 1 cup water
  • 1/2 cup sugar
  • 1/4 cup honey
  • 1/2 tablespoon kosher salt
  • 1 tablespoon juniper berries
  • 1 tablespoon coriander seed
  • 1 tablespoon black peppercorns
  • 1 tablespoon fennel seeds
  • 2 bay leaves
  • 1 teaspoon dried chili flakes

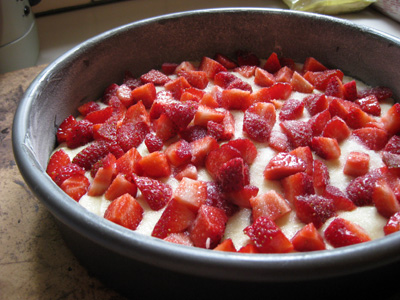
And then a final still life from even earlier in the year that never quite made it up here, but which I liked:

Strawberry and Buttermilk Cake (1 year later)

A year ago, Gourmet Magazine lit up quite a few food blogs with their Raspberry Buttermilk Cake recipe.  Munchkin and I made it and everyone loved it.  This year I found myself at a crossroads of two nice happenstances.  The first was a surplus of delicious strawberries from a farm in the Catskills.  The second was leftover buttermilk after making Alice Waters’ delectable chocolate cake (from the Art of Simple Food).

So we brushed off the recipe, and made it again — this time with strawberries.  It’s extremely easy to toss together, and a delicious summer lunch dessert. Here are the ingredients, and you can get the full recipe over at Epicurious:

1 cup all-purpose flour
1/2 teaspoon baking powder
1/2 teaspoon baking soda
1/4 teaspoon salt
1/2 stick unsalted butter, softened
2/3 cup plus 1 1/2 tablespoons sugar, divided
1/2 teaspoon pure vanilla extract
1 large egg
1/2 cup well-shaken buttermilk
1 cup fresh strawberries, washed and quartered

It is a shame Gourmet was shut down, especially since I vastly preferred it to Bon Appetit, but such are the woes of the publishing industry right now. Aside: this was my first time using the iPad in the kitchen to follow a recipe, and it is great for that purpose.  Epicurious’ iPad app is nicely done, and it’s a marvelous device for browsing food blogs.

Summer Meals: Bean Salad, Tenderloin Marinade and Salad Dressing

It is so nice to have grilling season back upon us. In many cases, our jobs as cooks is to get out of the way and let the food and fresh product do the talking.  Here are notes from Saturday’s dinner, when we had a few guests over for Lisl’s birthday.

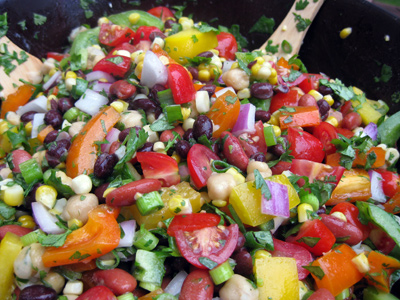
Three Bean Salad

1 can of red kidney beans
1 can of garbonzo beans (chickpeas)
1 can of black beans
4 ears of corn
4 sweet peppers (multiple colors if possible), cut into bite sized pieces
1 red onion, diced
1 bunch of spring onion, diced
Large bunch of cherry tomatoes, halved
1 jalapeno pepper, minced
Large bunch of cilantro, washed well and chopped
limes
lemon
salt and pepper
olive oil
champagne vinegar

I make this salad slightly different every time, but my basic routine is the following.  Carefully wash the canned beans in a colander, drain and add to the bowl.  Cook each ear of corn, still in the husk, in the microwave for 2 and a half minutes, then remove husk and take kernels off with a knife once cool enough to touch.  Dice the spring onions, using all of the green part, and toss it in with the diced red onion, tomatoes, jalapeno and sweet peppers ( I like using a mix of red, green, orange and yellow).

Dress the salad by taste.  Stir in the cilantro, juice from 1 lemon, juice from 3 or 4 limes, a sprinkle of olive oil and champagne vinegar (but go light on the oil and vinegar — you want the citrus to stand out).  Add salt to taste, and add some freshly ground pepper. Depending on how juicy your limes are, the number of limes you want to use will vary.

I like dressing this ahead of time so everything absorbs some of the citrus flavor.  This is a great, hearty and bright salad for serving a large number of people.

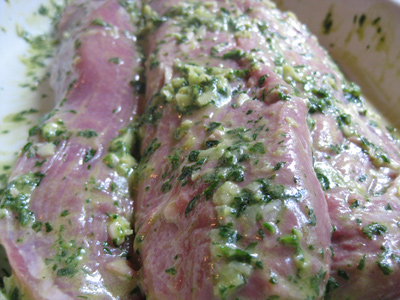
Pork Tenderloin Marinade

Large handful of parsley, chopped
Several sprigs of fresh oregano, leaves removed and chopped
4 large cloves of garlic, chopped
1 tbsp Olive oil
1 tbsp dijon mustard
1 tbsp apple cider vinegar
1/2 tsp salt
Pinch of fresh pepper

I made this marinade for use on three pork tenderloins — the amounts are ballpark but you can’t really go wrong here.  With a mortar and pestle, mash up the garlic and herbs.  Stir in the rest of the ingredients then rub all over the pork.  Cover and place in the fridge for several hours, then grill by searing the pork and then cooking on a cooler part of your grill until the meat hits the right point of firmness.

Side note: I was cooking on my brother-in-law’s grill the other weekend and I was reminded how difficult it is to work with unfamiliar equipment. I totally overcooked the chicken.  On my own grill, where I know how and where heat distributes, I was really pleased with getting these tenderloins perfect.  Lisl laughed and said it shows just how tough those Top Chef challenges are when they get thrown into crazy circumstances.

Shallot & Lemon Salad Dressing

There’s nothing rocket science here, but I’m addicted to the following salad and dressing and figured I would make a note of it:

Mince up a big shallot (or more than one shallot) and let the shallots sit for 20 to 30 minutes in the juice from 1 lemon and a couple splashes of champagne wine vinegar.  Then wisk in some olive oil, a dab of dijon mustard, and a pinch of salt and pepper.  Toss over a bunch of baby arugula (rocket), with some nice tomatoes and maybe some sliced mushrooms or red pepper. Can’t beat it.

Addendum

I’ve had Disqus installed on my tech blog forever and I *finally* have it installed here.  I much prefer the threaded comment system and after a few goes, it looks like it has imported all the old comments.

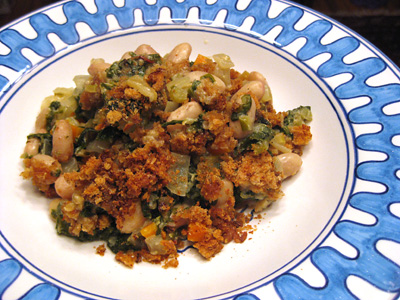
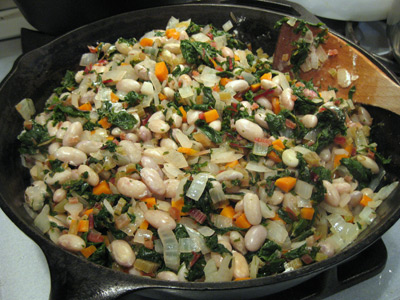
Chard and Cranberry Bean Gratin

chardplusgratin
It feels like forever since I’ve had a moment to write a post.  Interesting recipes have come and gone, never written down, photo-less, and unblogged.  Furthermore, it sucks not having the time to keep up with the blogs of all the friends I have made in the food blogosphere. Such is the nature of starting a company, Speaking of, please come over to Aprizi, try it out, and let me know what you think.  We just opened up a fledgling beta, and if you like shopping online and discovering cool new stuff, I hope you love what we’re doing.

OK, shameless plug complete! Let’s talk about this dish, which was a tad involved but oh so good.  Hearty vegetarian fare, although suited for a cooler evening.  It is inspired by Alice Waters’ Chard Gratin.  I just turned it into a meal. It has been a few weeks, but here is my best recollection of the dish:

Chard and Cranberry Bean Gratin

Large bunch of chard, leaves and stems separated
1 onion, diced
2 or 3 carrots, diced
1 stalk of celery, diced
1/2 lb of cranberry or borlotti beans
1 tsp fresh winter savory, finely chopped
salt and pepper
4 tbsp unsalted butter
3 tsp flour
3/4 to 1 cup milk
1 cup fresh breadcrumbs

I was working with dried cranberry beans. Put them in a pot with water an inch over the top of the beans, tossed in a couple bay leaves, brought to a boil for a couple minutes, then let simmer until just tender (time will depend on whether you soaked beforehand). Save 1/2 cup of the cooking liquid and drain the rest.

Make breadcrumbs by placing stale or fresh bread in a food processor. Spread them out on a baking tray, dot with pieces from 1 tbsp of butter, and toast in a 350F oven until lightly golden.

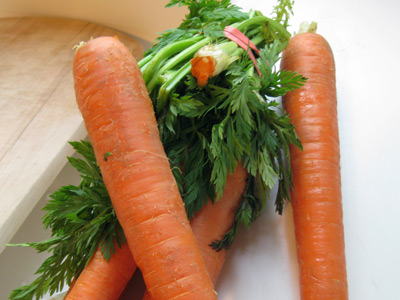
carrots

Bring a large pot of water to a boil and cook the chard leaves for about 3 minutes, then remove with a slotted spoon and let them drain and cool.  Dice the chard stems and cook them in the boiling water for 5 minutes, then drain.

Melt 2 tbsp of butter in a large (ideally oven-capable) skillet and saute the onions on low heat until translucent.  Add the carrot and celery and continue to cook for 10 minutes.

chardplusgratin-inprocess

Add the beans and the bean liquid and/or some white wine, and continue to let it simmer (turn up the heat a tad, if necessary), stirring occasionally.

Squeeze much of the excess liquid out of the chard leaves and coarsely chop them.  Add the chard stems and chard leaves to the skillet.  Add the winter savory (Note: I think oregano or tarragon would also work).  Let simmer for a few minutes.

Sprinkle and stir in the flour, then stir in the milk.  Cook for 5 more minutes, adding more milk if the mixture gets too thick. Add salt and pepper to taste.

If you are not using an oven-friendly skillet, transfer to a baking dish.  Spread the breadcrumbs on top, dot with bits from the last tbsp of butter, and bake for 30 to 40 minutes in the 350F oven.

Forage & Feast, the sequel

ramps-clean-400px

It’s ramp season here in New York, and with that comes Forage and Feast led by Jonathan of Lab 24/7 and Marc of No Recipes (here’s my post from last year’s event). I had been looking forward to this for weeks.  Nothing beats tromping around outside with a bunch of fun people and digging your food right out of the dirt.

ramps-4-13-10-400pxRamp greens

Still, there were moments of sheer and utter pain. I’m talking about in-the-trash-can-in-front-of-20-people kind of pain.  I have the utmost respect for professional caterers who can waltz into a foreign kitchen with strange or missing equipment and still pull out an incredible meal with one hand tied behind their back while hopping.  ‘Cause folks, that ain’t me.

The Fritter Fracas
Last year, in the comfort of my own kitchen, I made some delicious ramp fritters.  I remembered it being incredibly easy, so thought, “why don’t I whip this up as a working snack for everyone?”  Note to self: hey bozo, next time you think to cook for 20 people in a strange kitchen, *practice* the recipe again beforehand.

I could *not* get the batter to cook all the way in the center of the damn things, and there was no time to figure out why because my window at the stove was shutting fast.  I don’t know if it was my mistake of putting lemon in the batter (I misread my own recipe in the rush) or the fact that I made the batter too thick because I had to eyeball the flour.  I’m thinking the latter, but maybe a food chemist can weigh in on the former.  Someone suggested finishing them off in the oven, but that was an unmitigated disaster of soggy proportions. The fritters thus took an undignified exit into the bin.

The Brisket Brouhaha
Then there was the brisket — this gorgeous grass-fed brisket from Ulla’s, of Goldilocks finds Manhattan, family farm. I had visions all morning of a nice slow braise with melting, carmelized onions, garlic, ramps and a nice half-bottle of white wine. However, with one oven juggling multiple dishes at multiple heats and a stove top completely occupied, the idea of a braise was a no-go.  Someone suggested using a smoker, which I had never used before. Does trying something unfamiliar in a time-pressure situation sound like a good idea?

This will not end well, you sagely think to yourself.  But I concocted a lovely little dry rub and we sallied forth. Not unlike the Light Brigade.  Only to find that we couldn’t get the smoker above 200 degrees. And only 4 to 5 hours with which to work. Cannons to the left of us. Cannons to the right.

So the poor briskets got shunted from smoker to t00-hot-oven to sitting in the cold outside to a quick warm up in the oven again.  It was the most delicious smokey, spice-rubbed leather you might ever eat.

Ulla was totally understanding, but I felt guilty about the cow.

The Rib-Eye Rescue
The fritters were mush. The brisket was being ogled by the local shoemaker. I then had to grill seven gorgeous grass-fed rib-eyes.  Somehow, Ulla was still talking to me, and at this point, I was terrified of killing this meat as well.

Hot charcoal grill in the pitch dark,” I thought. “Relatively thin steaks, probably going to rest a while and need to be warmed up again … ok, let’s just not overcook these: 3 min a side and test for firmness.” I’m usually good about measuring how well done a steak is by feel, but that would be totally inconsistent with my day, would it not? And I was an idiot for not checking the steaks after 5 minutes of resting.

20 minutes later, Marc comes to me and whispers, “Stephane finished the ramp chimichurri and we want to to serve the rib-eye, but it’s… far too chewy.”  That is probably the nicest way anyone has ever said, “your meat is so raw it is inedible.

This I could at least fix! With an inner howl, not unlike that of a manic-depressive coyote , I gave the meat a quick run under the broiler and that did the trick. With a dip in the chimichurri, thank heavens it was a nice little bite.

Now, just to put forth a little contrast, throughout *all* of this, Stephane of Zen Can Cook has been juggling a million dishes and he pulls out the most perfectly roasted lamb cutlets (with a balsamic glaze) you’ve ever had.  What a right bastard!

They all killed me with kindness, but I knew. I knew.

Redemption via Pickling
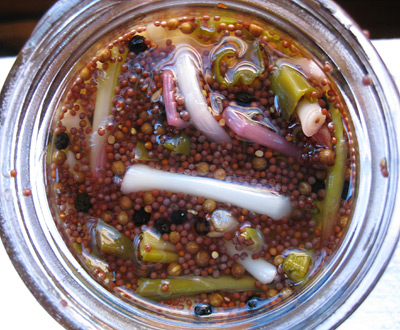
Here is the one thing I did do well (not surprisingly, in my own kitchen), and if you can get ahold of some ramps, I highly recommend it.  Follow this link to Stephane’s post from last year’s Forage and Feast and try your hand at his pickled ramps recipe.  Make yourself a martini with these pickled ramps, and I promise the pain of even a day like mine will start to fade.

But in truth, I’ve had fun writing about this little melodrama, and I had fun the whole time.  The brisket has even found a happy ending in a slow-cooked chili.  I won’t deny that it stings to fall down in front of people you want to impress, but that came with some useful lessons learned and new friends made.
ramps-pickled

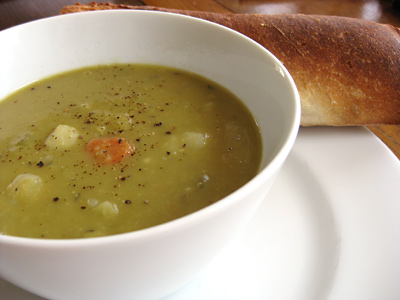
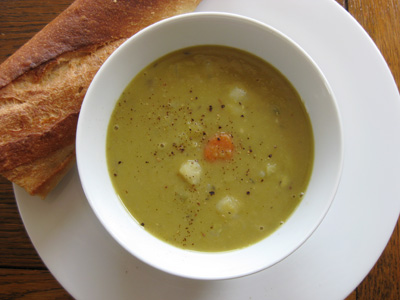
Green Pea and Red Lentil Soup

pea-soup

I’m a huge fan of pea soup on a chilly day.  I make it slightly differently every time, but one thing I’ve learned is that a soup needs to be built up. When I was young, I would dump everything in the pot at once, turn up the heat and simmer, and wonder why it didn’t taste like it should. In this case, I started with the onions and gradually added ingredients until only the legumes, water and herbs remained to be added. I was happy with this particular version and thought I’d share it here.

1 spanish onion, diced
4 carrots, roughly chopped (size depends on how chunky you like your soup)
3 celery stalks, diced
4 medium red potatoes, roughly chopped
4 or 5 cloves of garlic, minced
2 thick slices of ham, sliced into small cubes (again, your size preference)
1 lb dried green split peas
1/4 lb dried red lentils
10 to 12 cups of water (depending on how thick you like your soup)
2 bay leaves
1 tsp dried thyme
1/2 tsp fennel seed
1/2 tsp ground savory
salt and pepper
olive oil

If you have time, brown the ham in the bottom of the soup pot in a little bit of olive oil, then remove to a bowl. Add a couple tbsp of olive oil in the bottom of your soup pot, and saute the onions, stirring occasionally, on medium-low heat until they are translucent and starting to carmelize. Add the carrots and cook for another 5 to 10 minutes minutes; add the potatoes and garlic (and the ham, if you didn’t brown it) and cook for another 5 minutes; add the celery and cook for another 5 minutes. During this process, stir occasionally because while a little browning on the bottom of the pan can add a nice flavor, you don’t want to go overboard and burn anything, which will ruin the soup. Stir in the ham.

Add the water, herbs and 1/2 tsp of salt.  Bring to a boil, stir the pot and lower the heat to a very gentle simmer.  Most likely you’ll want more salt, but it is better to add and taste for salt in increments and there is plenty of time ahead. I’ll cook this for a few hours, stirring every once in a while, until the legumes have completely disintegrated.  Towards the end of the cooking process, I’ll add in some freshly ground pepper to taste.

This is marvelous served with some good bread, and maybe a garnish of fresh, chopped parsley on top.

pea-soup-vert

Cauliflower, Fennel and Potato Mash

This was a delicious variation on cauliflower mash that I threw together and wanted to remember. The fennel adds a bit of sophistication, but it was still wolfed down by our 4 year old.

1 head of cauliflower
1 large fennel bulb
2 or 3 medium potatoes
2 tbsp butter
heavy cream
salt and pepper

Cut the fennel bulb into eighths (halve, halve again, halve again), and chop the cauliflower into similar sized pieces. Peel and quarter the potatoes.  Fill a large pot with about 1/2 inch of water (so the vegetables are not totally immersed) and bring to a boil.  Toss in the potatoes first, then everything else, cover so the steam is captured, and keep on a light boil until tender.  Drain.

In batches, spoon the vegetables into a food processor and puree (you will probably need to pulse, stir and push the fennel pieces down so they get fully pureed), and then spoon each batch of puree into a large bowl.  Once you have everything pureed, add the butter, salt, pepper, and heavy cream to taste.  Note: I usually make my mash potatoes with milk, not cream, but think the cream really works here.

This was a wonderful side dish, and I can see it being used as a nice base for either a hearty fish or chicken breasts.  I’m imagining lots and lots of mushrooms…

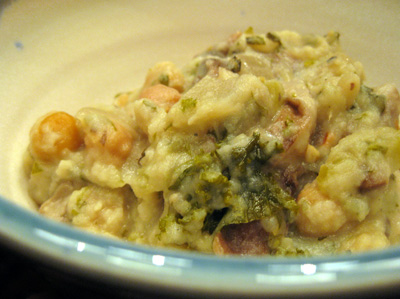
Winter Vegetarian Stew

vegetarian-winter-stew

This vegetarian stew was completely winged tonight but I ran with the concept of trying to heighten each flavor first, and then bring things together. I loved how it came out. The idea of the turnip puree came from Kevin on Top Chef last season and I loved it — was almost like coconut milk.  It reminded another person of a chicken pot pie.  I loved how the puree thickened the meal into a great comfort dish without the need for flour.

This was a big hit so I thought I should write down my best memory of the process while it was fresh in my mind.  The amounts below are kind of rough, but it’s stew — nothing needs to be exact here!

3 tbsp unsalted butter
1/2 cup cream
1/4 tsp sugar
2 medium/large turnips, peeled and roughly chopped
1 large sweet onion, chopped
4 or 5 garlic cloves, minced
1 lb white mushrooms, halved and sliced
1/2 lb shiitake mushrooms, stemmed and sliced
3 celery stalks, finely chopped
2 cans of chickpeas (or equivalent dried and cooked)
6 to 8 stalks of kale, stemmed and roughly chopped
5 or 6 small red potatoes
1 cup white wine or vermouth
1 tbsp apple cider vinegar
2 tbsp fresh oregano, finely chopped (or half as much dried)
1 to 2 tbsp fresh parsley, finely chopped
pinch of hot red pepper flakes
salt and pepper to taste

Stage 1: cooking the separate ingredients
A. In a large pot, saute the onions and garlic in a touch of olive oil and 1 tbsp of butter, and let slowly cook on low heat for 15 minutes. Add the celery and a couple pinches of salt and continue to cook.

B. Place the turnips, 1/2 cup of cream, and 1/2 cup of water in a pot and simmer until the turnips are soft

C. Melt 2 tbsp of butter in a saute pan and cook the mushrooms, with a couple pinches of salt, for 15-20 minutes. Add 1 tbsp of apple cider vinegar near the end.

Stage 2: the rest!
Pour 1/2 cup of vermouth (or white wine) into the pot with the onions and celery and let it cook down a bit, then add in the kale.  Cover and let simmer for several minutes.  Once the kale has initially softened, add in the cooked mushrooms and the chickpeas, oregano, parsley. Add another 1/2 cup of vermouth and 1 cup of water and continue to cook.

Place the turnips, with the cooking liquid, in a food processor and let cool.  At this point, I rinsed out this pot, brought water to boil, and boiled the potatoes for 10 to 15 minutes to soften.

Puree the turnip and cream, and add 1/4 tsp of sugar.  Gently stir the puree into the stew, add the pepper flakes and a couple pinches worth of freshly ground black pepper, and add the potatoes when they are done.

Cook the stew for a while longer on very low heat until you are happy the flavors have all come together.  Add some water if it feels too thick.  Taste for salt and pepper.

Ratatouille Beef Braise

ratatouillebraise

Welcome to 2010 everybody (although compared to our relatives in Australia, we are *so* late to the party). The last decade was certainly an interesting one for us.  Where did these two kids come from?  Here’s hoping for a great next ten!

This recipe was simply an inevitability in this household.  I love braises. I love ratatouille. Why not do them together? I mean, come on, we’re talking about *fewer* pots here.  WIN.

Ratatouille Beef Braise

3 lb hunk of chuck or rump beef, trimmed of excess fat
1 large spanish or sweet onion, diced
1 large eggplant, cut into ~1″ cubes
3 green zucchini, halved and cut into 1/2″ slices
1 green pepper, diced
5 or 6 garlic cloves, peeled
handful of mushrooms, roughly chopped
1 28oz can of whole peeled tomatoes
1 15oz can of diced tomatoes
bouquet garnis of parsley, bay leaf
1 tbsp dried oregano
salt and pepper
olive oil
1/2 cup of vermouth or white wine

Pre-heat oven to 300F.

Liberally sprinkle salt and pepper on the outside of your beef, and sear each side in a dutch oven. Remove to the side.

Add a couple tbsp of olive oil to the pot and saute the onions on medium-low heat for 10 or 15 minutes, then turn the heat up to medium and add the eggplant and cook for 5 to 10 minutes before adding the zucchini. Cook for another 10 minutes, then add everything else: the green pepper, mushrooms, tomatoes (and their juices), oregano, vermouth/wine and a tsp of salt. Cook for another 10 to 20 minutes, then nestle the beef in the middle. You don’t want the beef to be swimming, but make sure there is liquid up about 1/3 of the side of the meat, so add water (or more wine) if necessary.

Cover the pot and place in the oven. Cook for an hour then flip the beef and cook for another hour. At this point, taste the vegetables for salt and oregano, and return the pot to the oven uncovered. Cook for another 2 hours, turning the beef every 30 minutes or so.

ratatouillebraise-cut
The braised rump before plating.

Slice the beef against the grain and serve with rice and a fresh vegetable like green beens or broccoli.  Skim excess fat from the ratatouille, and generously spoon it over the beef on the plate (and possibly over the rice too).

There you have it, as best as I can remember.  The leftovers were awesome.  And now you’ll have to excuse me because kiddo is napping, Lisl and munchkin and guests are off skiing, which means there’s two things on my agenda: get a stew on the pot, and get some work done.  Happy new year!

Rosemary, garlic and mustard pork roast; Happy Holidays 2009

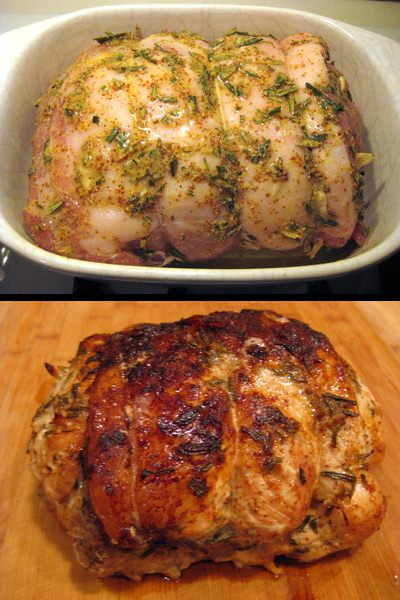
pork-roast

I spent days scratching my head over what to make for Christmas dinner, and decided to go with a classic pork roast.  With the Battle for Cold/Flu Pass raging in this house, full guns ablazing, we didn’t actually have Xmas dinner until two days *after* Christmas (naturally, we didn’t make elder munchkin wait that long to open her presents).  Still we have managed to have a very nice holiday season.  I hope you have as well.  Here is the recipe for the pork roast:

Rosemary, garlic and mustard pork roast

4 or 5 lb boneless pork loin (of course, recipe will work for smaller roasts as well)
garlic cloves, peeled
1 to 2 tbsp fresh rosemary, chopped
1 to 2 tbsp grain mustard
olive oil
apple cider vinegar
salt
white wine or dry vermouth

To marinate the pork, start by slicing some garlic cloves into little pointy-ended stakes. With a paring knife, poke a hole in the pork and the stuff the garlic piece inside. Do this all over your pork loin, spacing them out by an inch or two depending on your love of garlic. Then rub about a tablespoon of kosher salt (less if using fine table salt), the mustard and the rosemary all over the pork. Place in something you can put in the fridge, then drizzle olive oil and a couple tablespoons of apple cider vinegar over the top. Cover and place in the fridge for one or two days.

To roast, remove the pork from the fridge, place in a baking dish, and let it come to room temperature for about 20 minutes while you pre-heat the oven to 450F. Roast the pork for 15 minutes, then pour 1/2 cup of wine or vermouth over the top.  Turn the heat down to 325F.

It should take the pork about 2 hours to cook, although start checking with an instant read thermometer earlier.  Every half hour or so, spoon the liquid from the baking dish over the pork.  If the dish is dry, add a little more wine or water.  Remove the pork and let it rest (place a piece of foil on top to keep it from getting to cold while you finish any remaining parts of the meal) when the instant read thermometer gets to 145F or 150F.

To make the gravy: add some water and wine/vermouth to the baking dish, a small amount of flour (maybe a quarter to half a tsp) and a pinch of salt and deglaze the dish on the stove top (note: if you are using ceramic, then get a heat diffuser rather than having the dish right on the flame).  Remove the excess oil — one simple method is to pour it into a measuring cup and then pour off the oil that rises to the top.

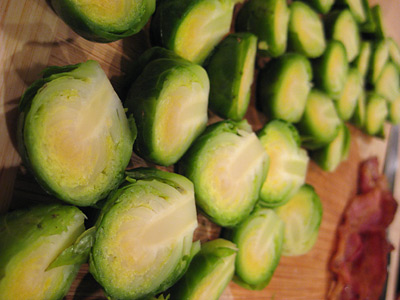
We served this with some brussel sprouts, parboiled and then sauted with champagne wine vinegar, and roasted potatoes.

brusselsprouts

I hope that this post sees you all well, and happy holidays from our family to yours!

xmastree